< Main USD Tutorials Page Inspecting and Authoring Properties >
¶Creating a Simple USD Stage
This tutorial focuses on creating a simple USD stage containing a transform and a sphere using the operators from Shift_USD catalog.
¶Tutorial
- Open Shift application. A new window instance of Shift should appear like the following one:
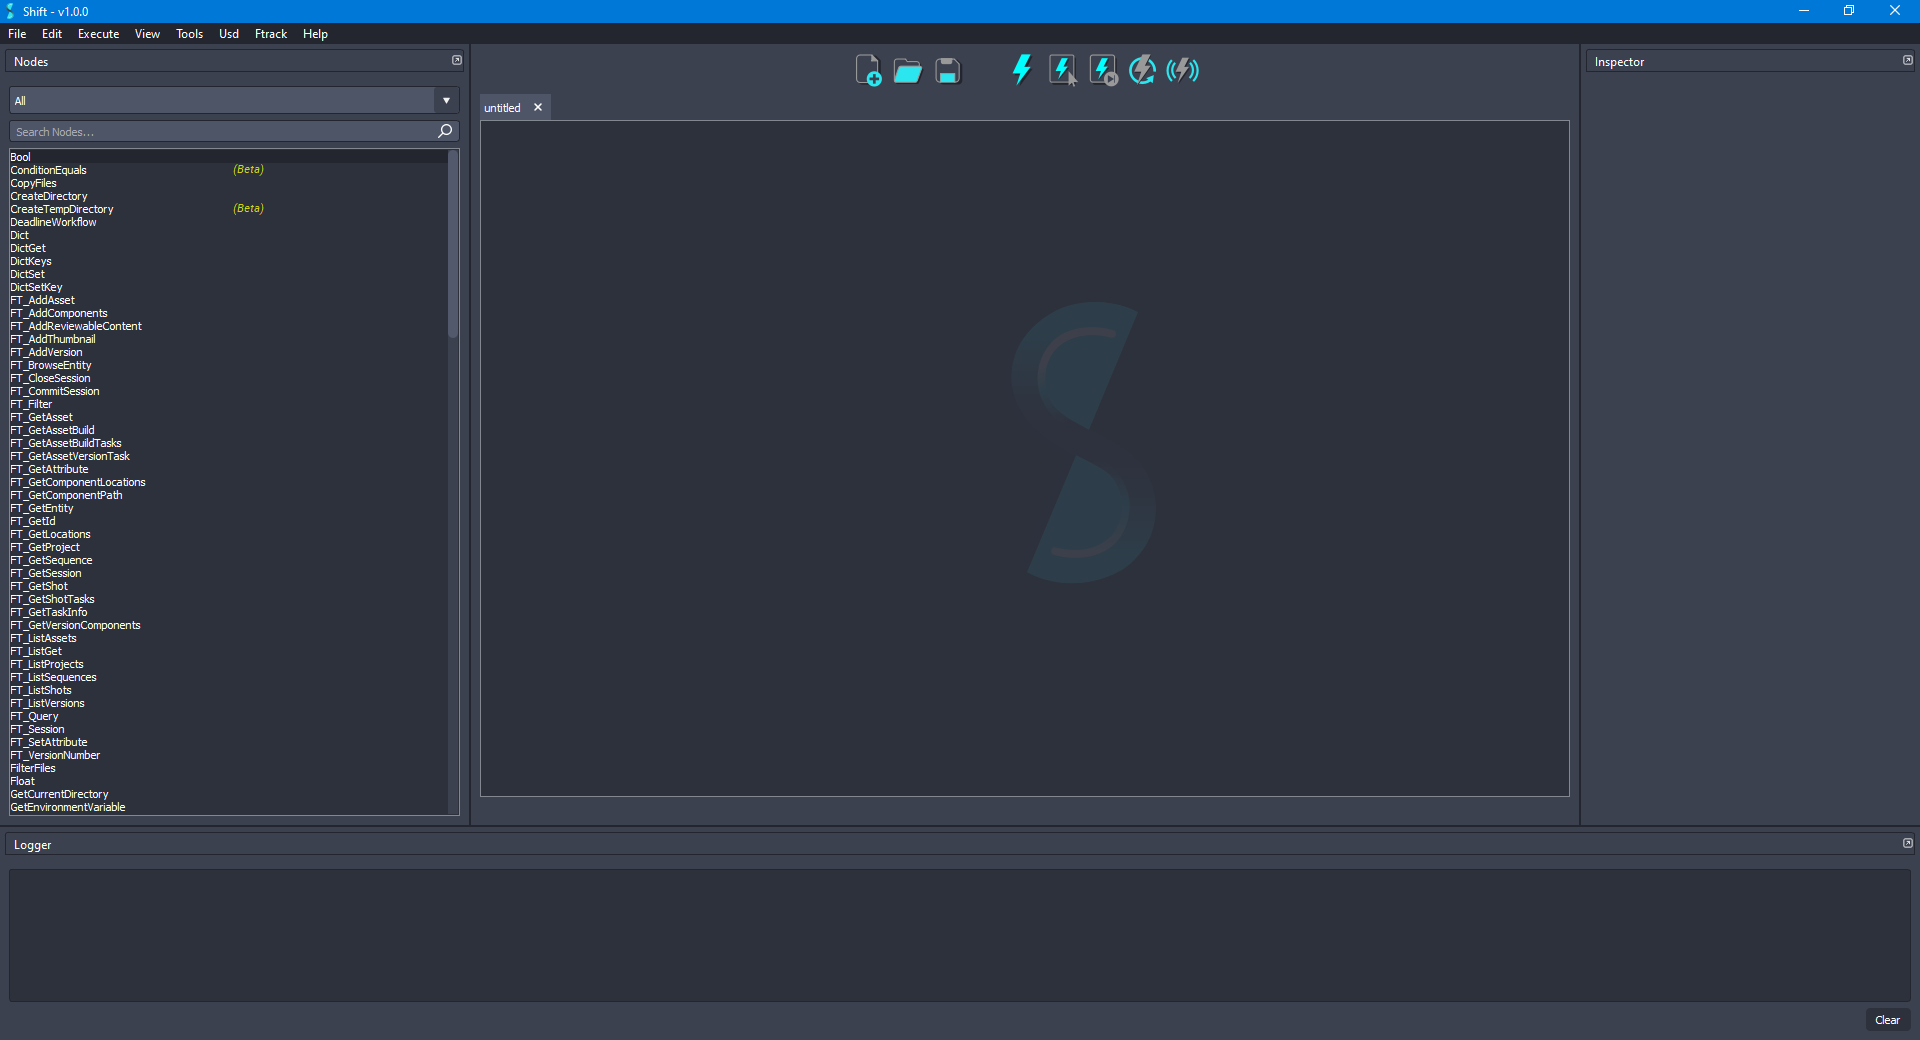
Before creating the USD workflow, ensure that the USD nodes appear in the Node List widget. The catalogs combobox should show
sUSDandsUSDTypesif USD is correctly loaded in Shift. If this is not the case, please check again the Shift_USD installation page.
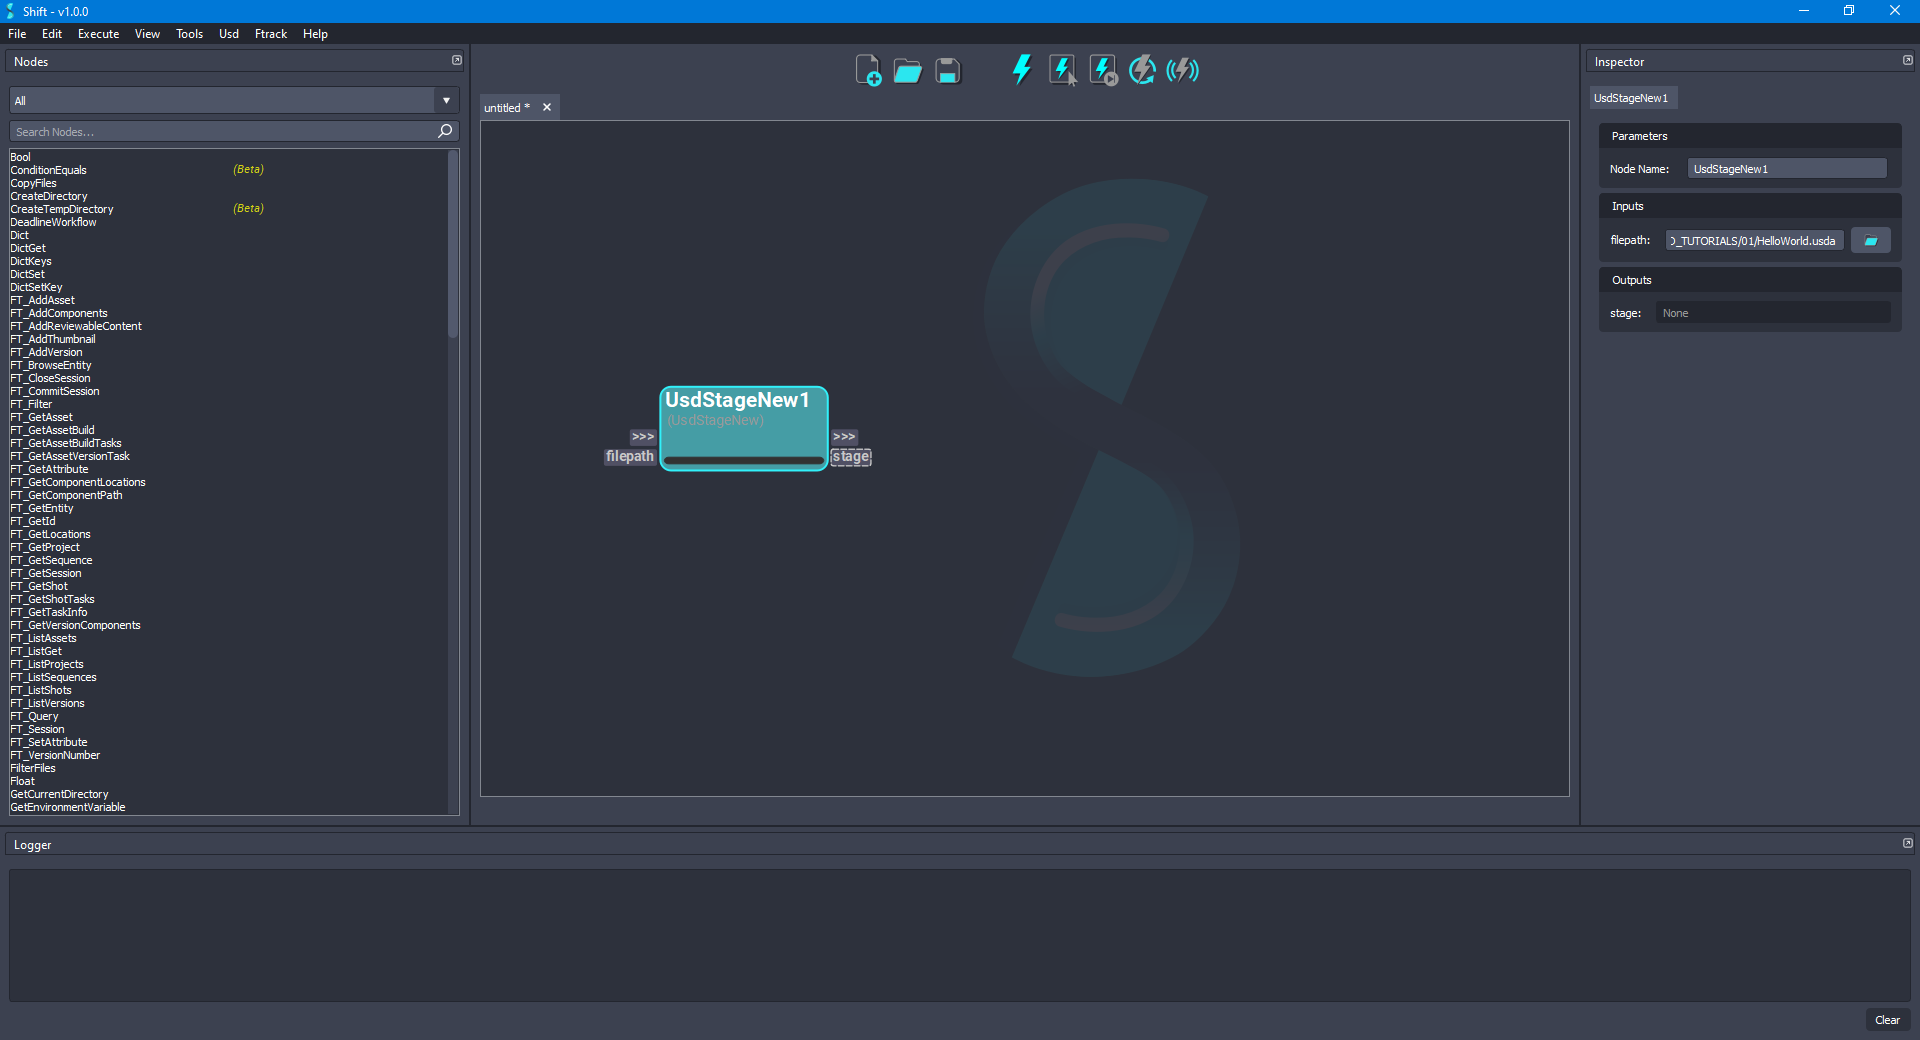
- Add a new UsdStageNew node to the board. Using the Inspector widget, set as the value for the filepath input plug the path to a
.usdafile. For the purpose of this tutorial, the filepath will be:D:/USD_TUTORIALS/01/HelloWorld.usda. The board should look like the following:
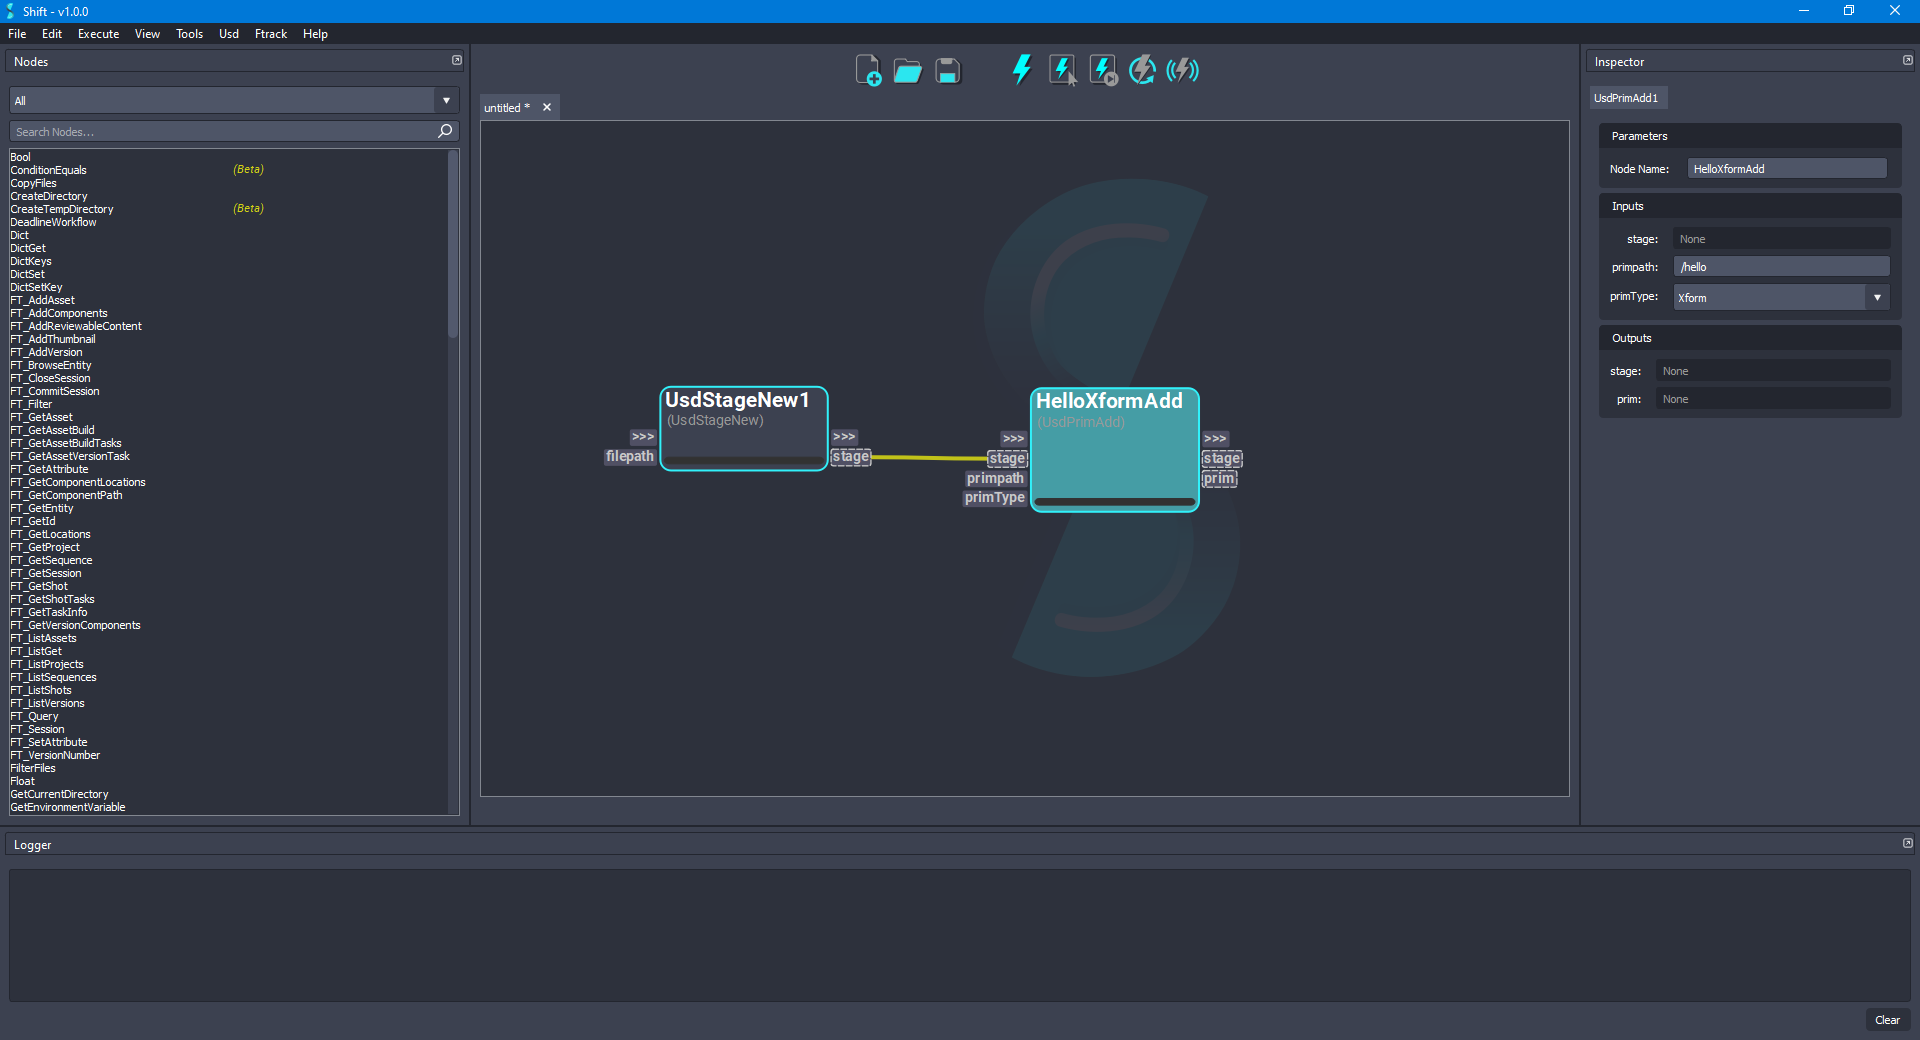
- Add a new UsdPrimAdd node to the board. Now, connect the stage output plug from the UsdStageNew node to the stage input plug of the new node. Set
/helloas the value for the primpath input plug and chooseXformas the value for the primType input plug. Rename the node as HelloXformAdd to easily identify it. The board should look like the following:
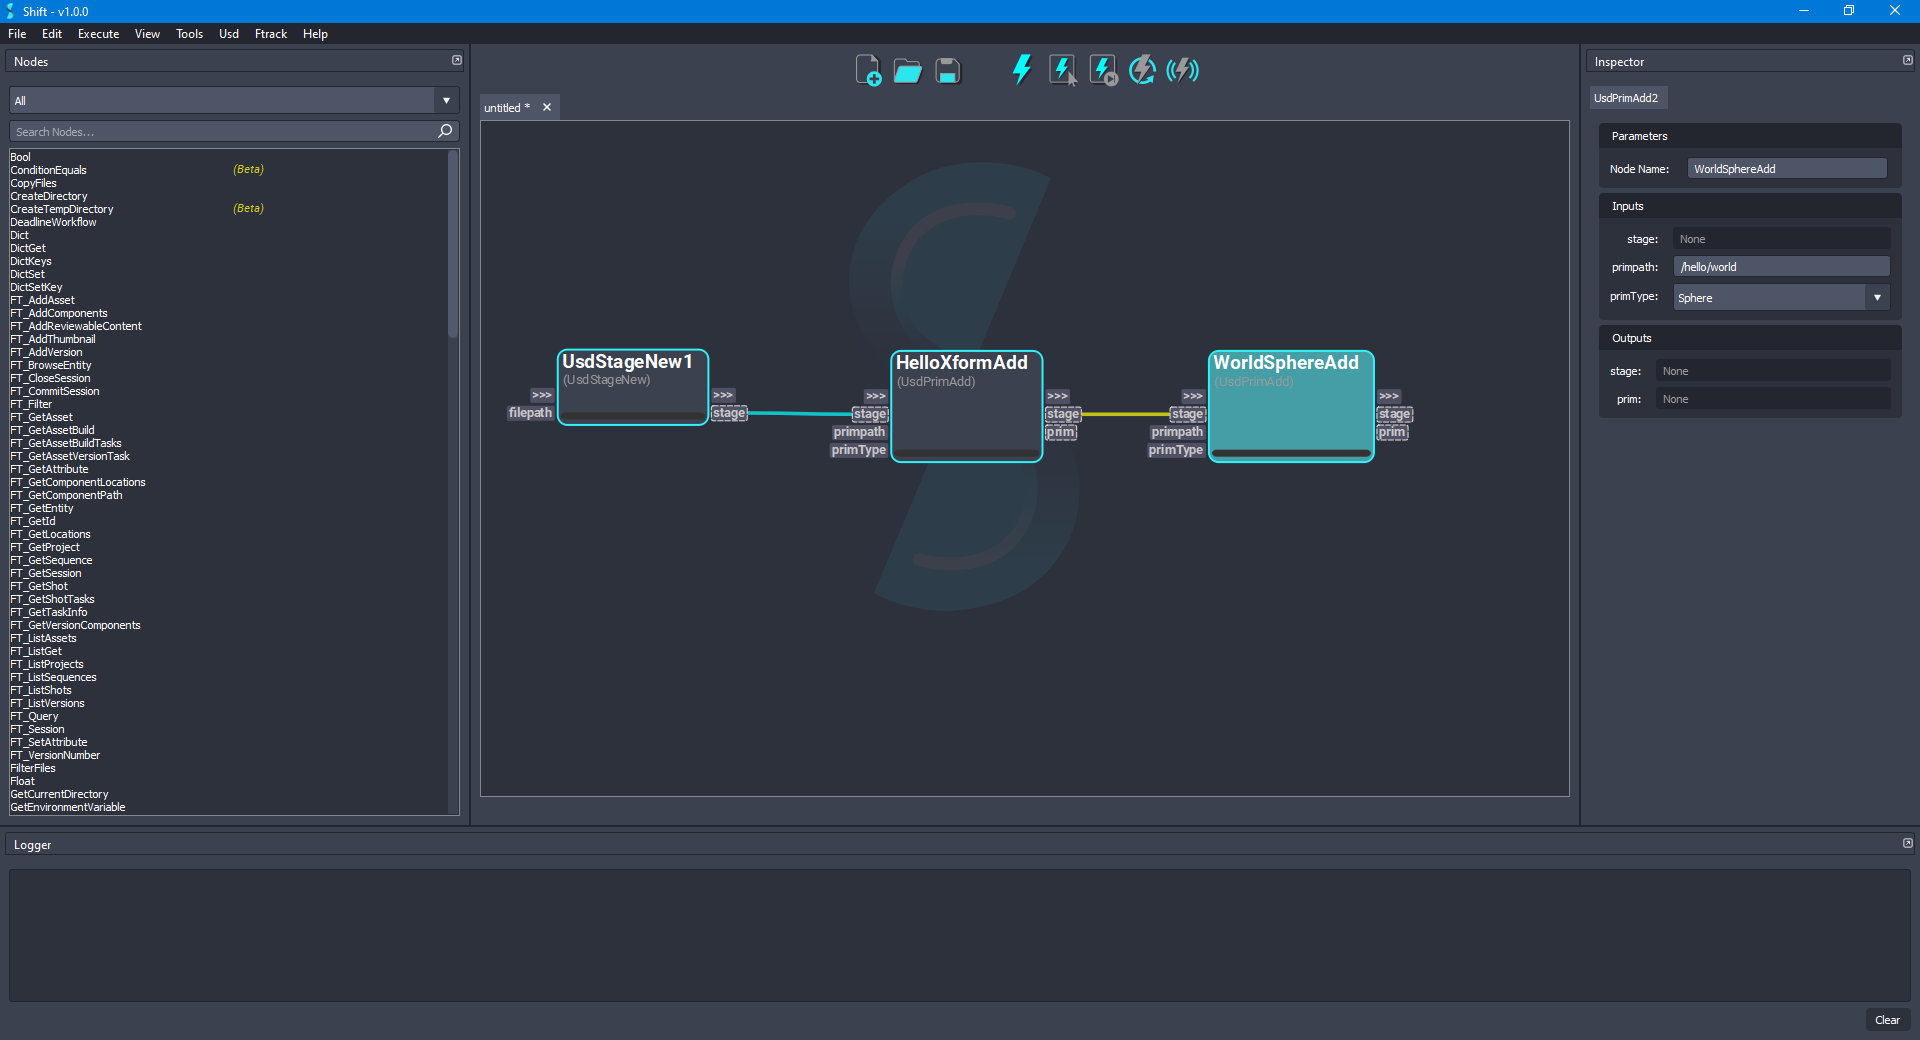
- Add another UsdPrimAdd node to the board for creating the geometry of the sphere. Connect the stage output plug from the HelloXformAdd node to the stage input plug of the new node. Set
/hello/worldas the value for the primpath input plug and chooseSphereas the value for the primType input plug. Rename the node as WorldSphereAdd to easily identify it. The board should look like the following:
- Finally, add a new UsdStageSave node. Connect the stage output plug from the WorldSphereAdd node to the stage input plug of the new node. A new filepath value can be set to save the stage to another specified location. For the current example, leave the value empty to update the file created by the UsdStageNew node. The board should look like the following:
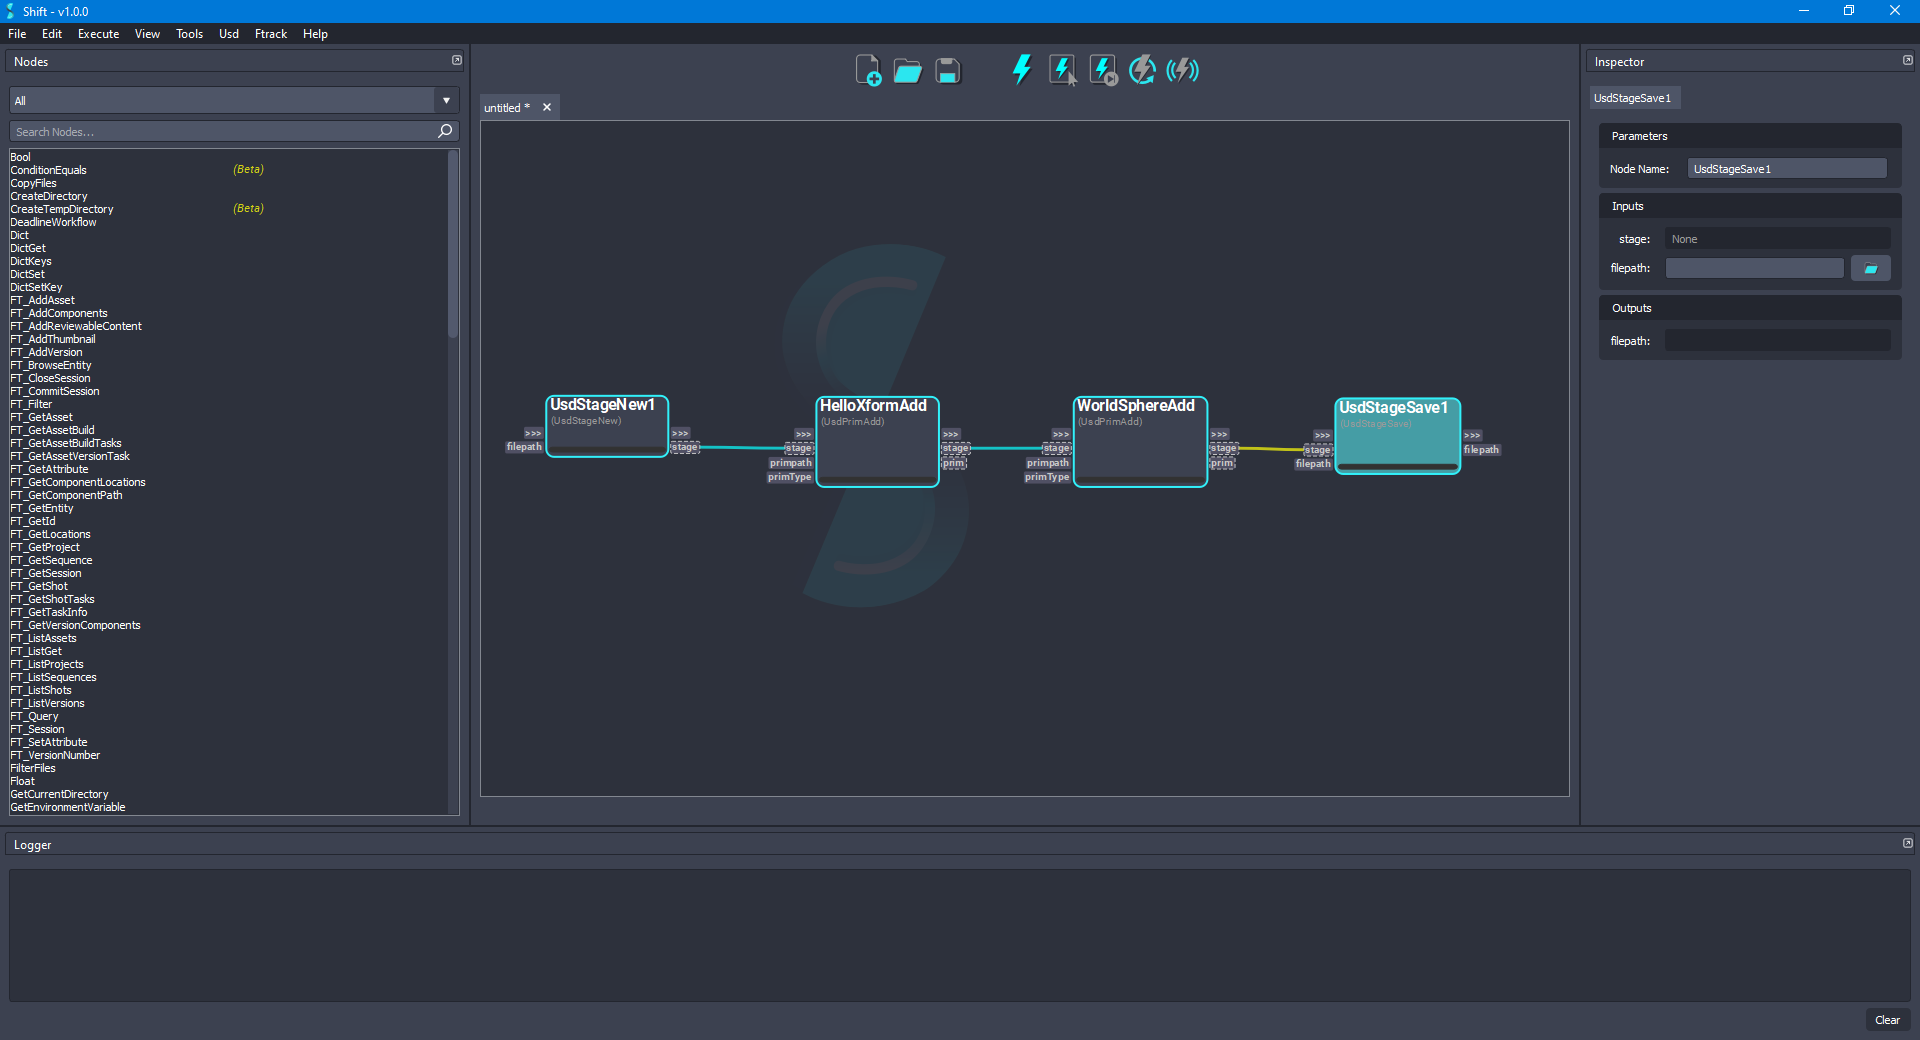
- Once the nodes are connected and properly set, the generated workflow can be executed to generate the USD file. The workflow will be executed and the nodes will show a blue progress bar as they are evaluated. Once the workflow has been executed, the board should look like the following:
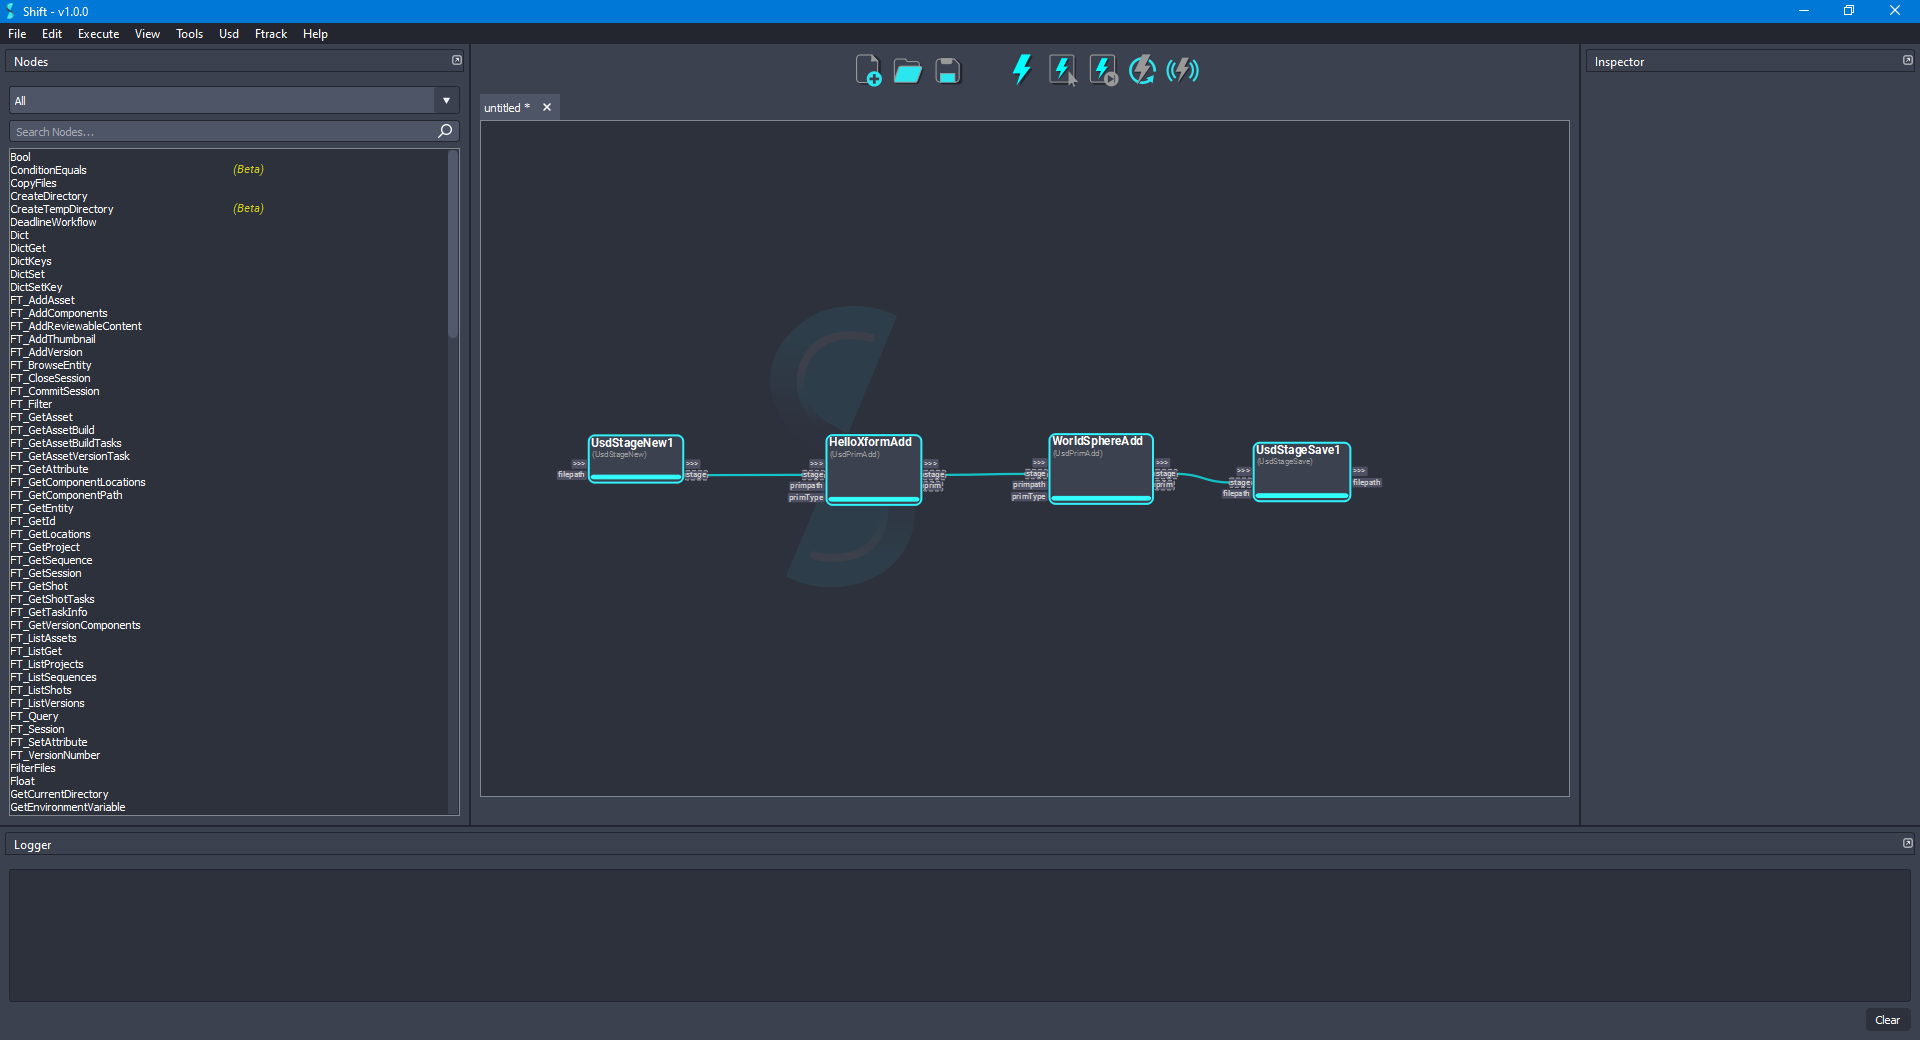
¶Visualising the Stage
Shift is shipped with native plugins to visualise and inspect the stage. They can be accessed from the USD top menu:
-
USD Outliner: Shows the user the stage hierarchy sourced from specific Usd nodes in the active board workflow.
-
USD Viewer: Shows the stage in the USD viewer sourced from specific USD nodes in the active board workflow.
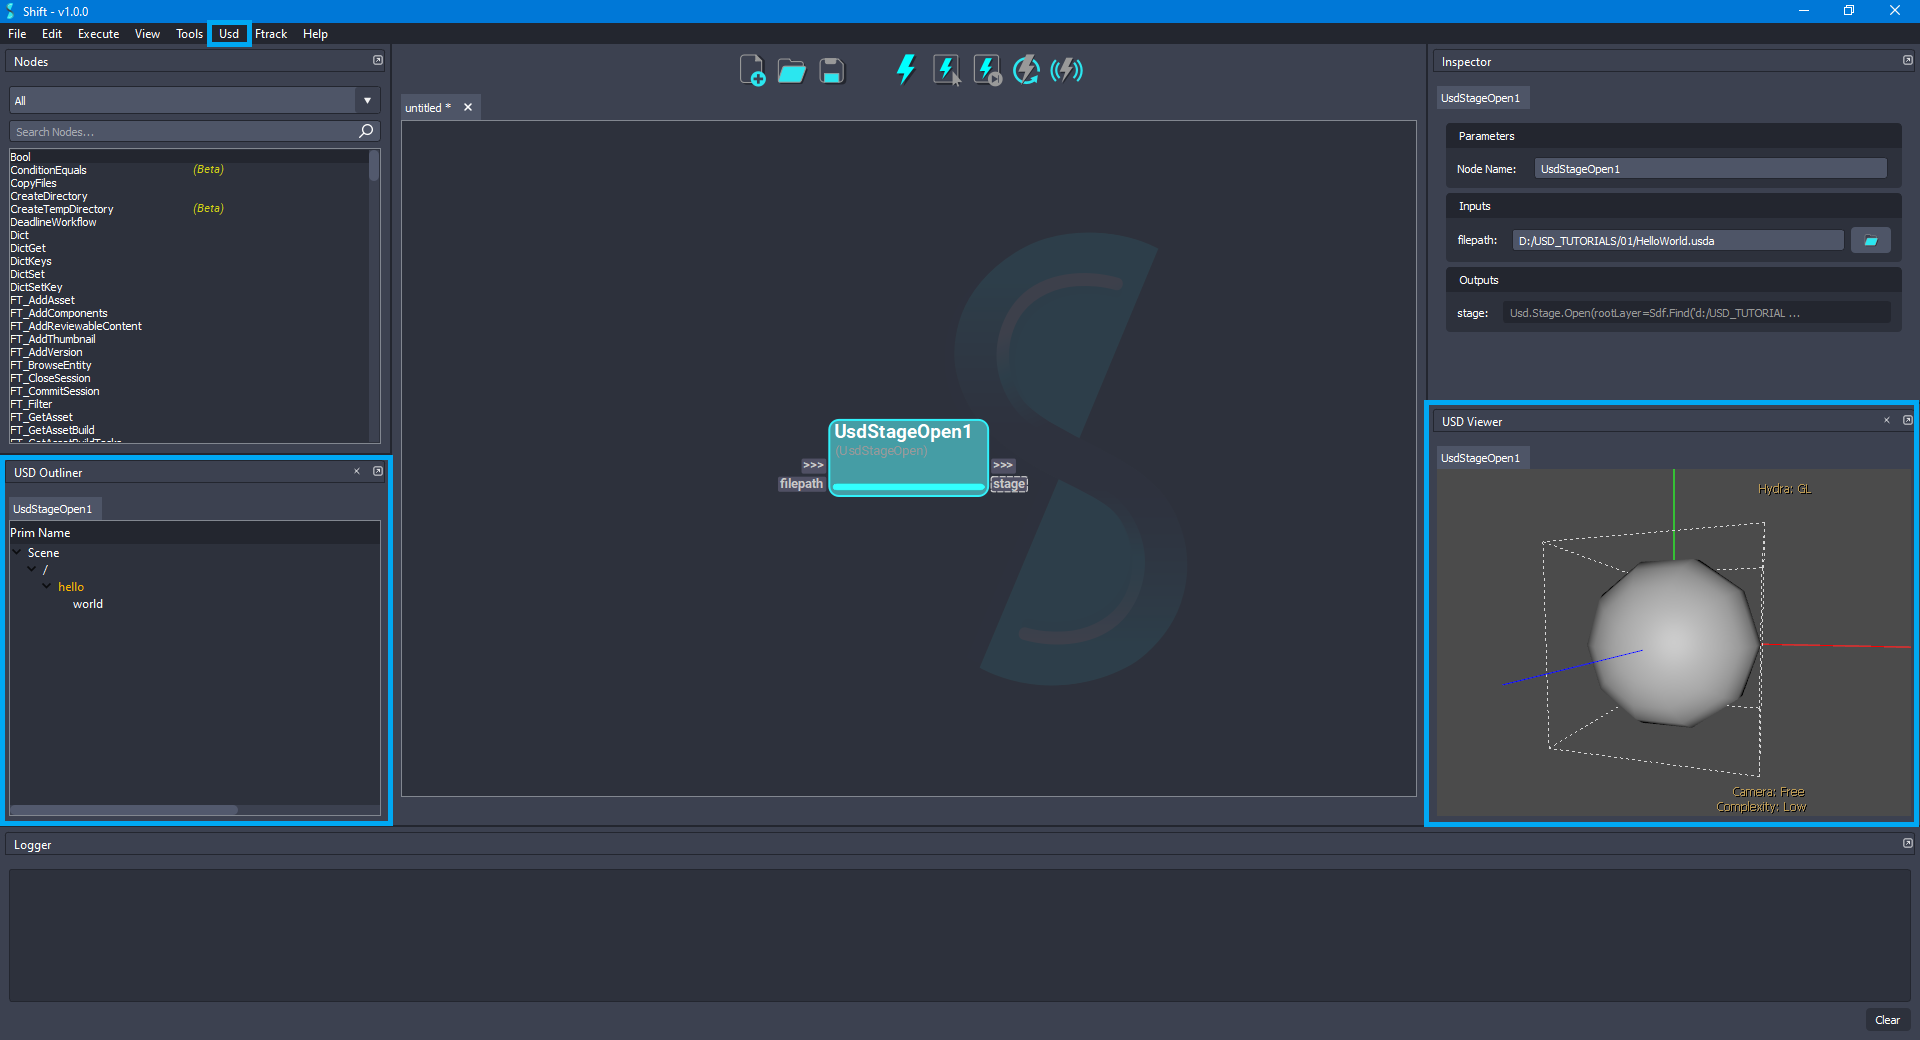
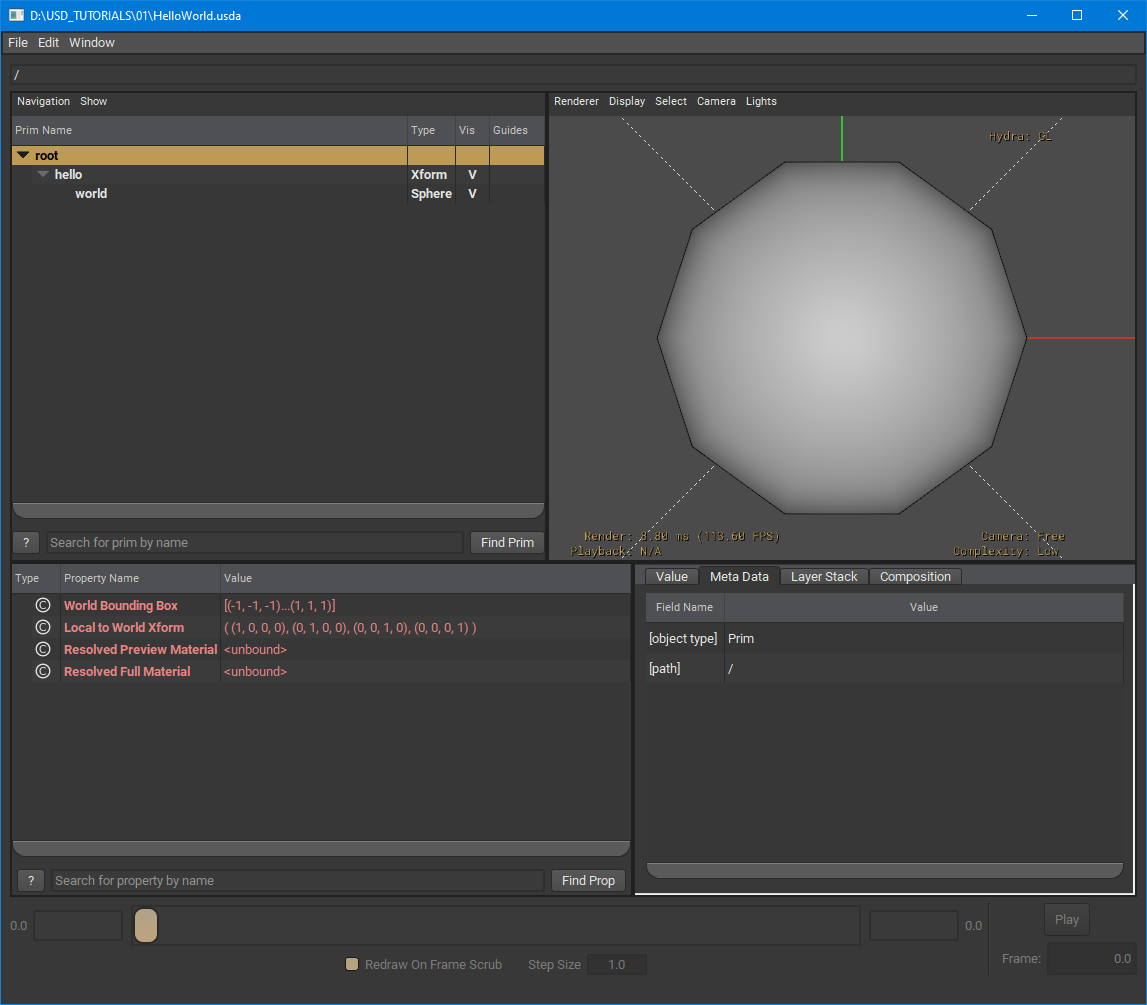
The USD Viewer tool shipped with USD is used to visualise and inspect the stage viewport:
¶Workflow Resources
The workflow corresponding to this tutorial can be found in the following path in the Shift installation folder: <path_to_the_shift_installation_folder>/shift/examples/USD/tutorials/tutorial_01_creating_first_stage/tutorial_01.sft
< Main USD Tutorials Page Inspecting and Authoring Properties >


