< Creating a Simple USD Stage Referencing Layers >
¶Inspecting and Authoring Properties
This tutorial focuses on inspecting the properties containing geometric data of the prims created in the tutorial Creating a Simple USD Stage, using the operators from the Shift_USD catalog.
The USD file HelloWorld.usda can be found in the following path in the Shift installation folder: <path_to_the_shift_installation_folder>/shift/examples/USD/tutorials/tutorial_01_creating_first_stage/result/.
¶Tutorial
- Open Shift application. A new window instance of Shift should appear like the following one:
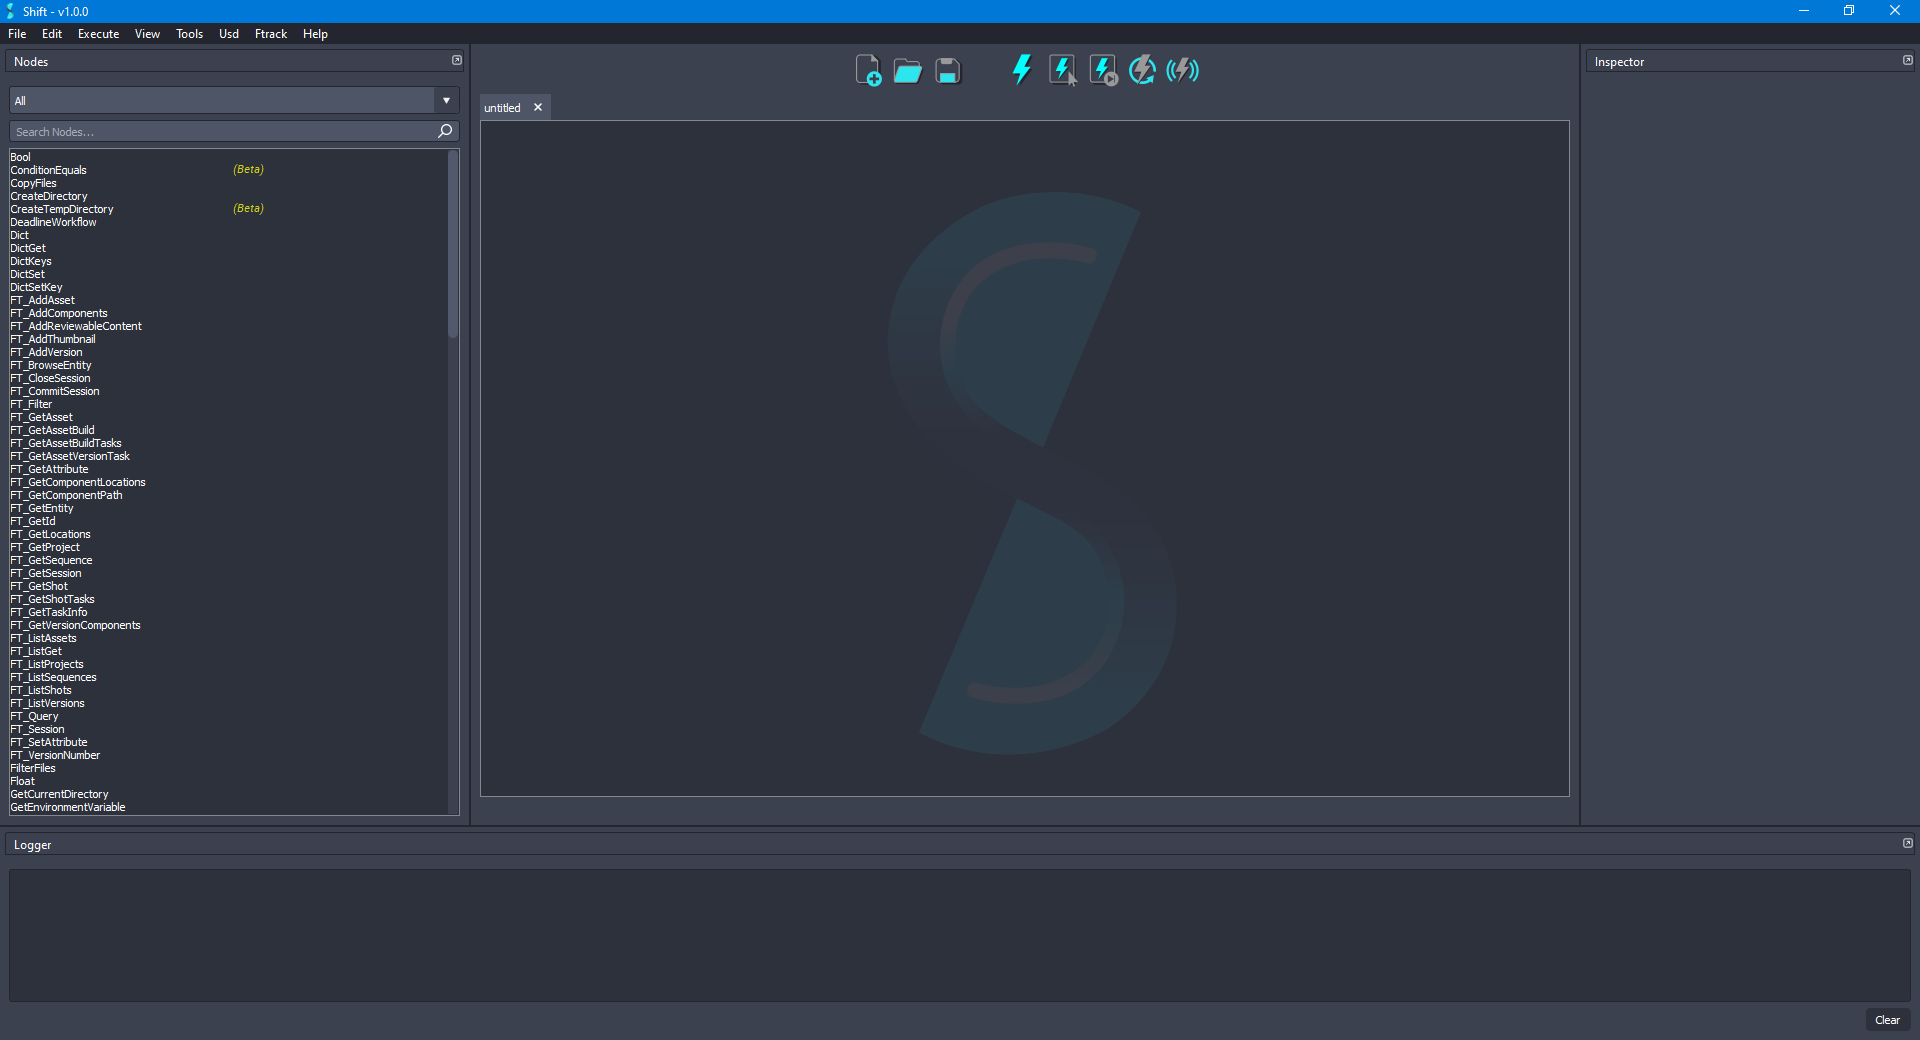
Before creating the USD workflow, ensure that the USD nodes appear in the Node List widget. The catalogs combobox should show
sUSDandsUSDTypesif USD is correctly loaded in Shift. If this is not the case, please check again the Shift_USD installation page.
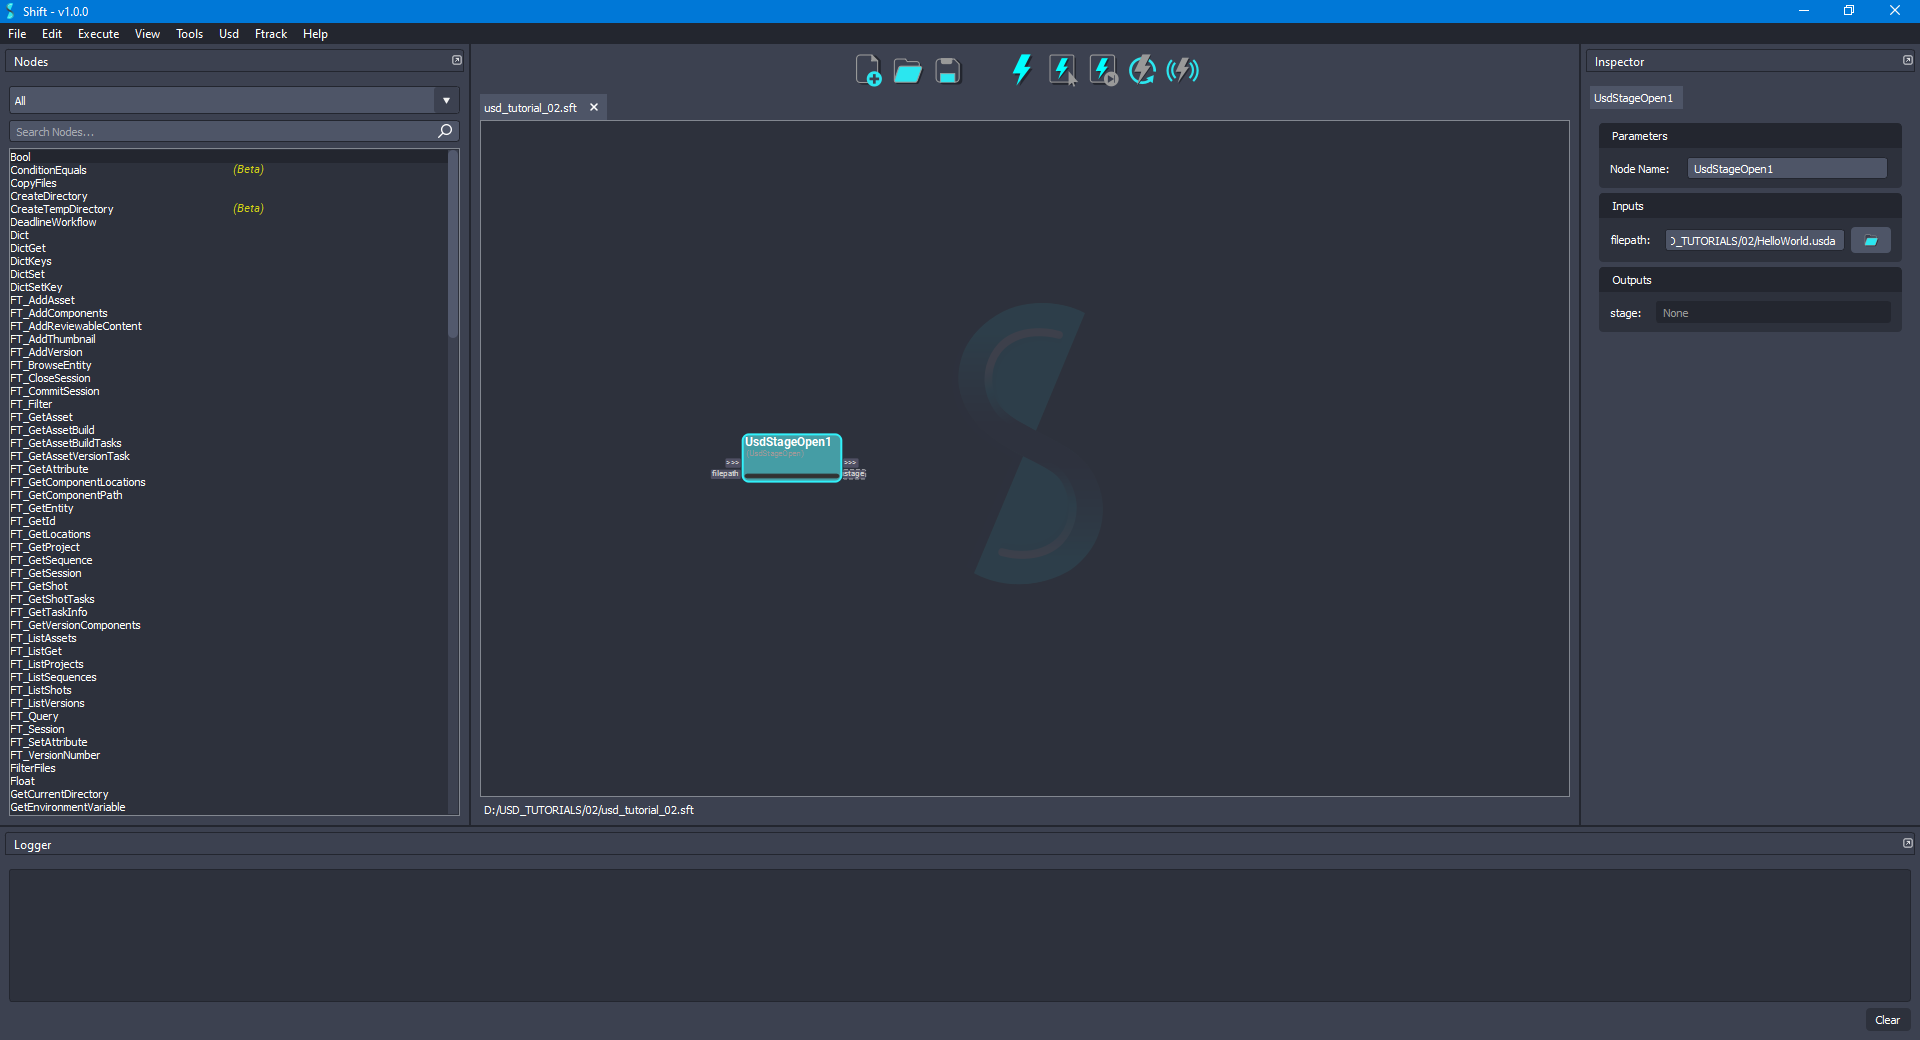
- Add a new UsdStageOpen node to the board. Using the Inspector widget, set as the value for the filepath input plug a filepath pointing to the
HelloWorld.usdafile downloaded for the example. The board should look like the following:
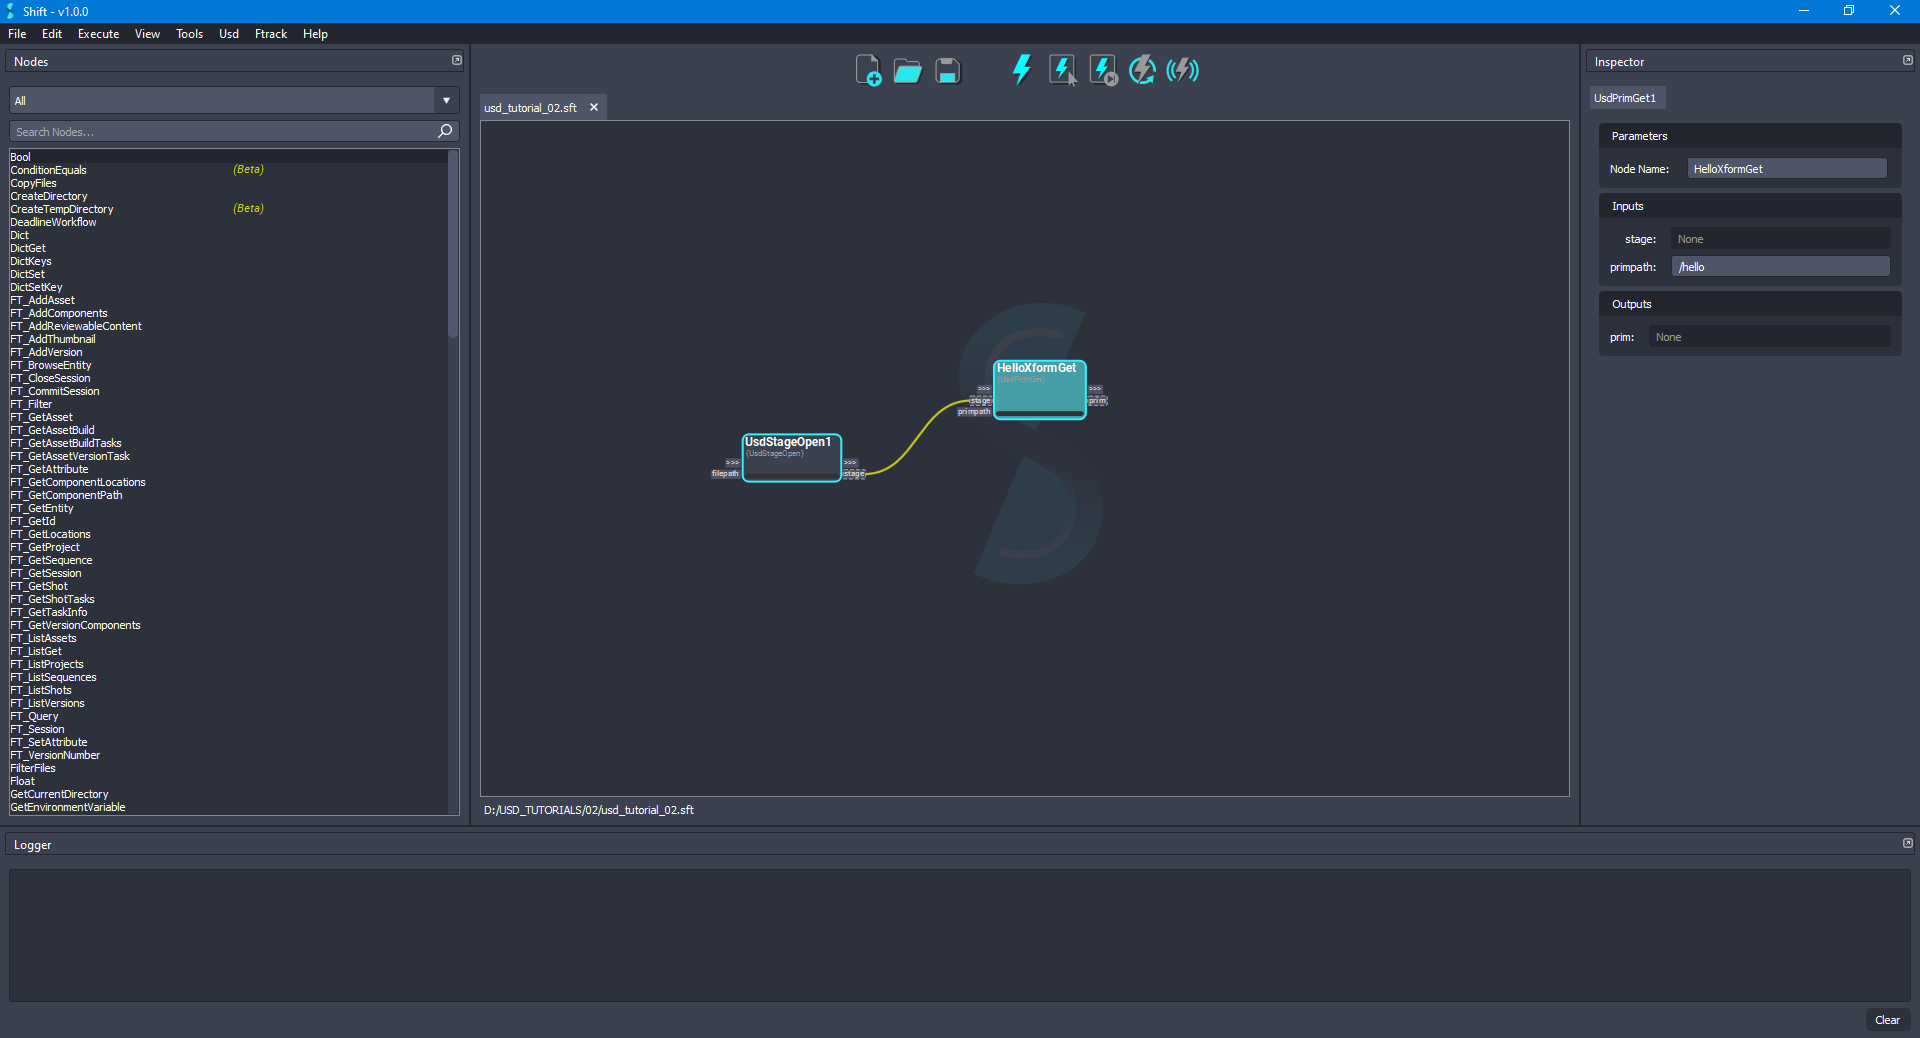
- Add a new UsdPrimGet node to the board. Connect the stage output plug from the UsdStageOpen node to the stage input plug of the new node and set
/helloas the value for the primpath input plug. Rename the node as HelloXformGet to easily identify it. The board should look like the following:
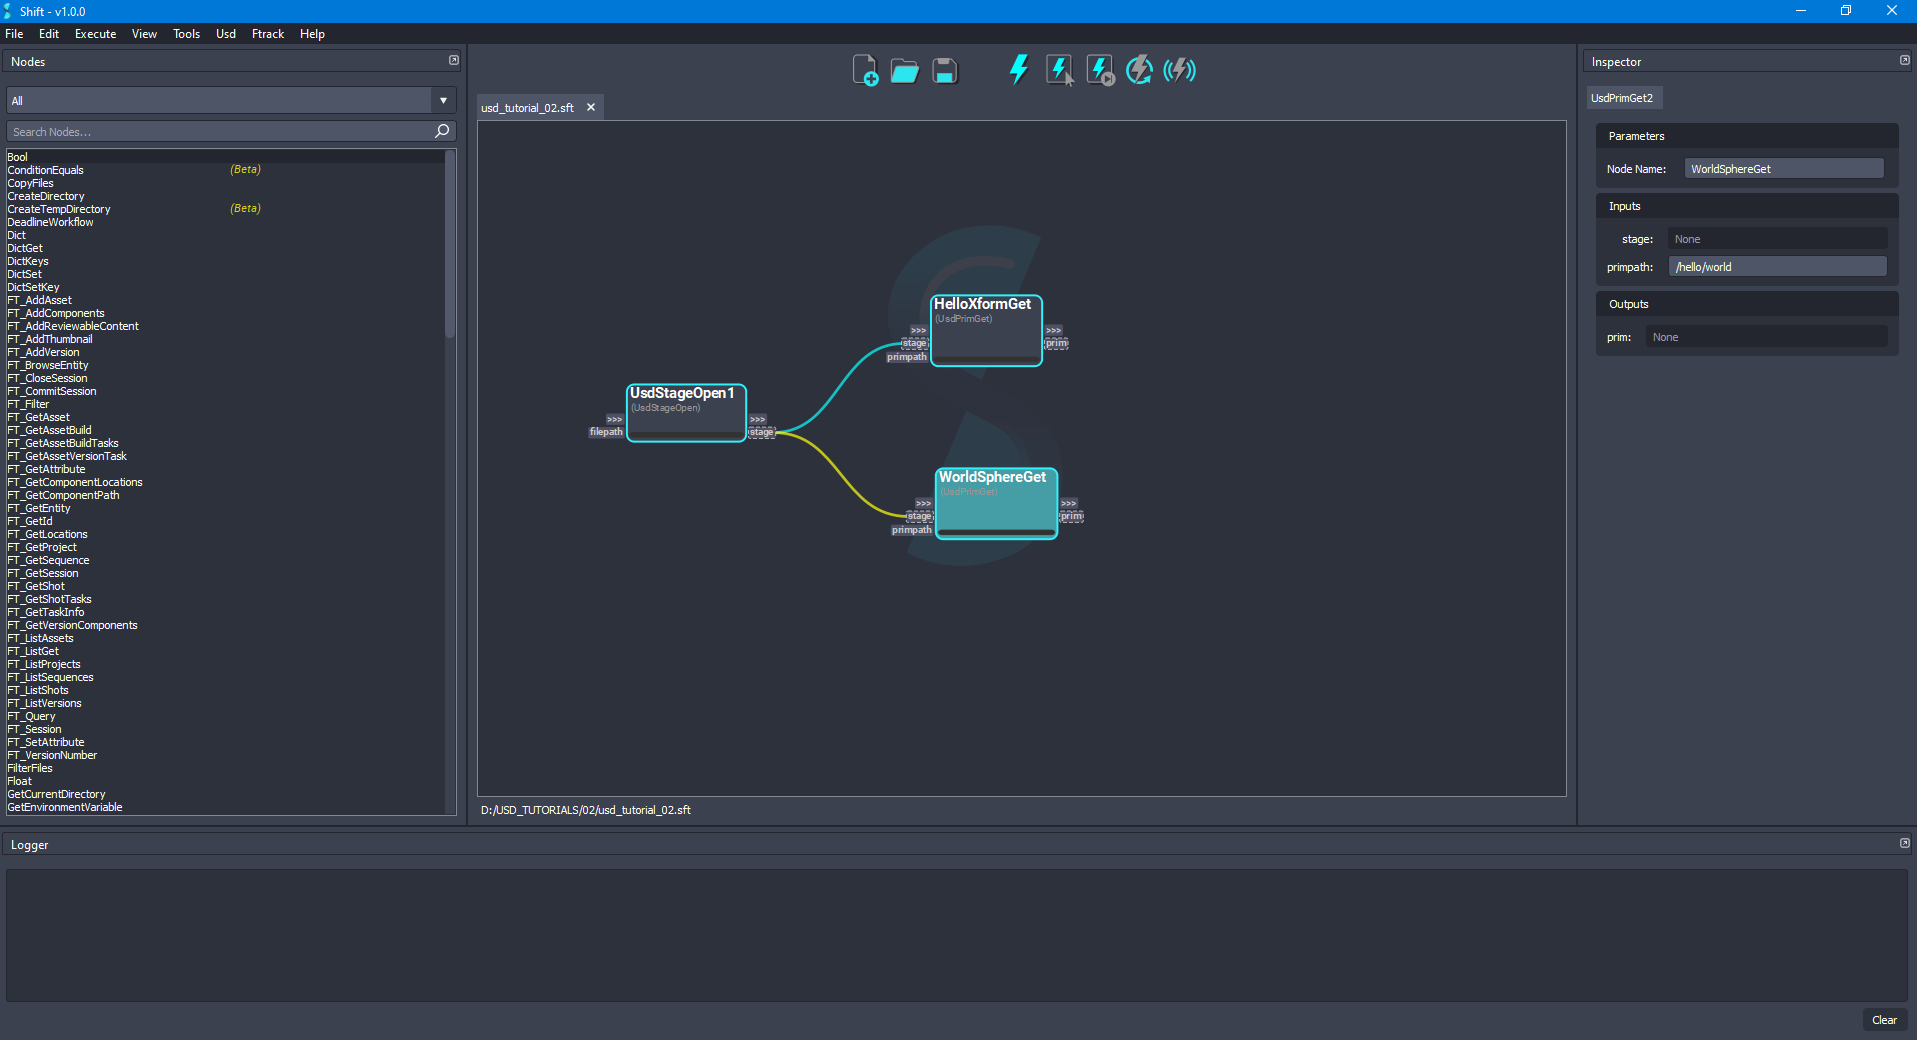
- Add another UsdPrimGet node to the board. Connect the stage output plug from the UsdStageOpen node to the stage input plug of the new node and set
/hello/worldas the value for the primpath input plug. Rename the node as WorldSphereGet to easily identify it. The board should look like the following:
- Add a new UsdPrimPropertyNamesGet node to the board. Connect the prim output plug from the HelloXformGet node to the prim input plug of the new node. Rename the node as HelloPropertyNamesGet to easily identify it. The board should look like the following:
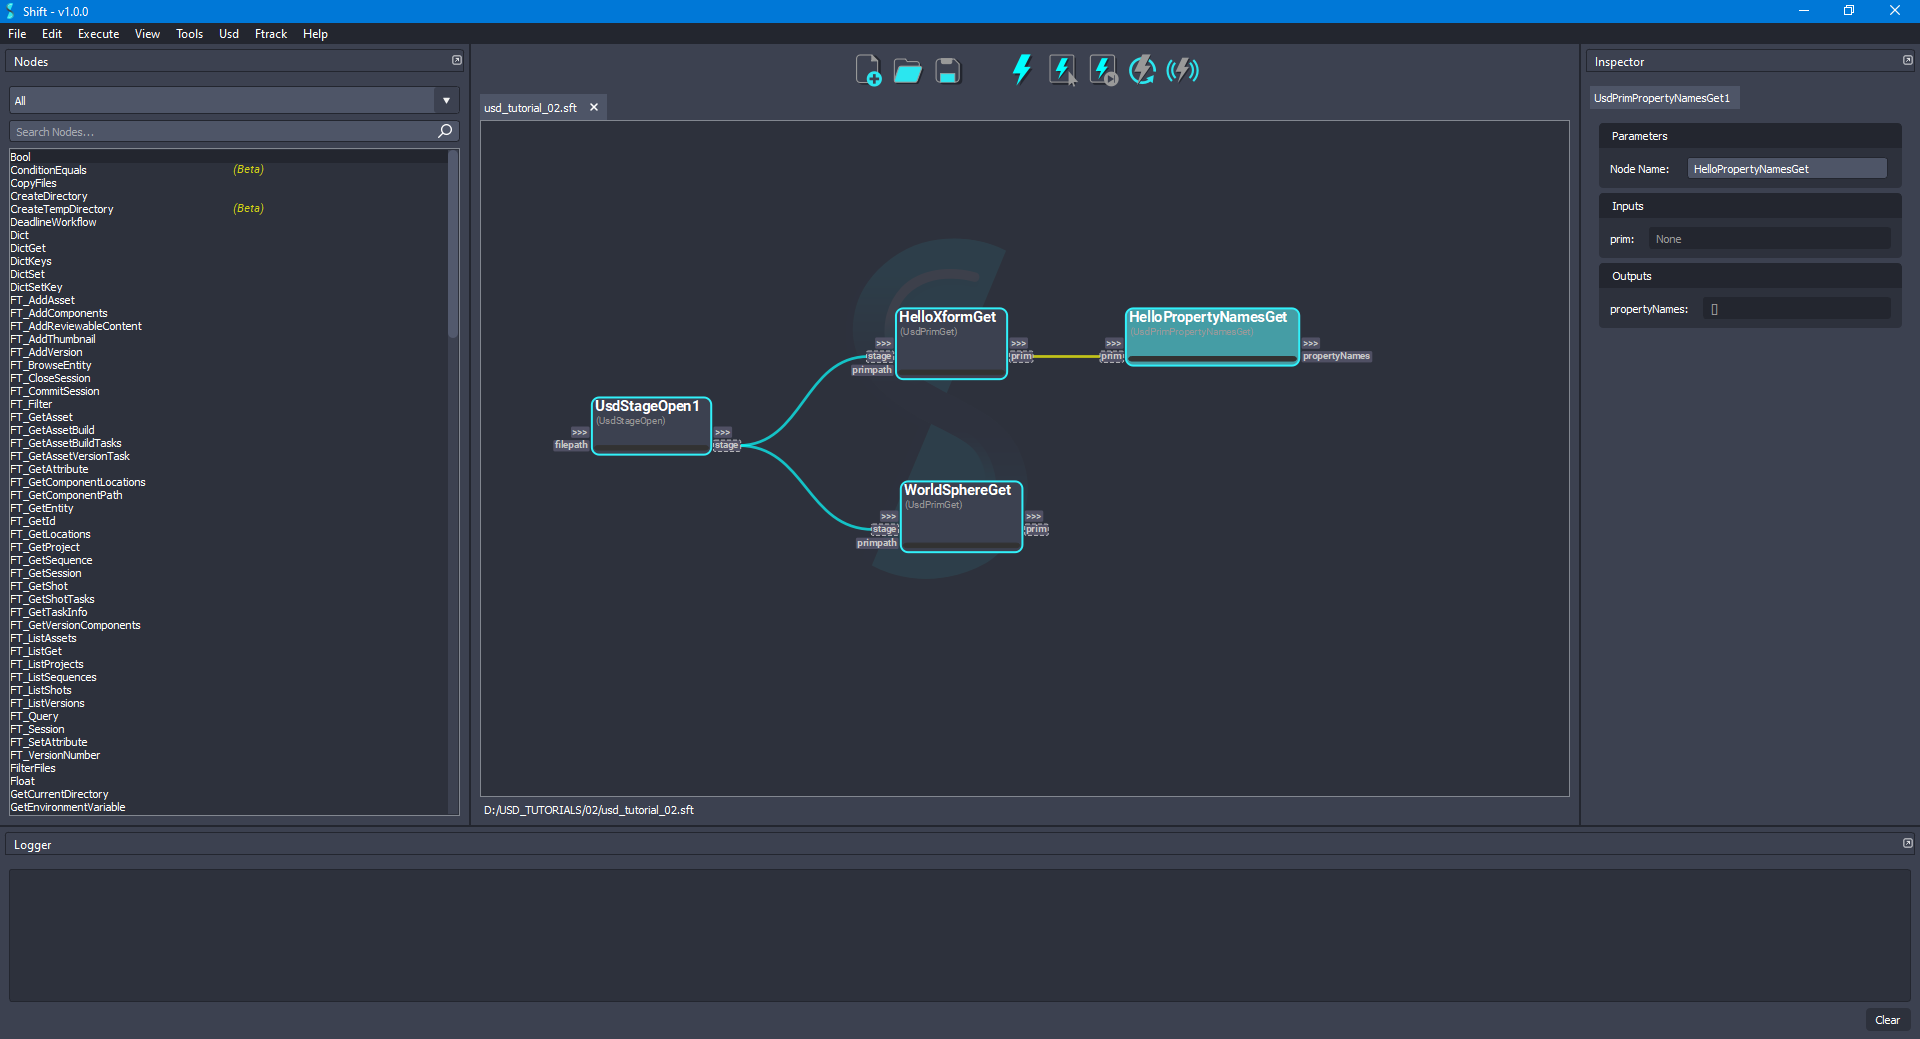
- As done in the previous step, add another UsdPrimPropertyNamesGet node to the board. Connect the prim output plug from the WorldSphereGet node to the prim input plug of this new node. Rename the node as WorldPropertyNamesGet to easily identify it. The board should look like the following:
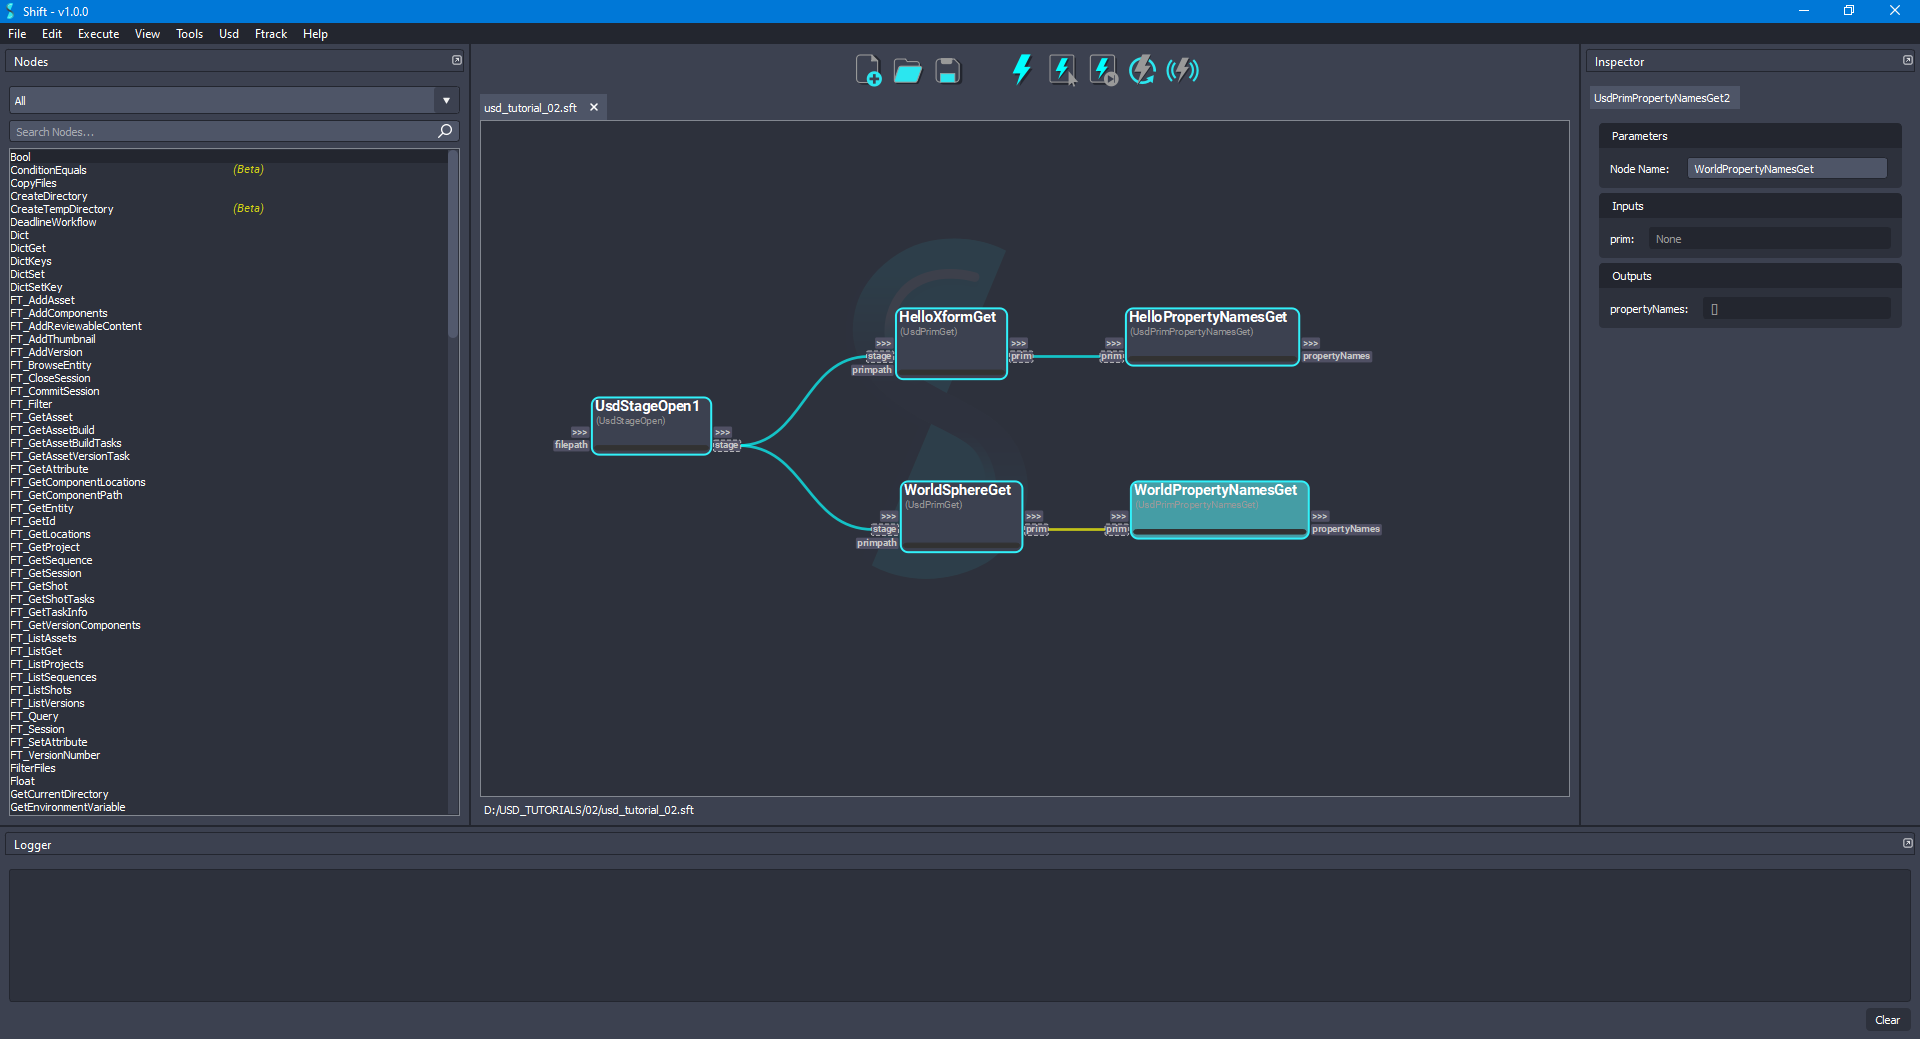
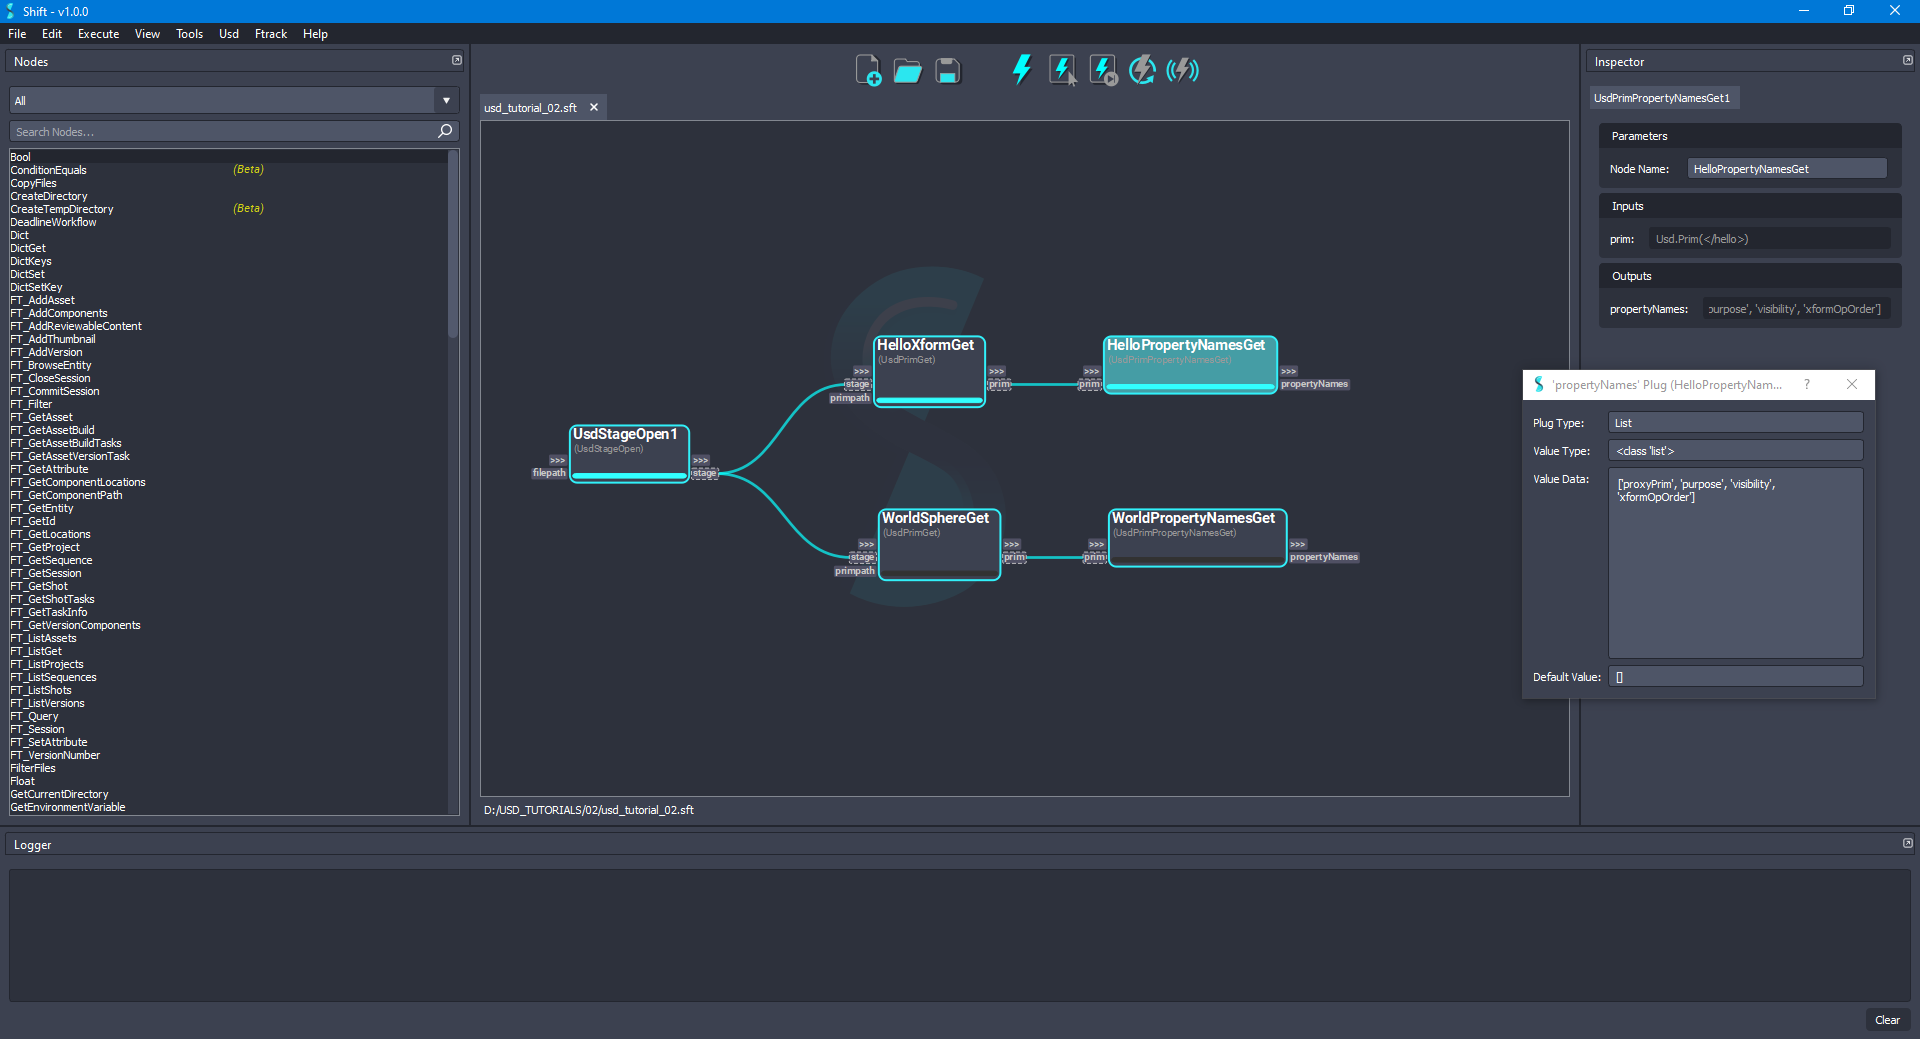
- Now, with the HelloPropertyNamesGet node selected, run the execution only for the selected nodes. The execution will run only on the necessary nodes to compute the HelloPropertyNamesGet node, meaning that from the 2 branches created, only the top one will be executed. With the HelloPropertyNamesGet node selected,
Right-Clickover the propertyNames output plug field and click on the Show option from the context menu. A new dialog should appear showing the value of the plug, which should be:['proxyPrim', 'purpose', 'visibility', 'xformOpOrder']. The board should look like the following:
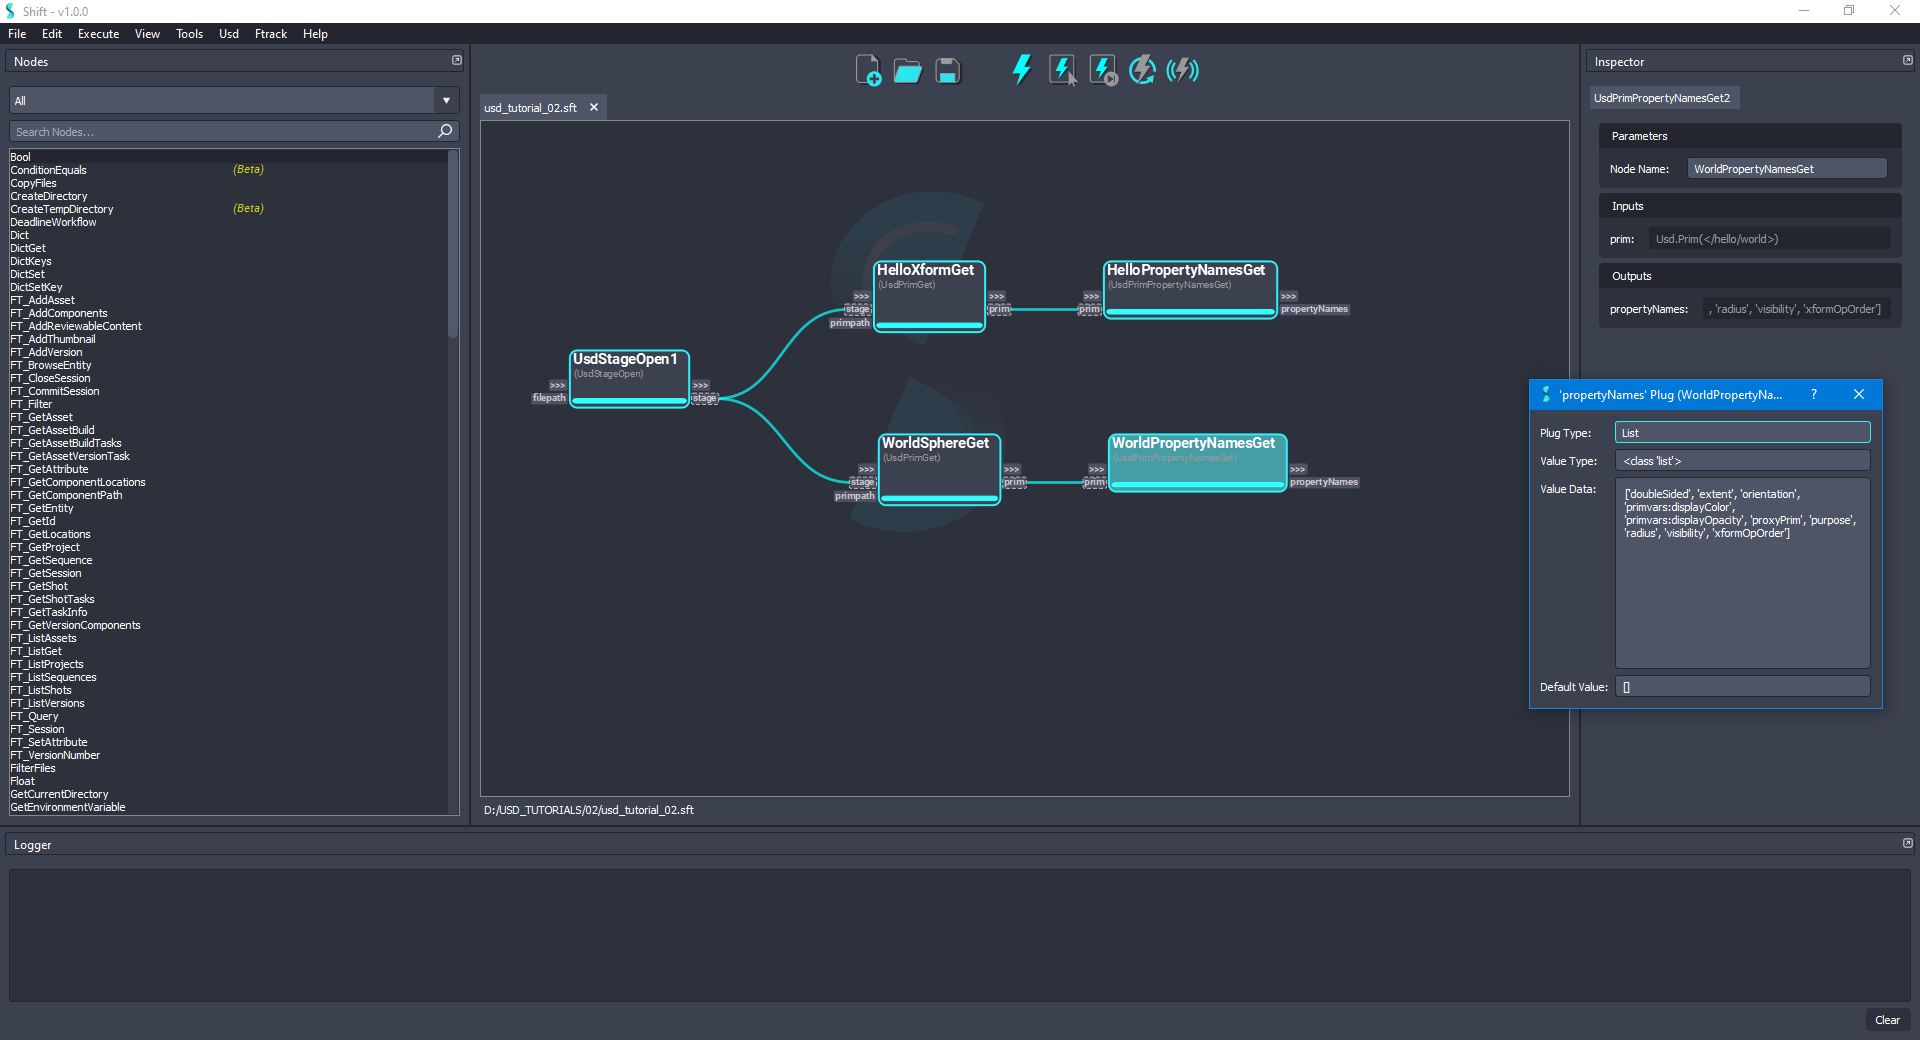
- Following the previous steps, do the same selecting now the WorldPropertyNamesGet node. Execute again only the selected node. The execution will run over the nodes on the bottom branch that were still not executed. When showing the result values from the propertyNames output plug, the values of the list are:
['doubleSided', 'extent', 'orientation', 'primvars:displayColor', 'primvars:displayOpacity', 'proxyPrim', 'purpose', 'radius', 'visibility', 'xformOpOrder']. The board should look like the following:
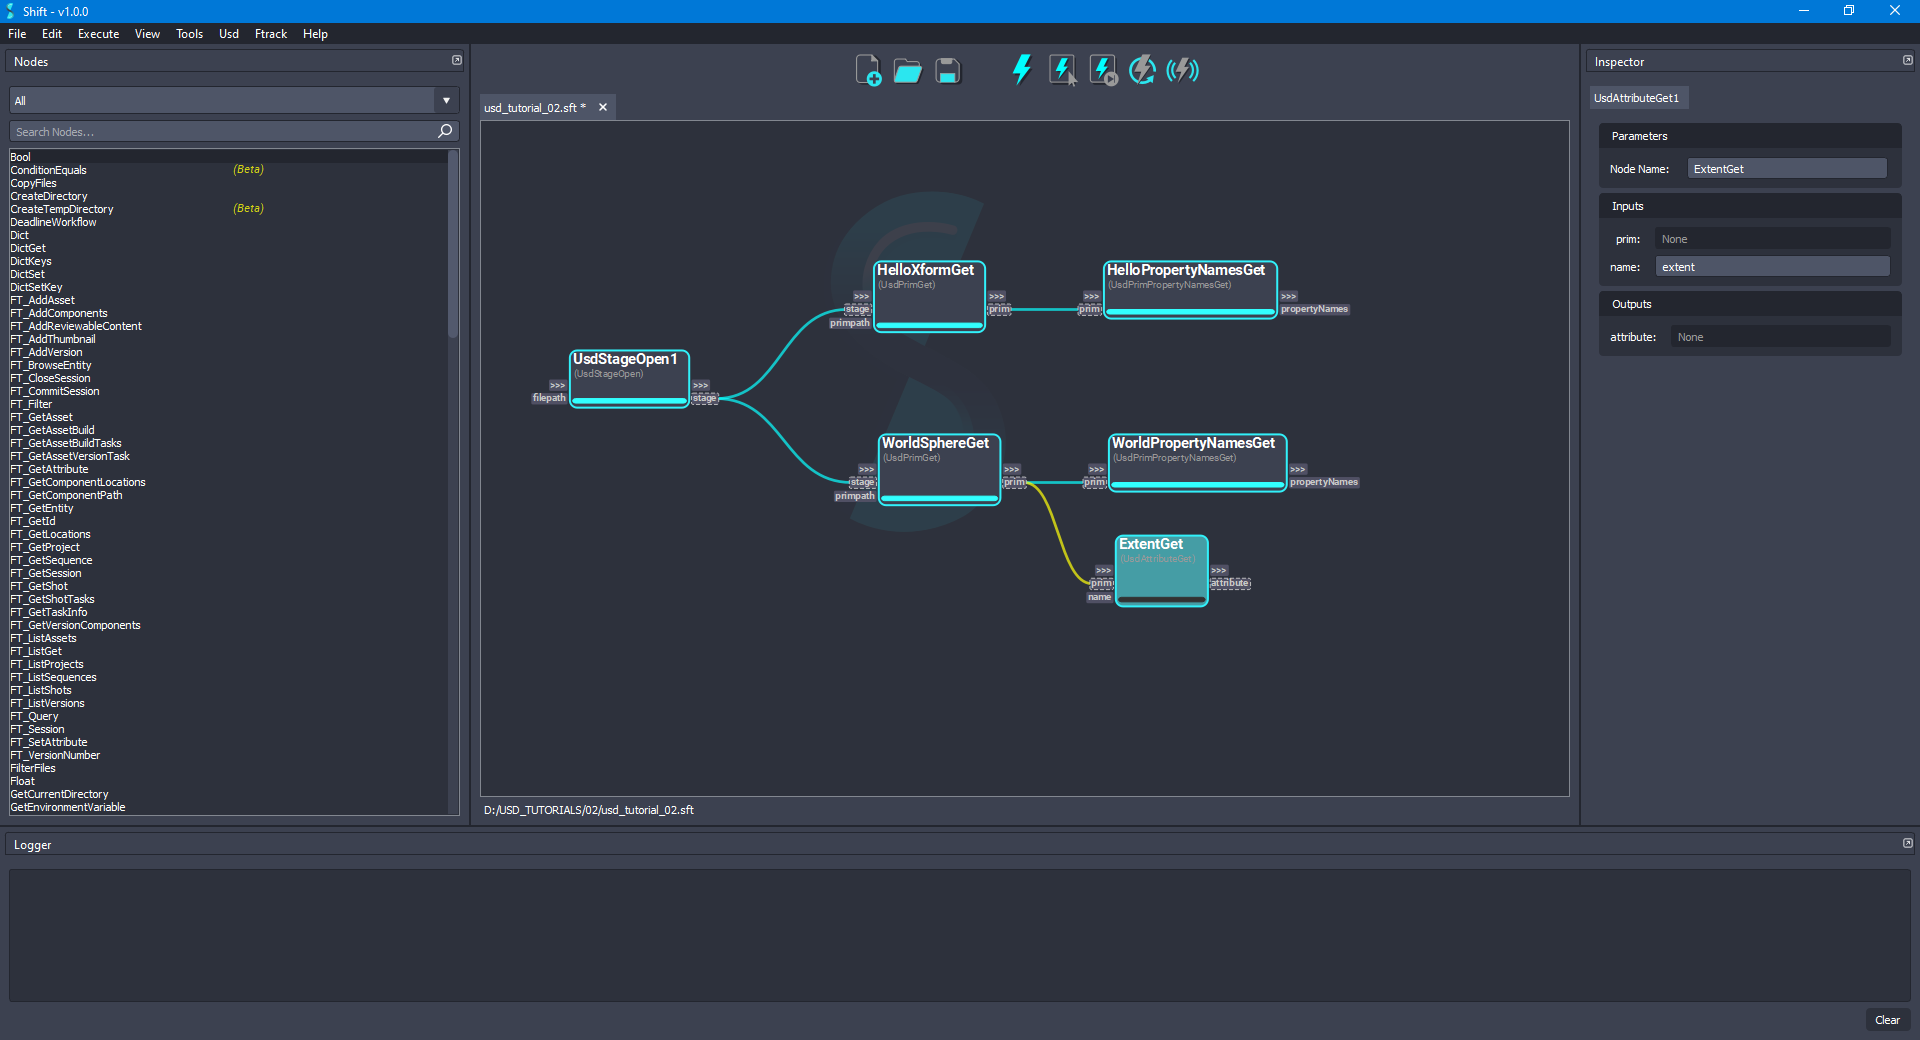
- Add a new UsdAttributeGet node to the board. Connect the prim output plug from the WorldSphereGet node to the prim input plug of the new node and set
extentas the value for the name input plug. Rename the node as ExtentGet to easily identify it. The board should look like the following:
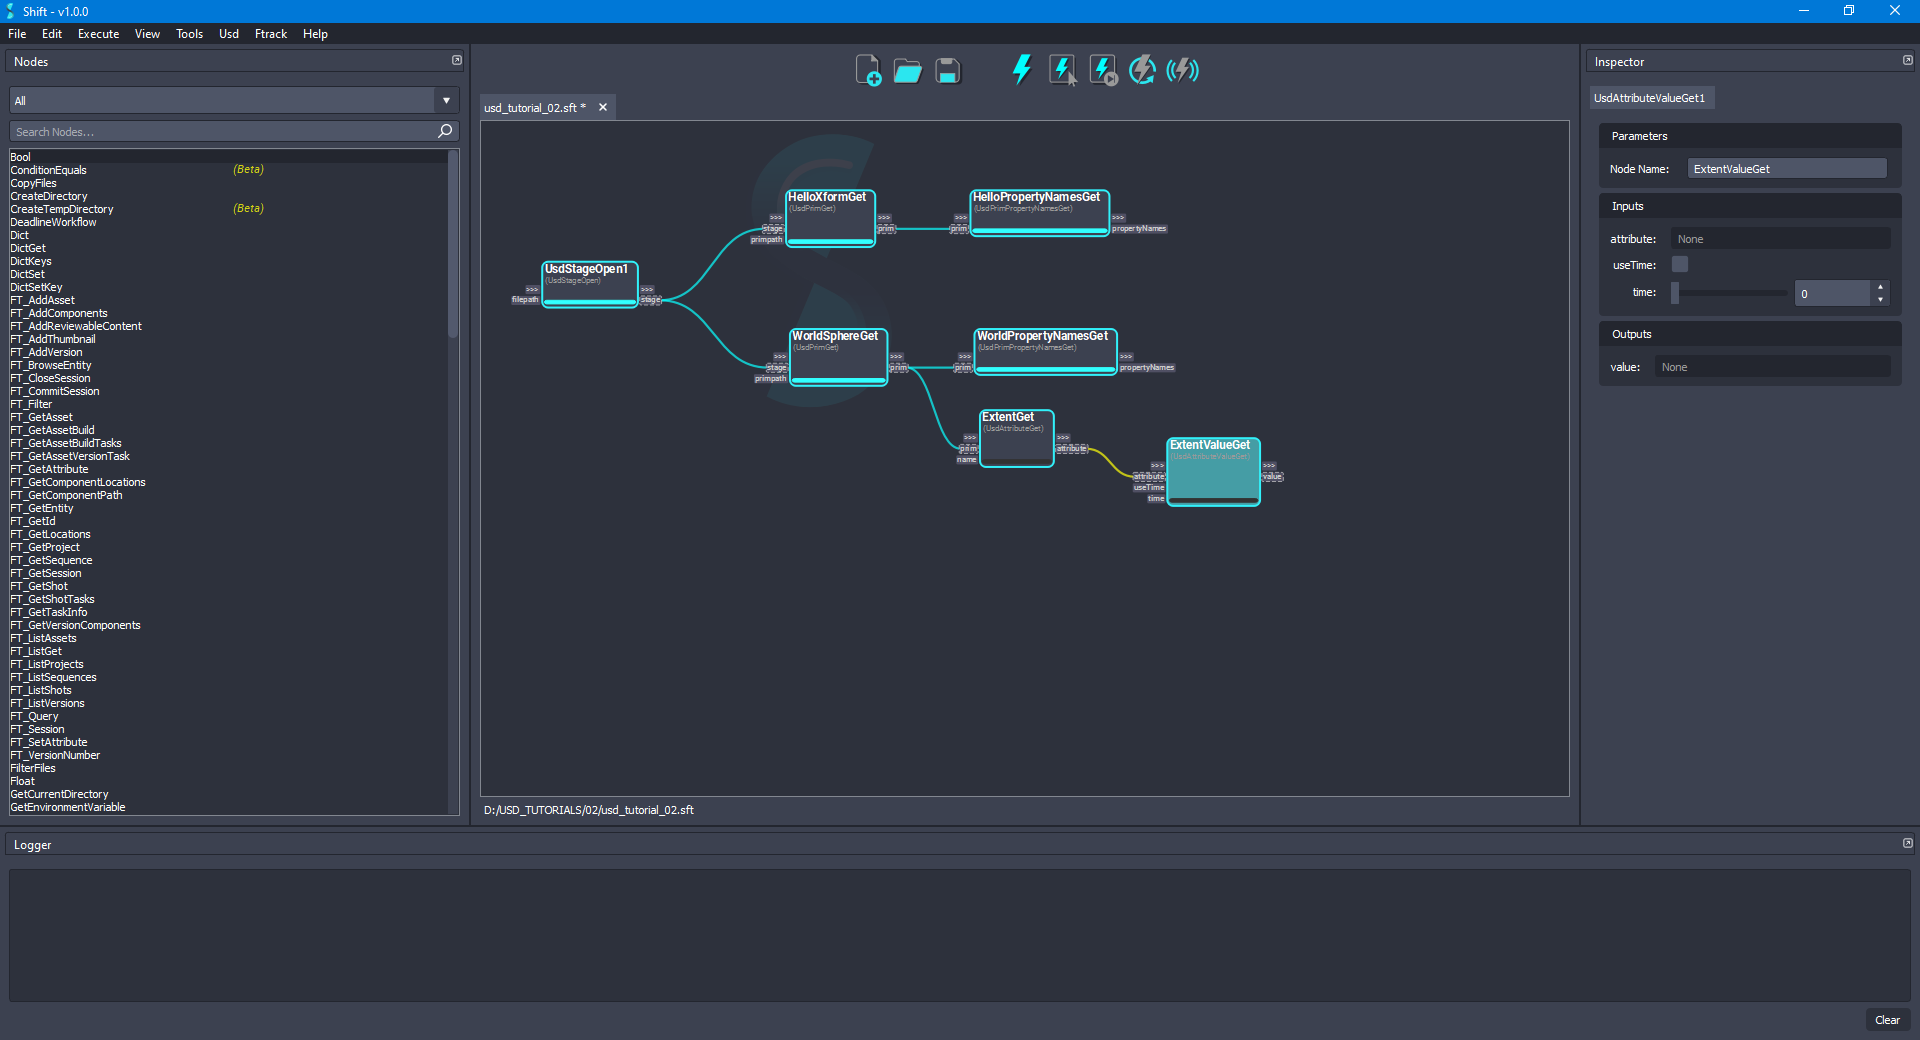
- In order to get the value of an attribute, add a new UsdAttributeValueGet node to the board. Connect the attribute output plug from the ExtentGet node to the prim input plug of the new node. Leave the useTime input plug value set to
Falseand the time input plug value set to0. Rename the node as ExtentValueGet to easily identify it. The board should look like the following:
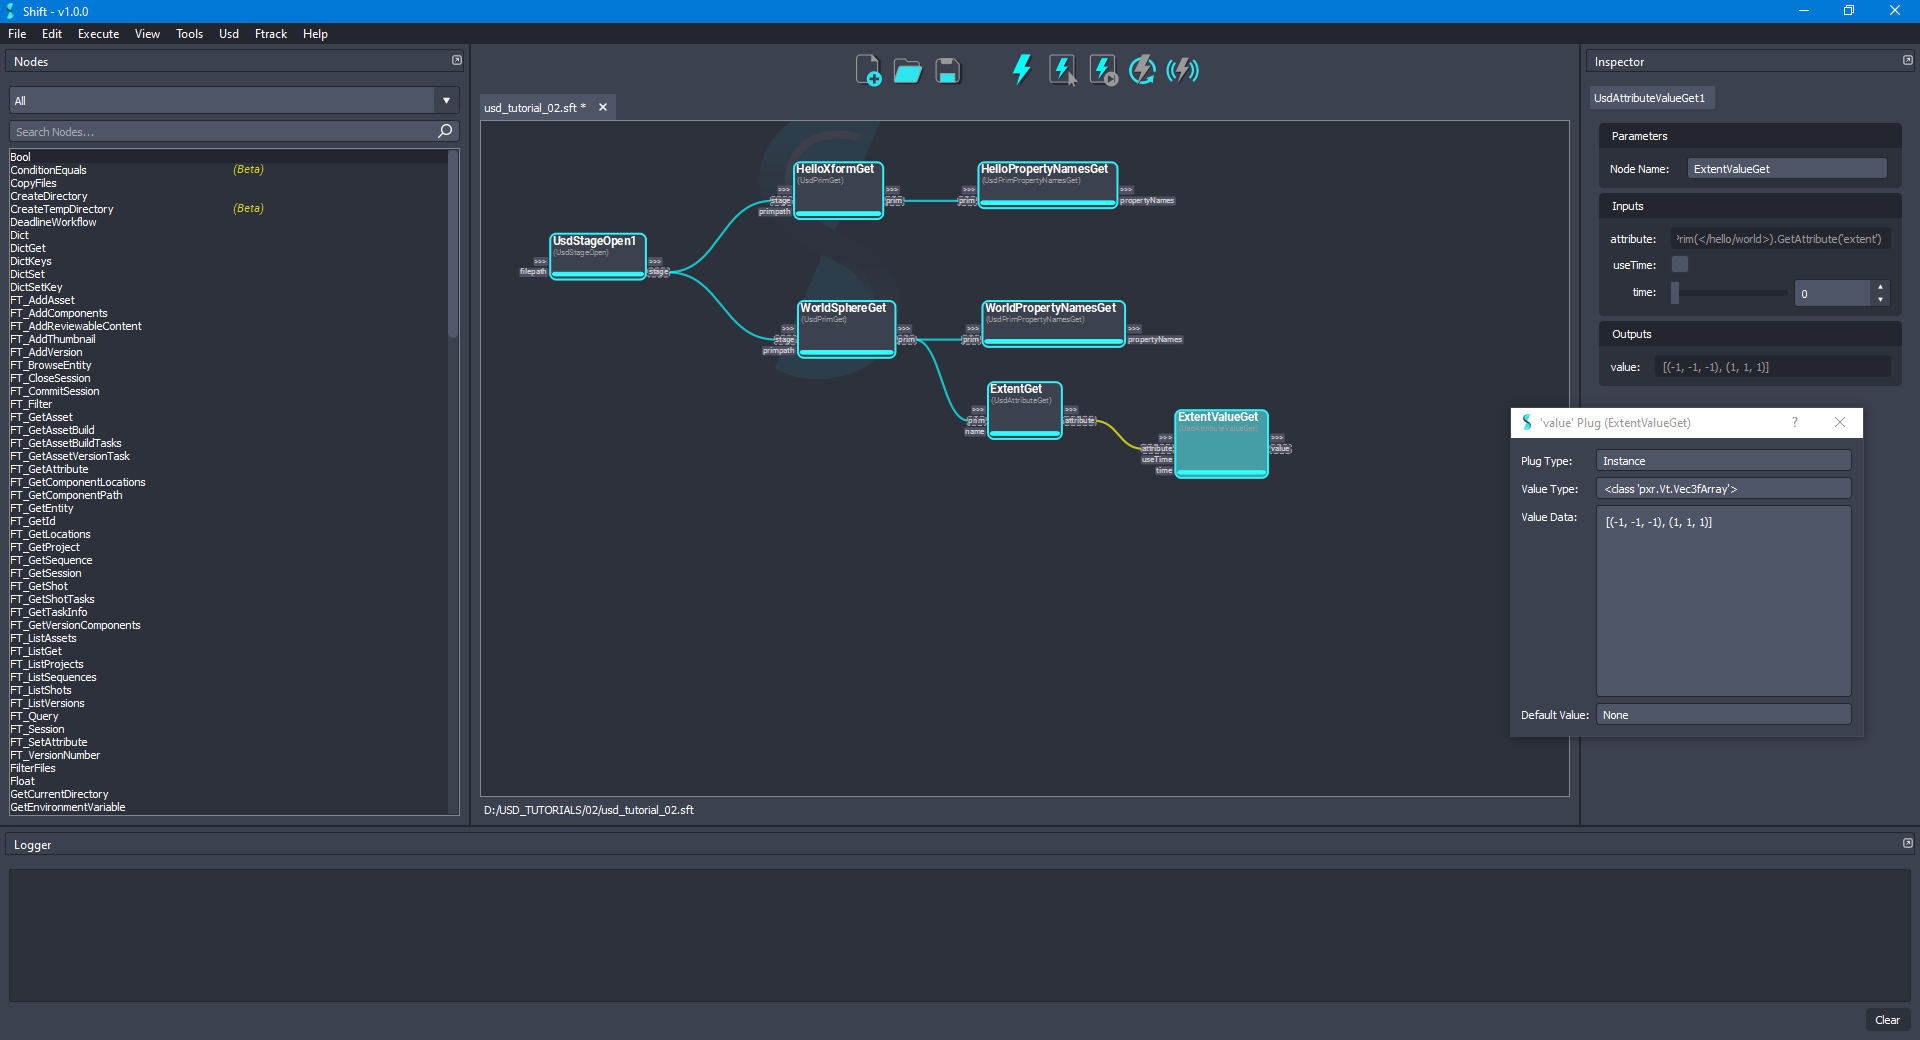
- Select the ExtentValueGet node and execute the workflow again only for the selected node. Inspecting the value of the value output plug as done in the previous cases, the result list is:
[(-1, -1, -1), (1, 1, 1)]. The board should look like the following:
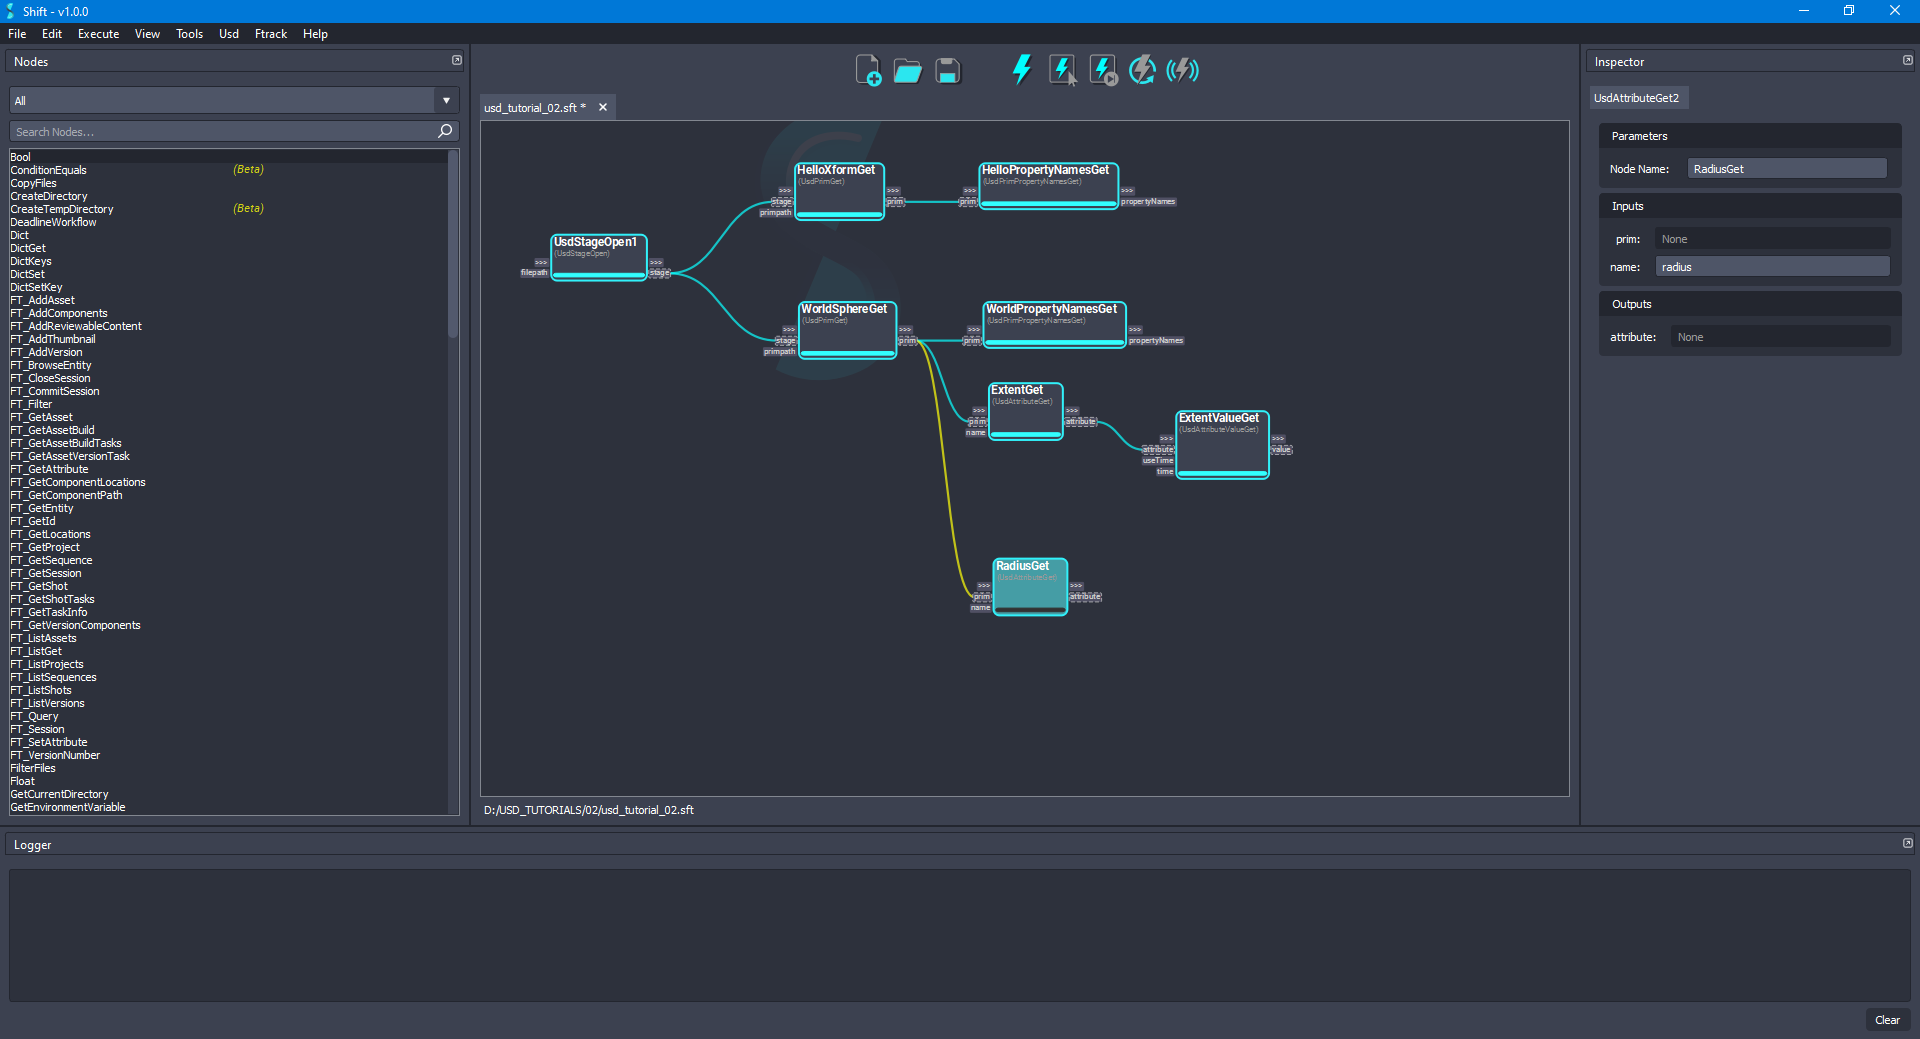
- Add another UsdAttributeGet node to the board. Connect the prim output plug from the WorldSphereGet node to the prim input plug of this new node and set
radiusas the value for the name input plug. Rename the node as RadiusGet to easily identify it. The board should look like the following:
- Add a new UsdAttributeValueSet node to the board and rename it as RadiusValueSet. Connect the attribute output plug from the RadiusGet node to the attribute input plug of the new node. Leave the useTime input plug value set to
Falseand time input plug value set to0. The board should look like the following:
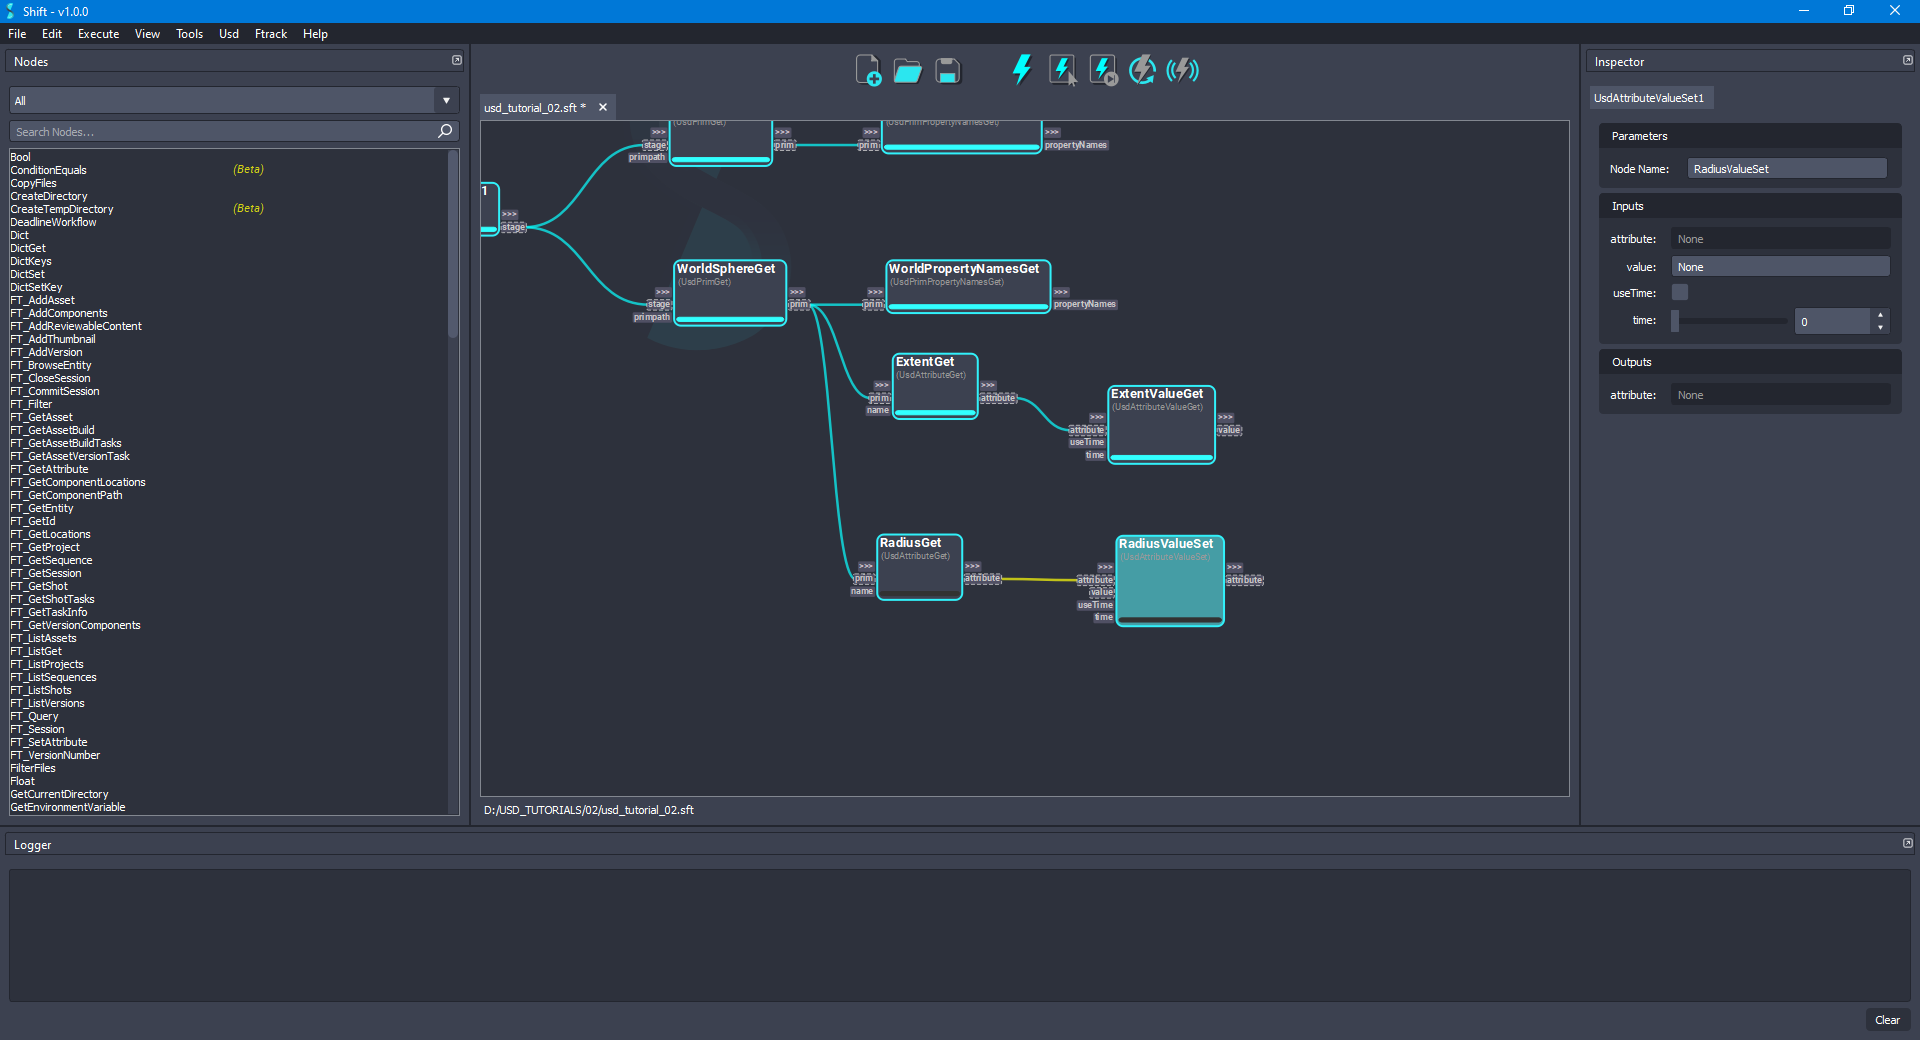
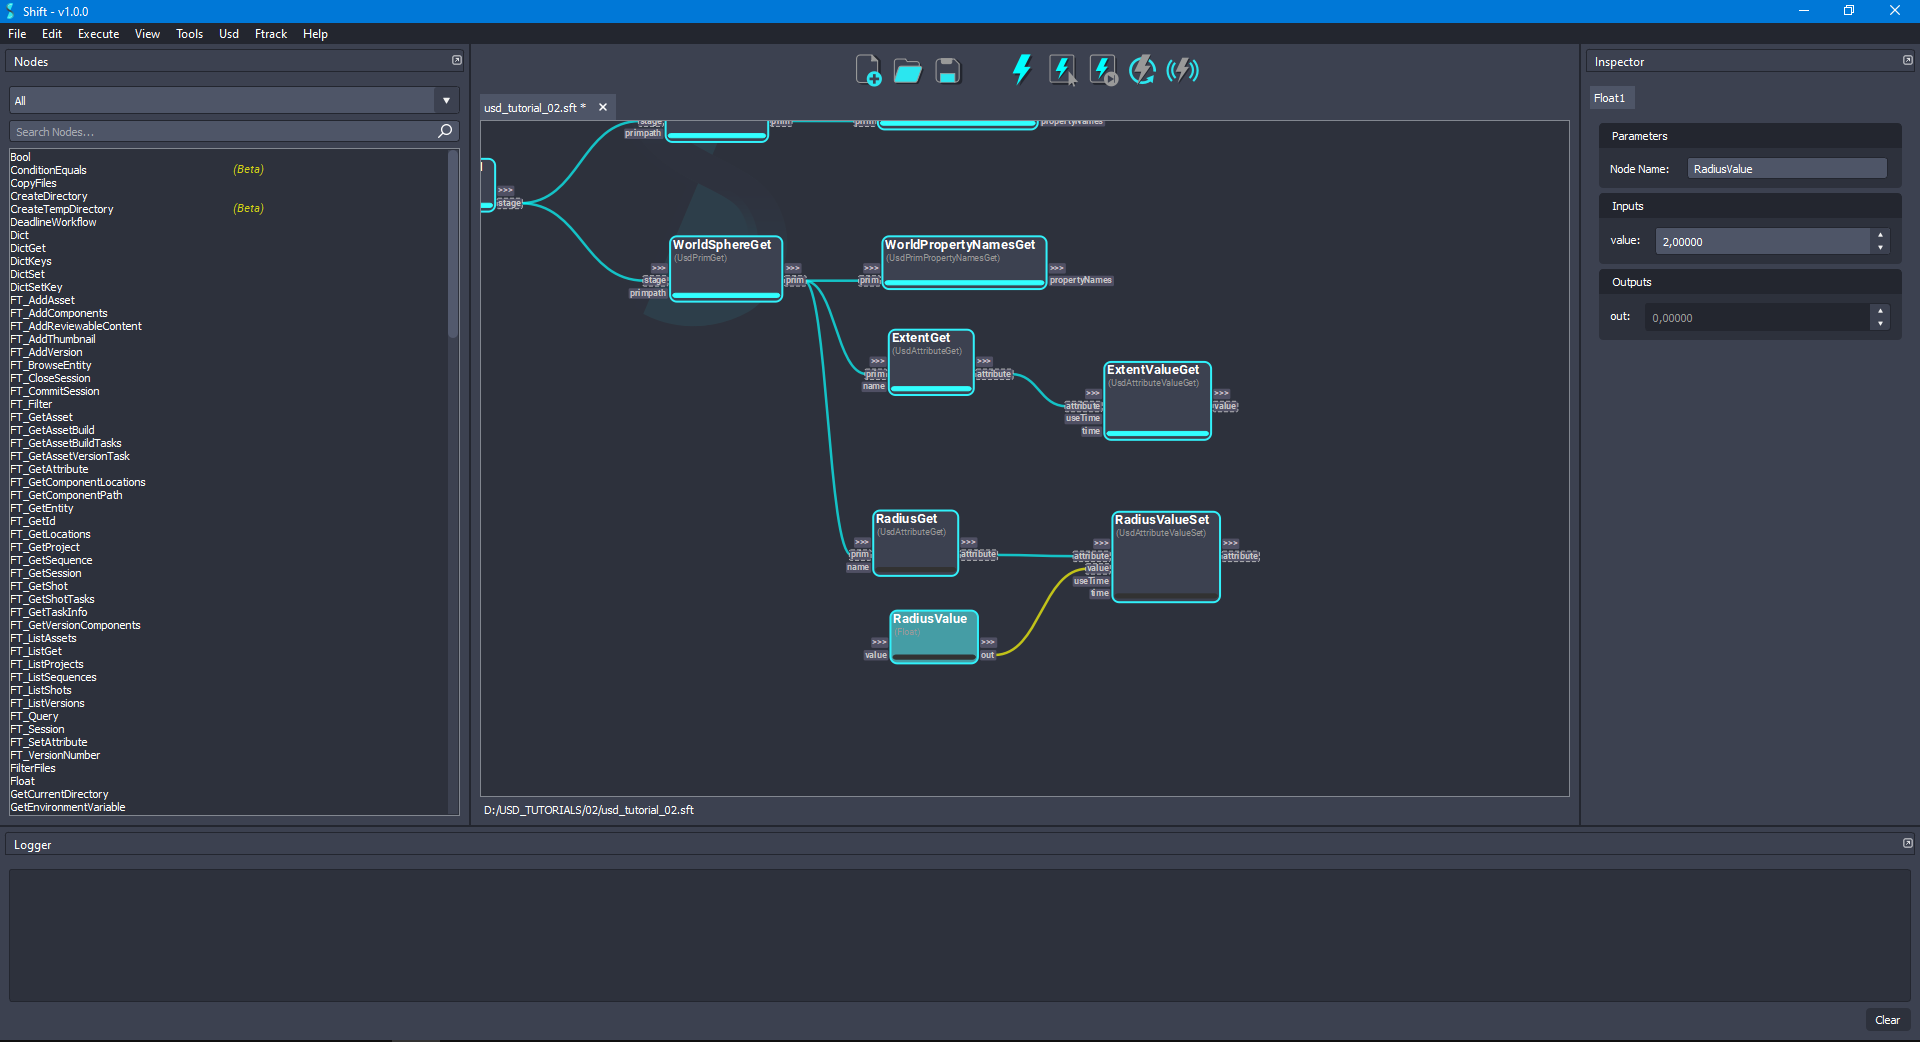
- Add a new Float node to the board and rename it as RadiusValue. Set
2,0as the value of the input value plug. Connect the out output plug from the RadiusValue node to the value input plug of the RadiusValueSet node. The board should look like the following:
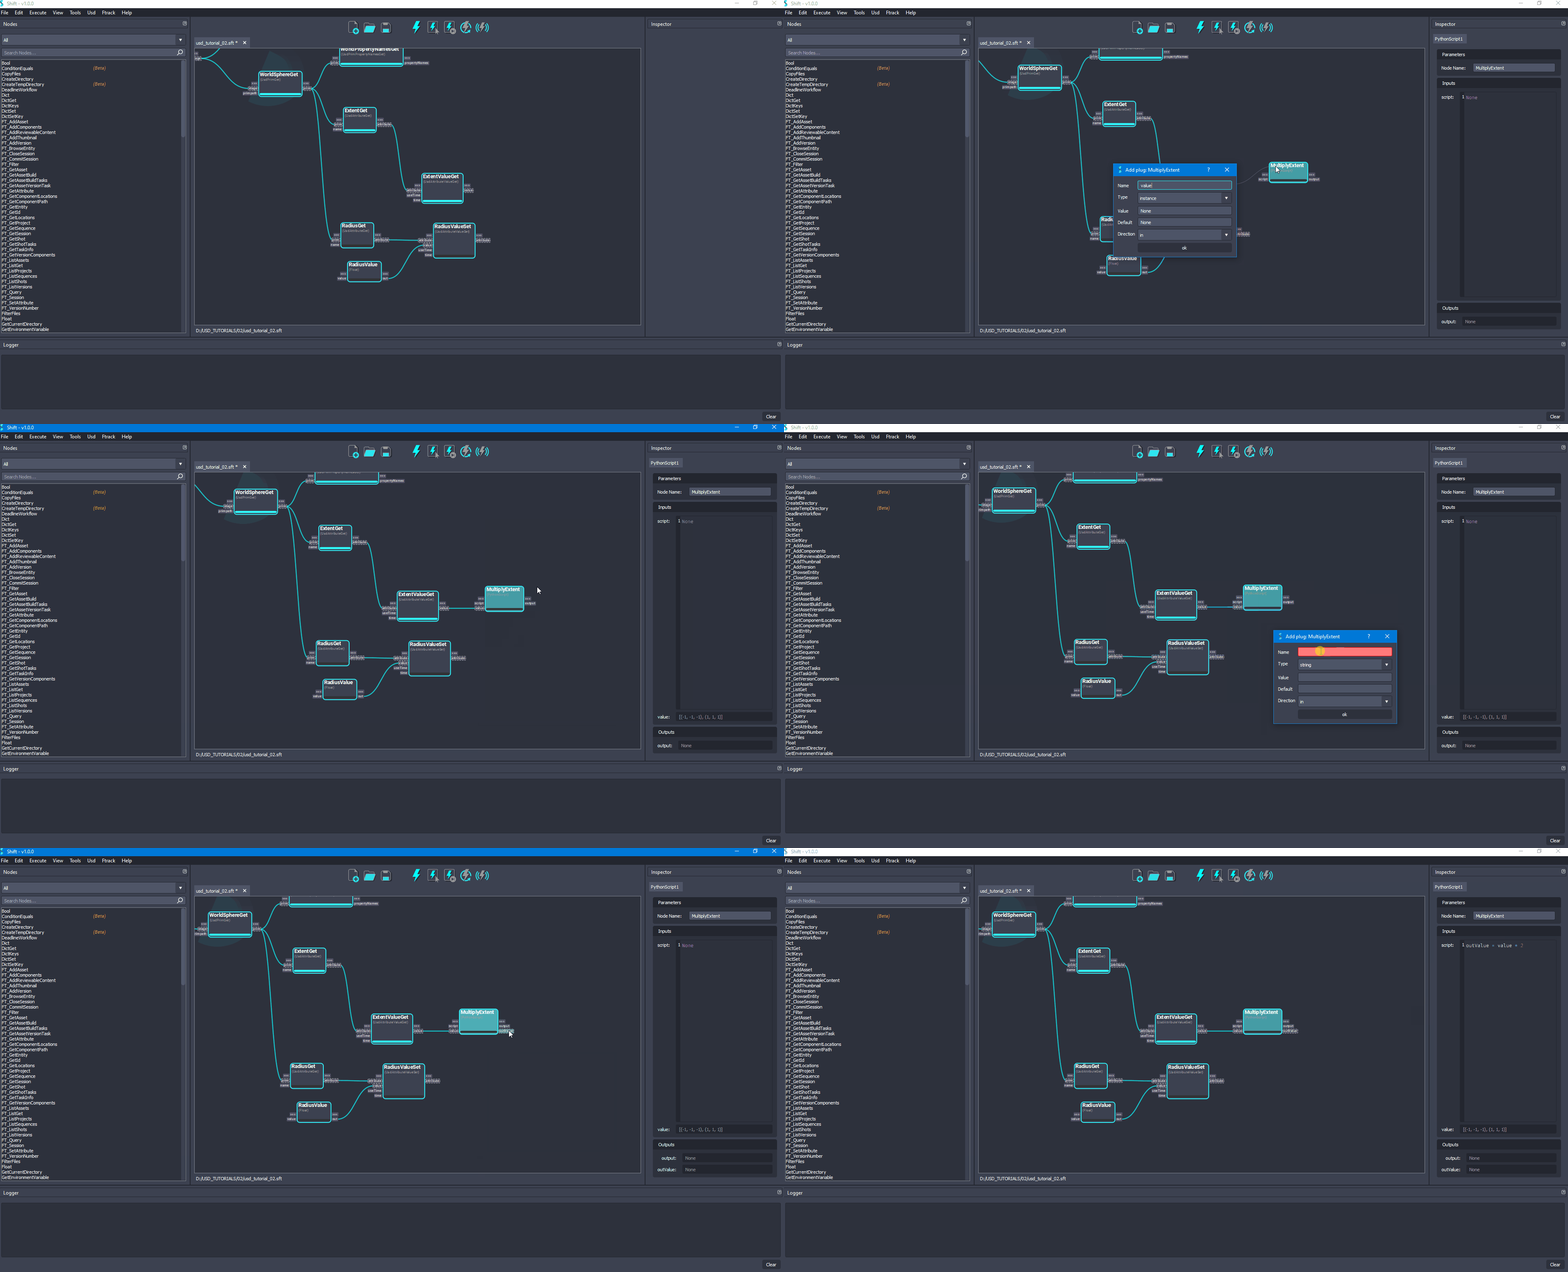
- To update the sphere's extent to reflect its new size, the same process is needed to update the value of the extent attribute. First, add a new PythonScript node and rename it as MultiplyExtent. Drag and drop a connection from the value output plug of the ExtentValueGet node over the MultiplyExtent node. In the Add Plug dialog should appear, keep the preselected values for the plug configuration and click over the OK button to create the new input plug. Create an additional output plug by pressing
Right-Clickover the node and selecting the Create New Plug option. In the Add Plug dialog, set the name asoutValue, the type asinstanceand the direction asout. Finally, typeoutValue = value * 2in the script input plug of the MultiplyExtent node. The board should look like the following:
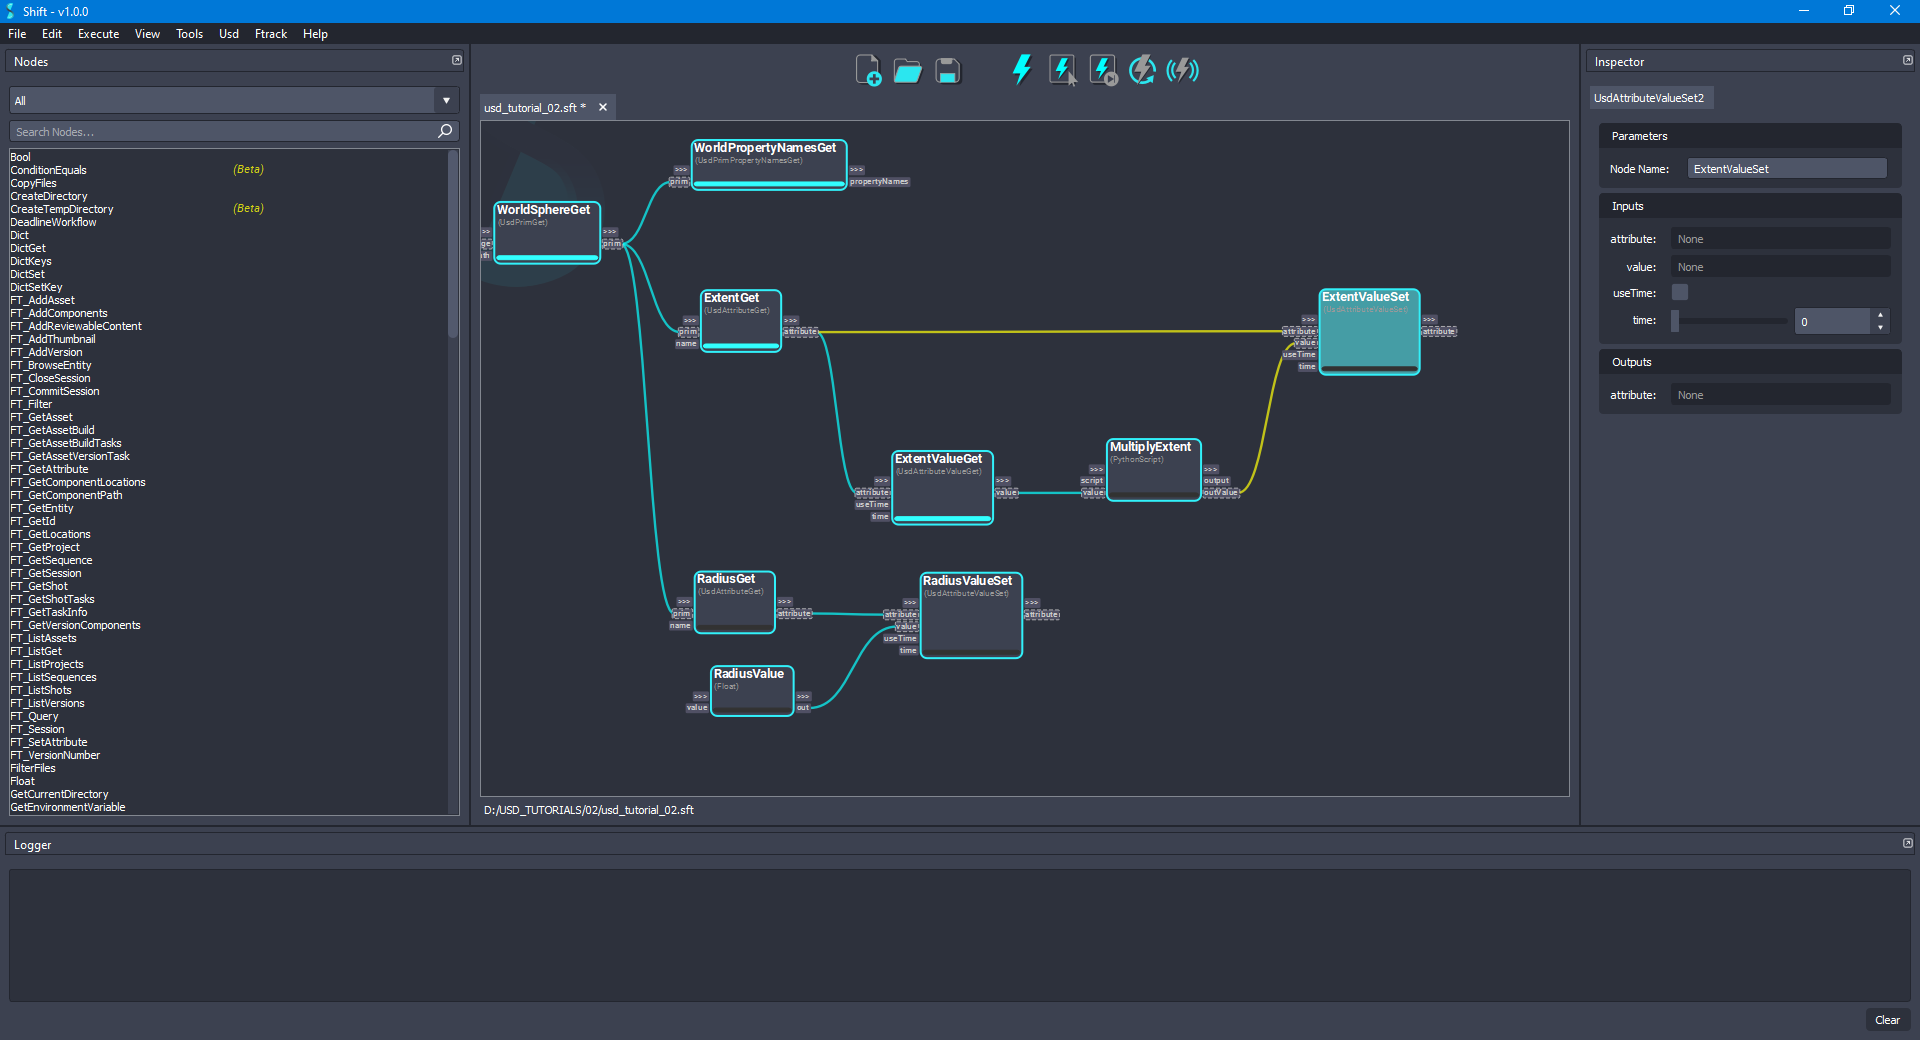
- Add another UsdAttributeValueSet node to the board and rename it as ExtentValueSet. Connect the attribute output plug from the ExtentGet node to the attribute input plug of the new node. Also, connect the outValue output plug from the MultiplyExtent node to the value input plug. Leave the useTime input plug value set to
Falseand the time input plug value set to0. The board should look like the following:
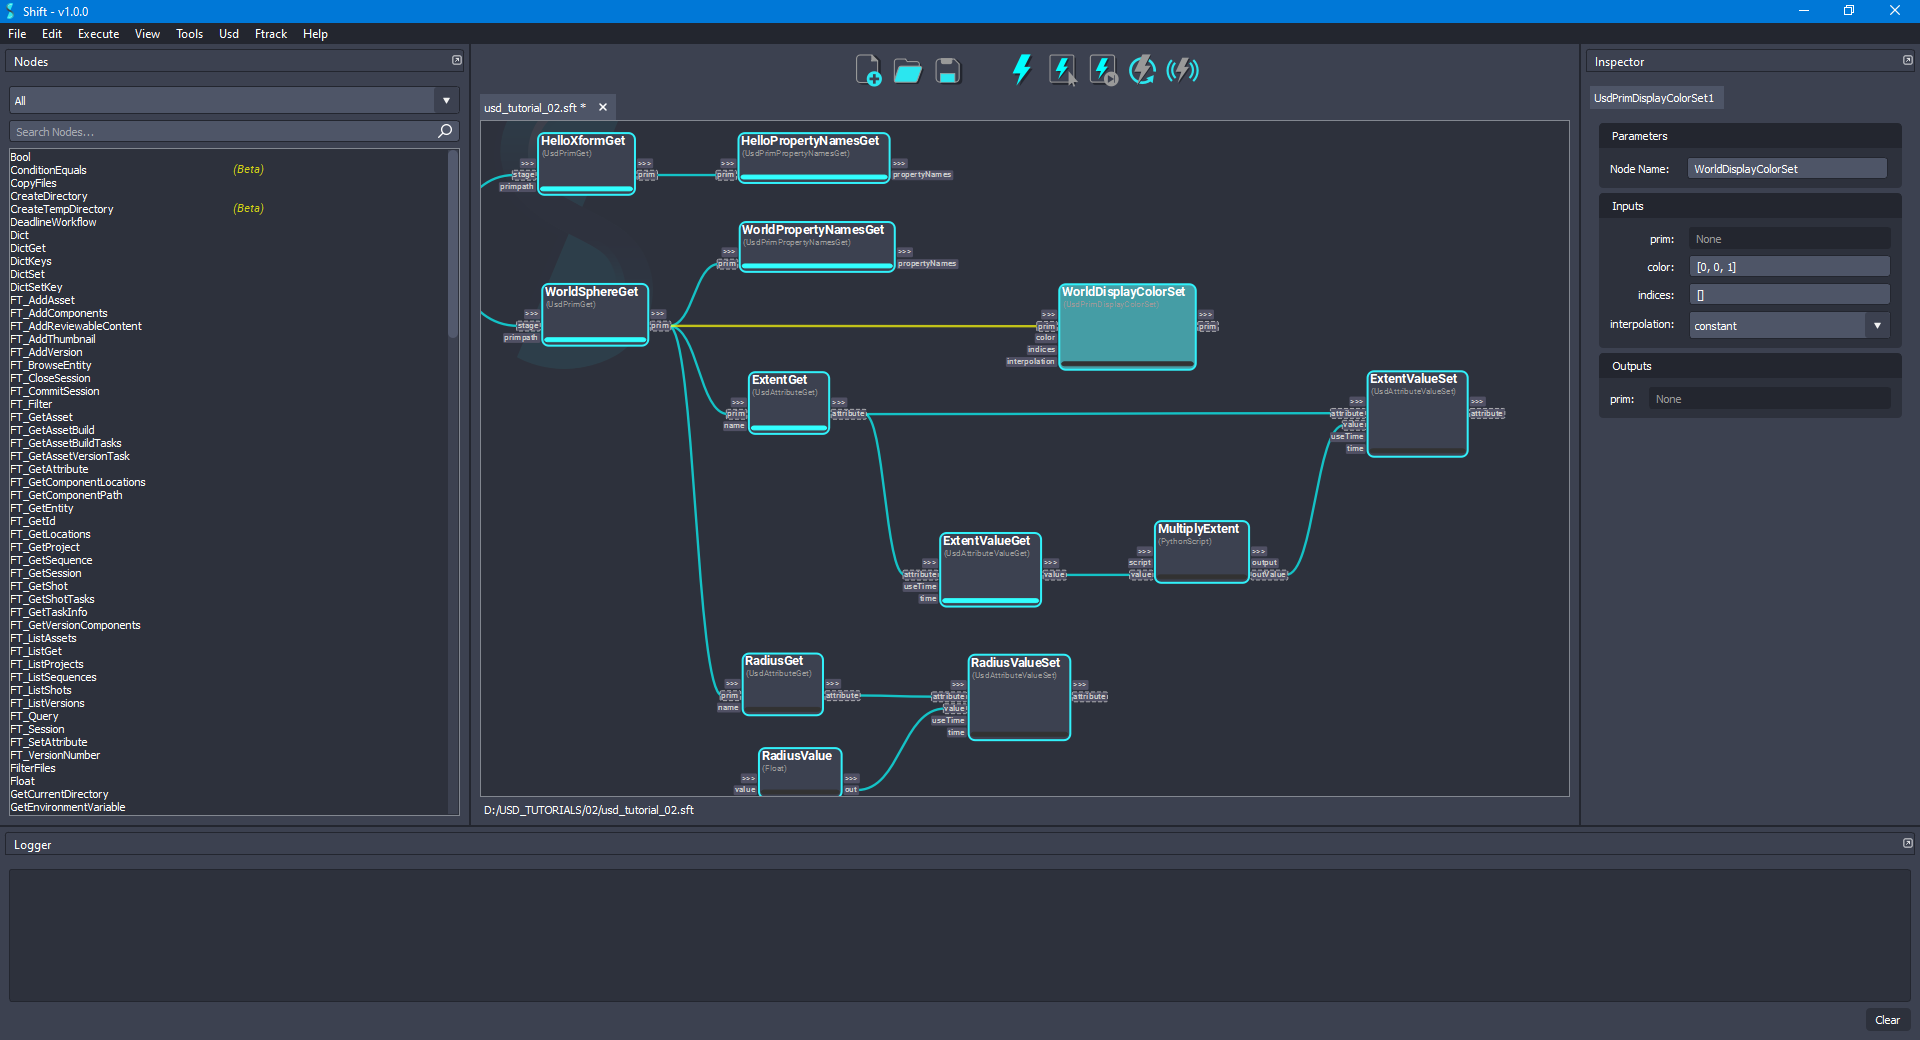
- For authoring the displayColor attribute of the sphere, add a new UsdPrimDisplayColorSet node to the board. Connect the prim output plug from the WorldSphereGet node to the prim input plug of the new node. Set the color input plug value to
[0,0,1], the indices input plug value as[], and the interpolation input plug value asconstant. Rename the node as WorldDisplayColorSet to easily identify it. The board should look like the following:
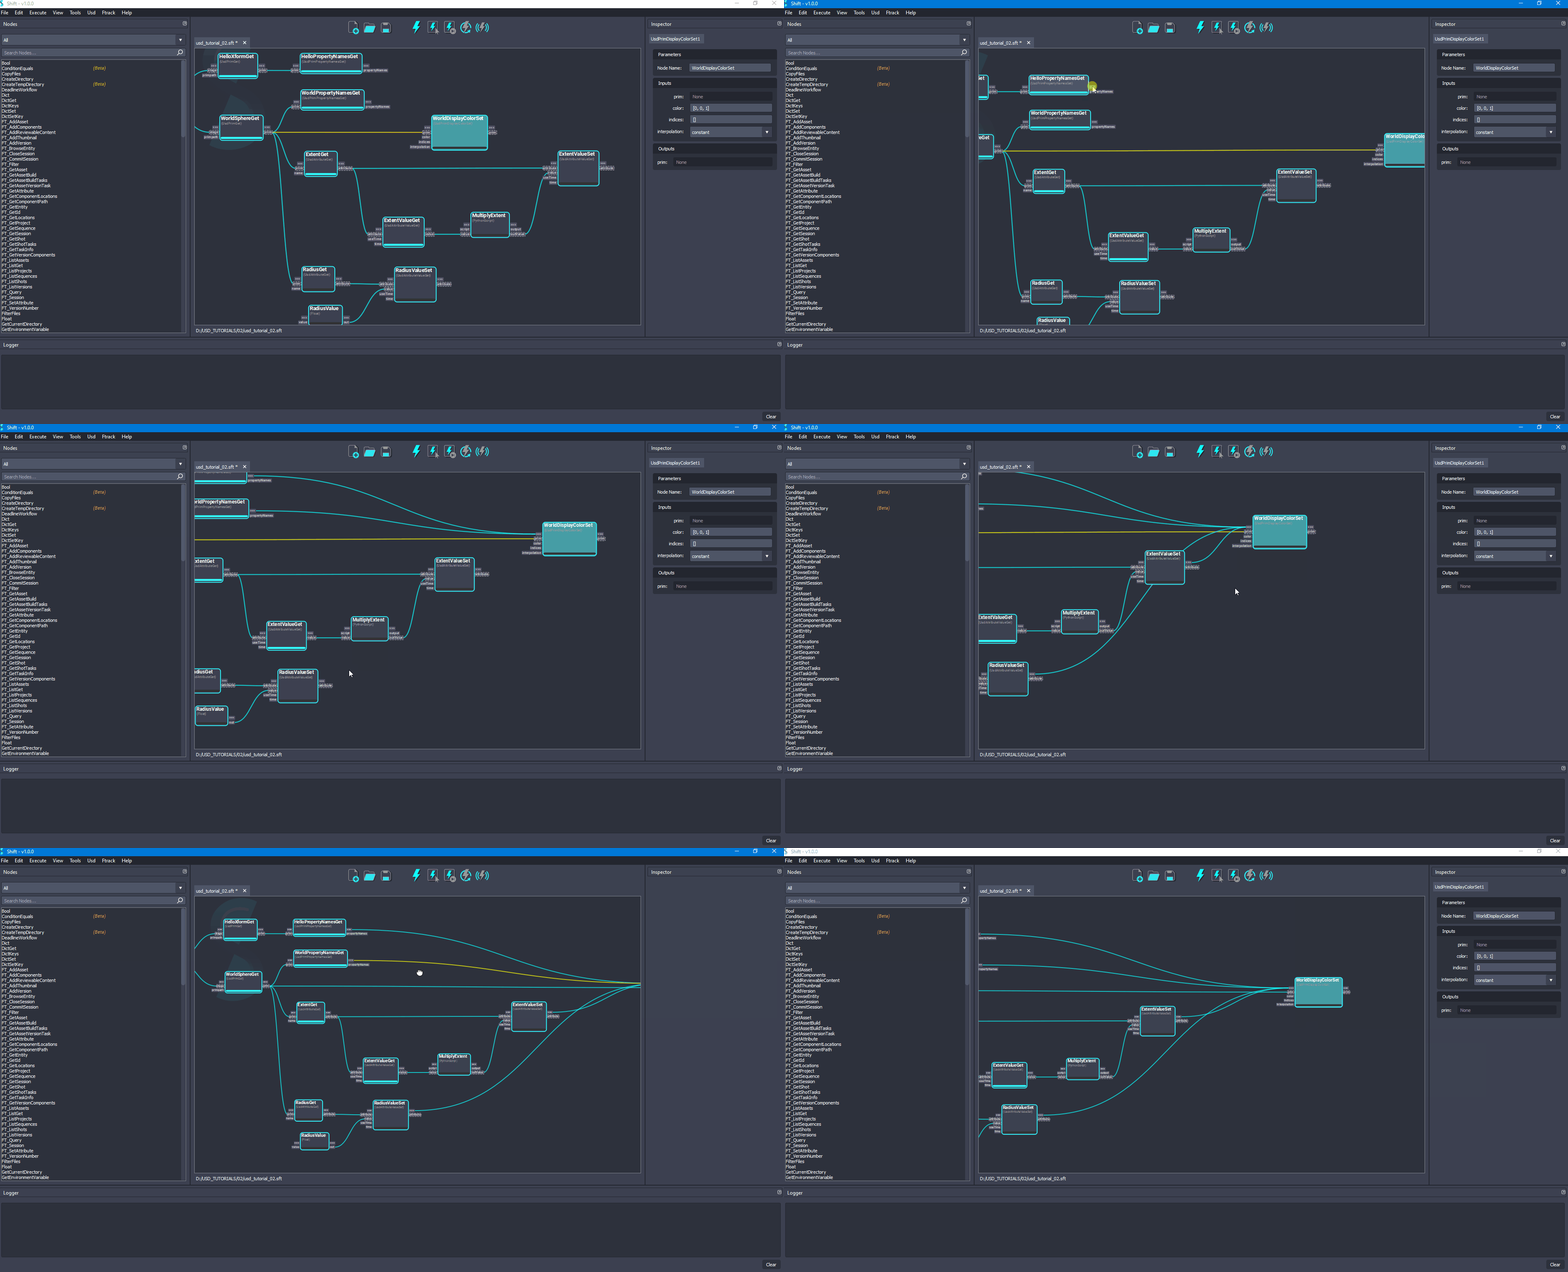
- To define the workflow execution order it is necessary to connect some trigger plugs. Connect the out-trigger output plugs from nodes HelloPropertyNamesGet, WorldPropertyNamesGet, RadiusValueSet and ExtentValueSet to the in-trigger input plug of the WorldDisplayColorSet node. Doing this, the WorldDisplayColorSet node will be executed once the other nodes are done. The board should look like the following:
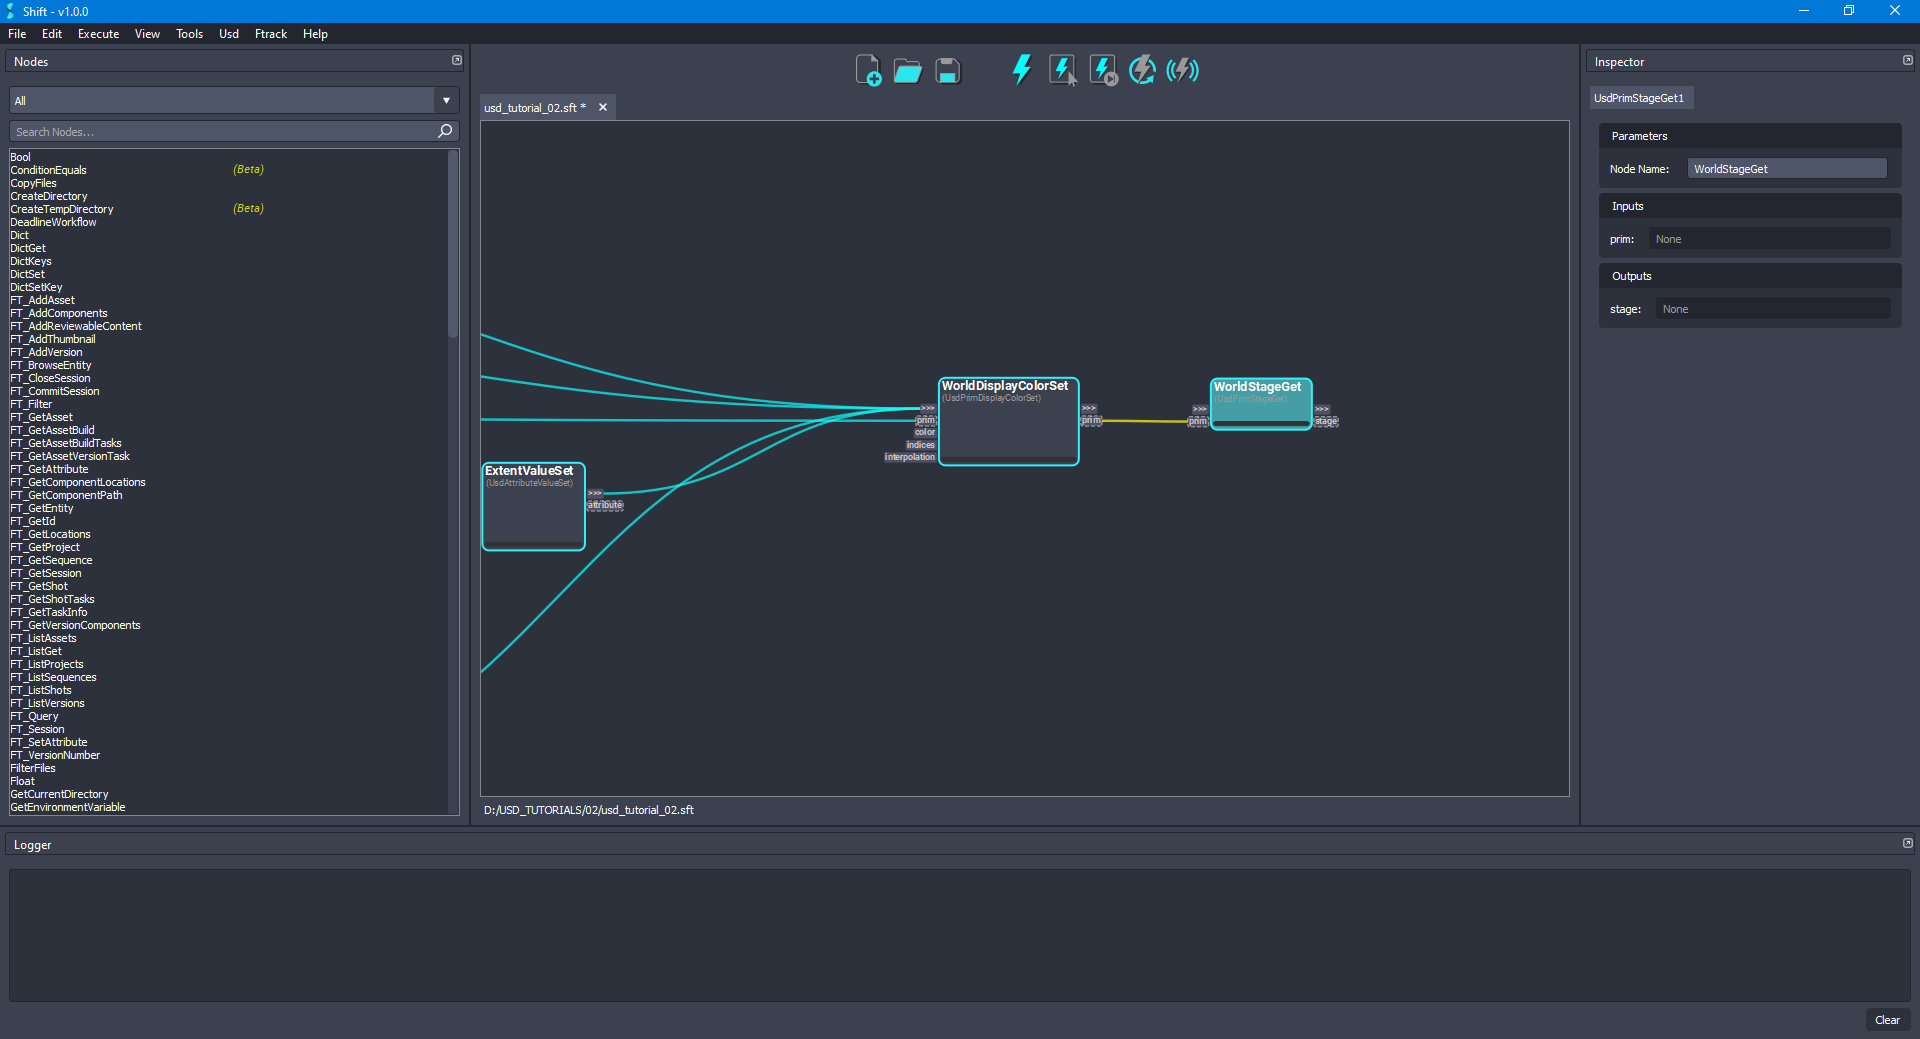
- For retrieving the stage from a prim, add a new UsdPrimStageGet node and rename it as WorldStageGet. Connect the prim output plug from the WorldDisplayColorSet node to the prim input plug of the new node. Doing this, the stage is retrieved from the sphere's prim. The board should look like the following:
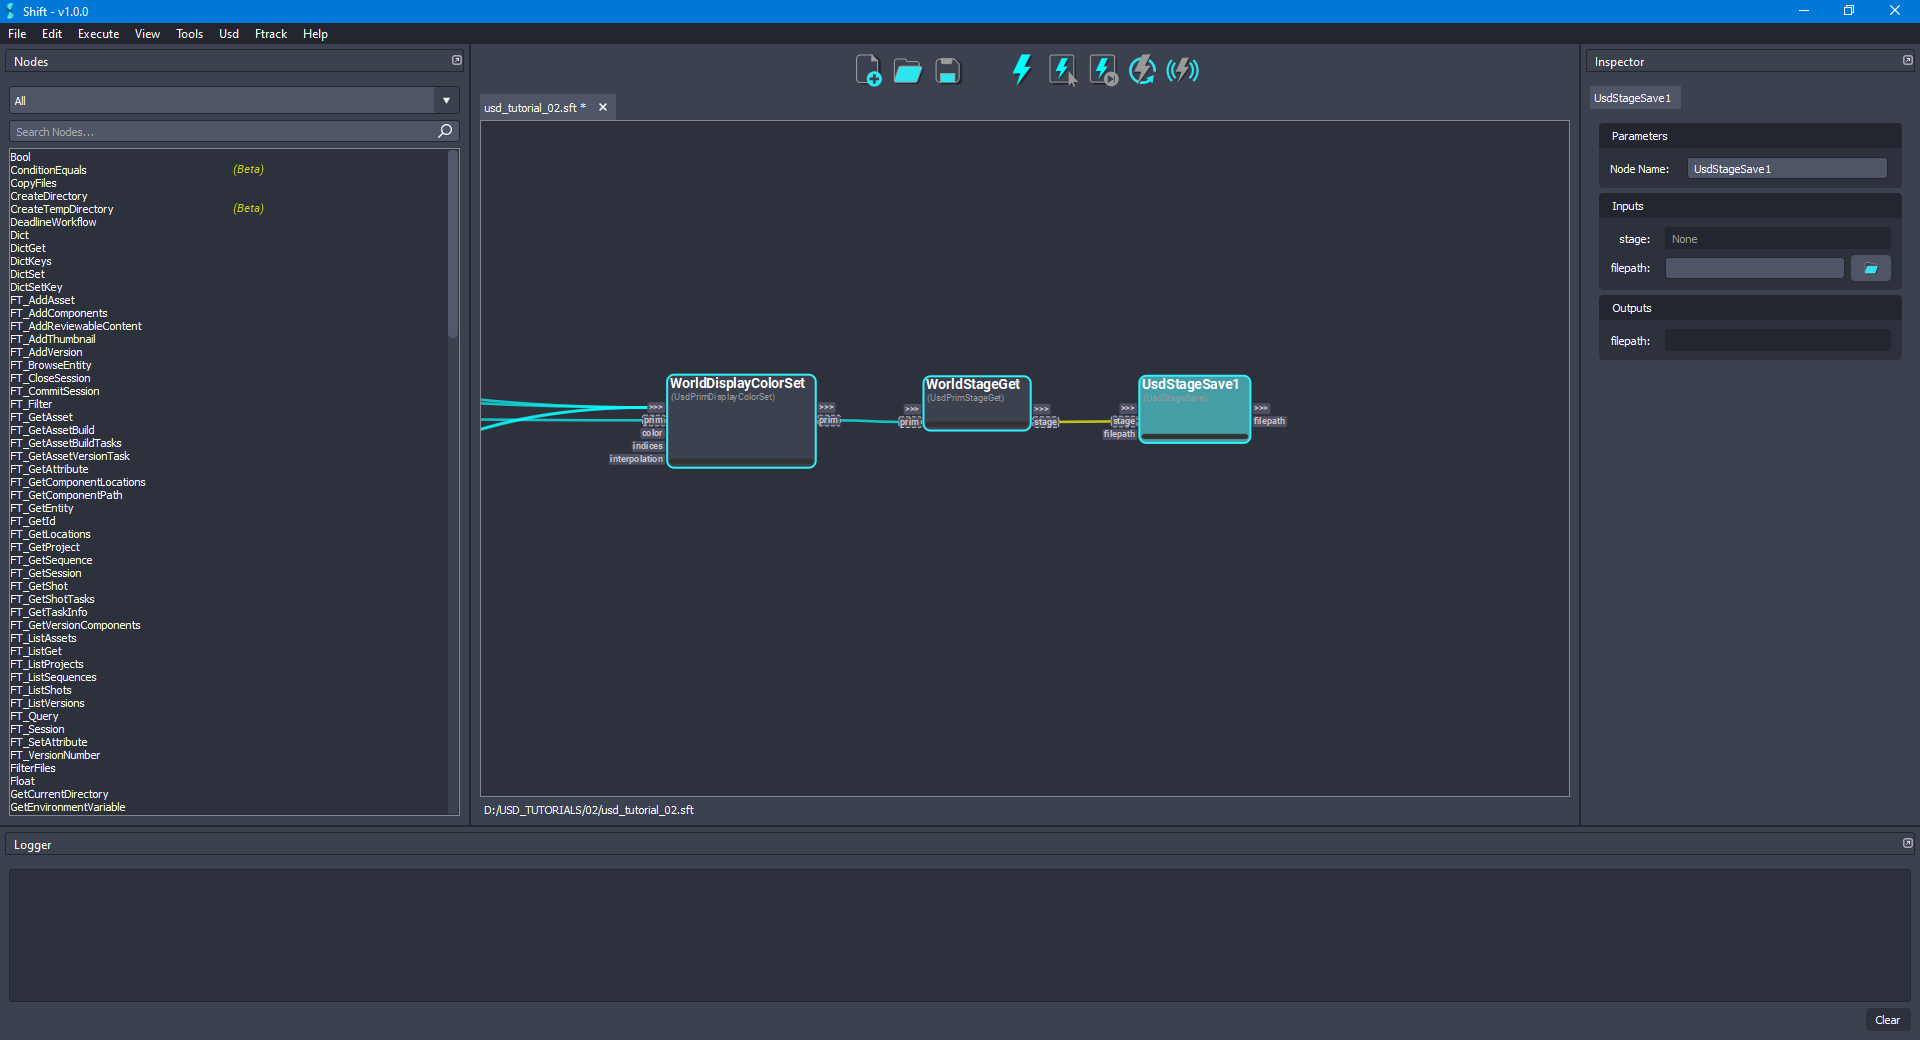
- For saving the stage, add a new UsdStageSave node. Connect the stage output plug from the WorldStageGet node to the stage input plug of the new node. Leave the filepath input plug value empty to override the same USD file opened at the beginning. The board should look like the following:
- Execute the entire workflow. Open again the
HelloWorld.usdafile, it will now contain the authored properties updated and the new displayColor attribute set.
¶Visualising the Stage
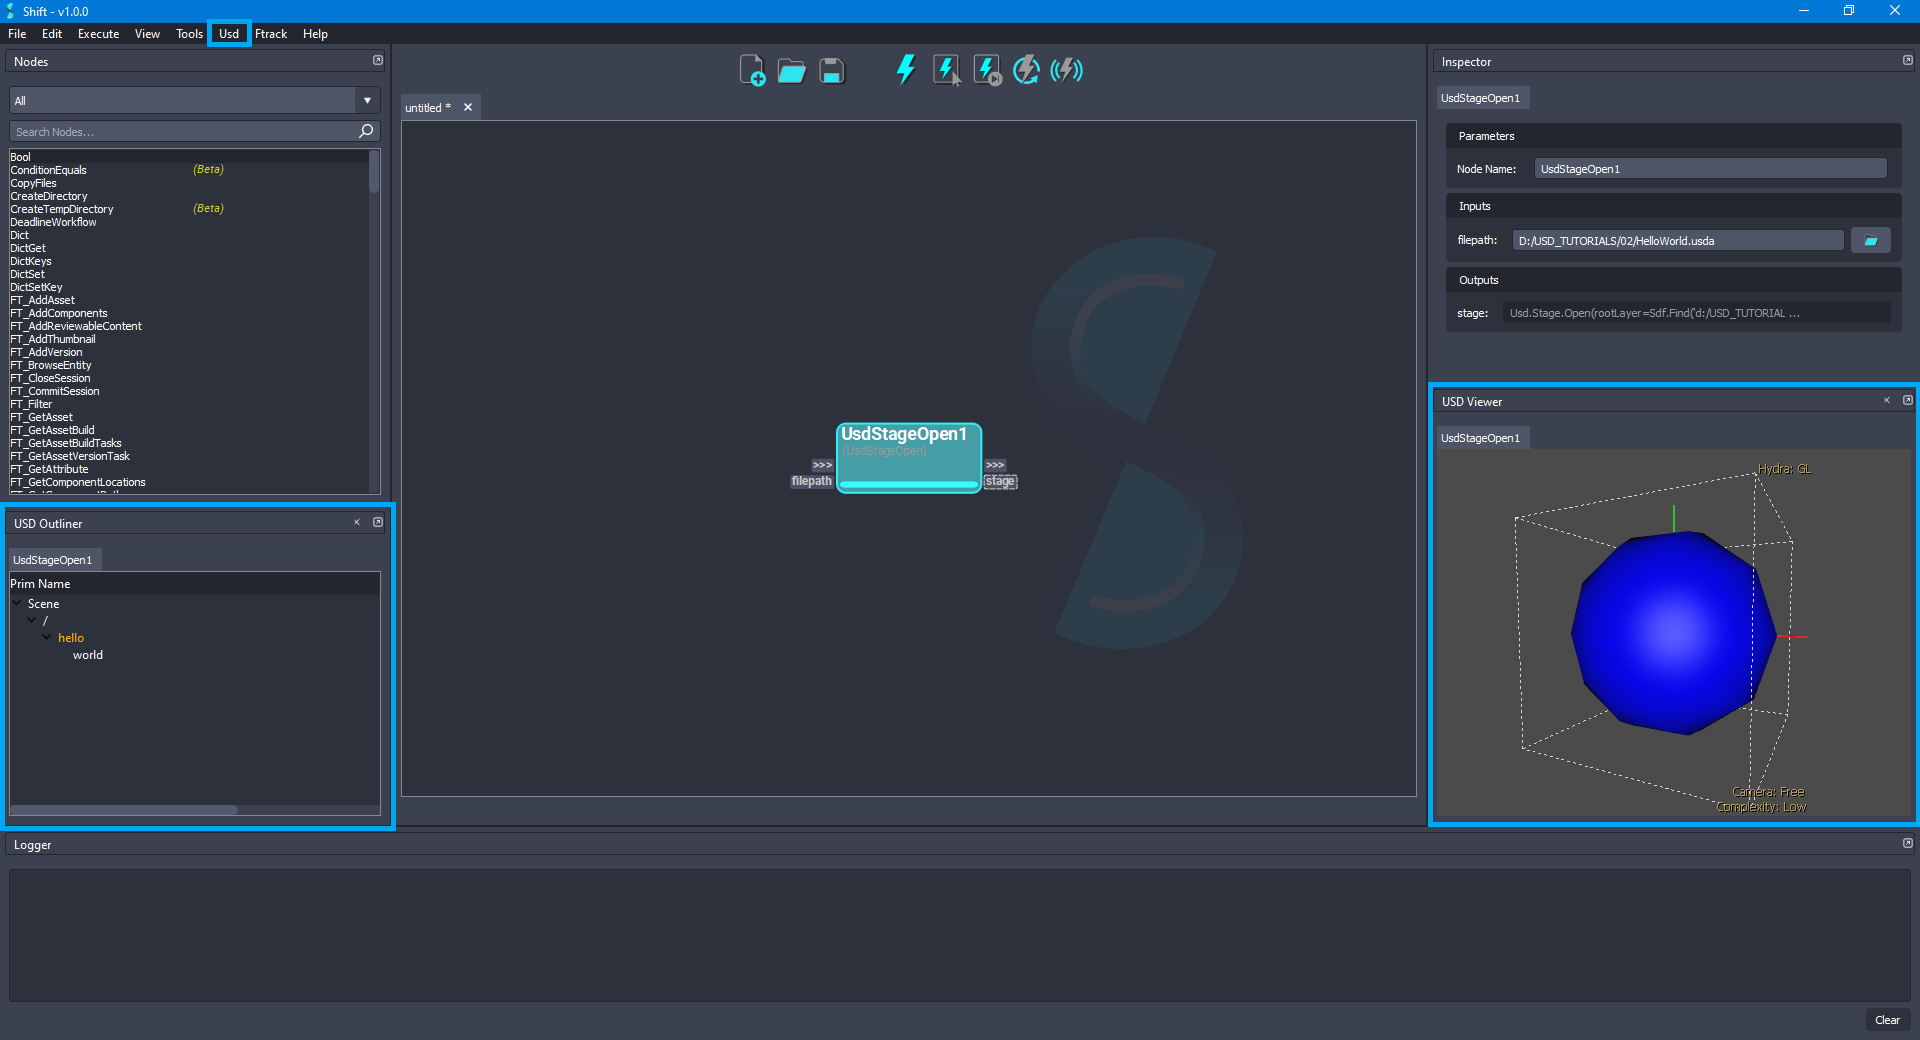
Shift is shipped with native plugins to visualise and inspect the stage. They can be accessed from the USD top menu:
-
USD Outliner: Shows the user the stage hierarchy sourced from specific Usd nodes in the active board workflow.
-
USD Viewer: Shows the stage in the USD viewer sourced from specific USD nodes in the active board workflow.
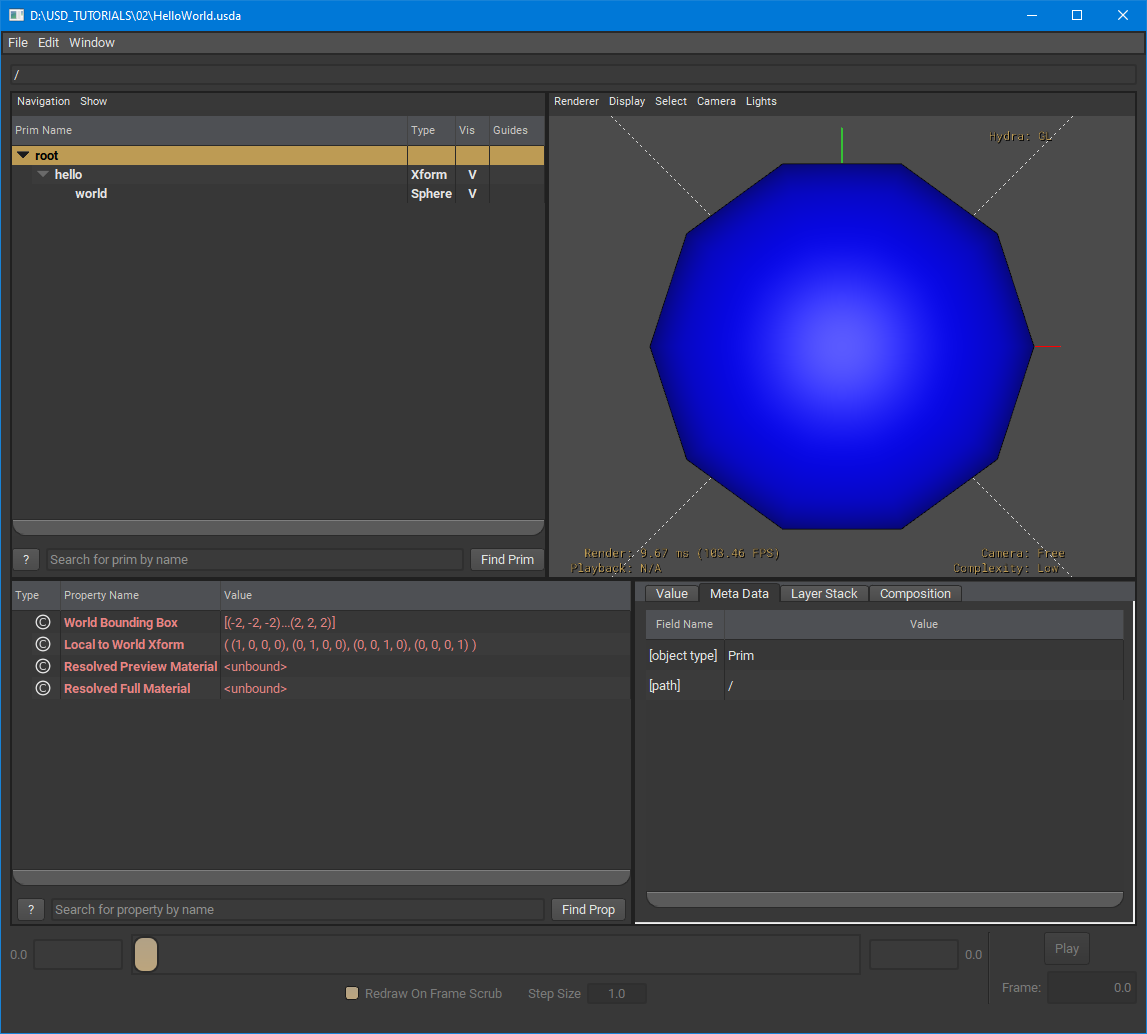
The USD viewer tool shipped with USD is used to visualise and inspect the stage viewport:
¶Workflow Resources
The workflow corresponding to this tutorial can be found in the following path in the Shift installation folder: <path_to_the_shift_installation_folder>/shift/examples/USD/tutorials/tutorial_02_authoring_properties/tutorial_02.sft
< Creating a Simple USD Stage Referencing Layers >


