< Referencing Layers Traversing a Stage >
¶Converting Between Layer Formats
This tutorial focuses on converting layer files between the different native USD file formats using the operators from the Shift_USD catalog.
The USD file used in this tutorial Sphere.usd can be found in the following path in the Shift installation folder: <path_to_the_shift_installation_folder>/shift/examples/USD/tutorials/tutorial_04_converting_layer_formats/.
¶Converting between .usda/.usdc and .usd
- Open Shift application. A new window instance of Shift should appear like the following one:
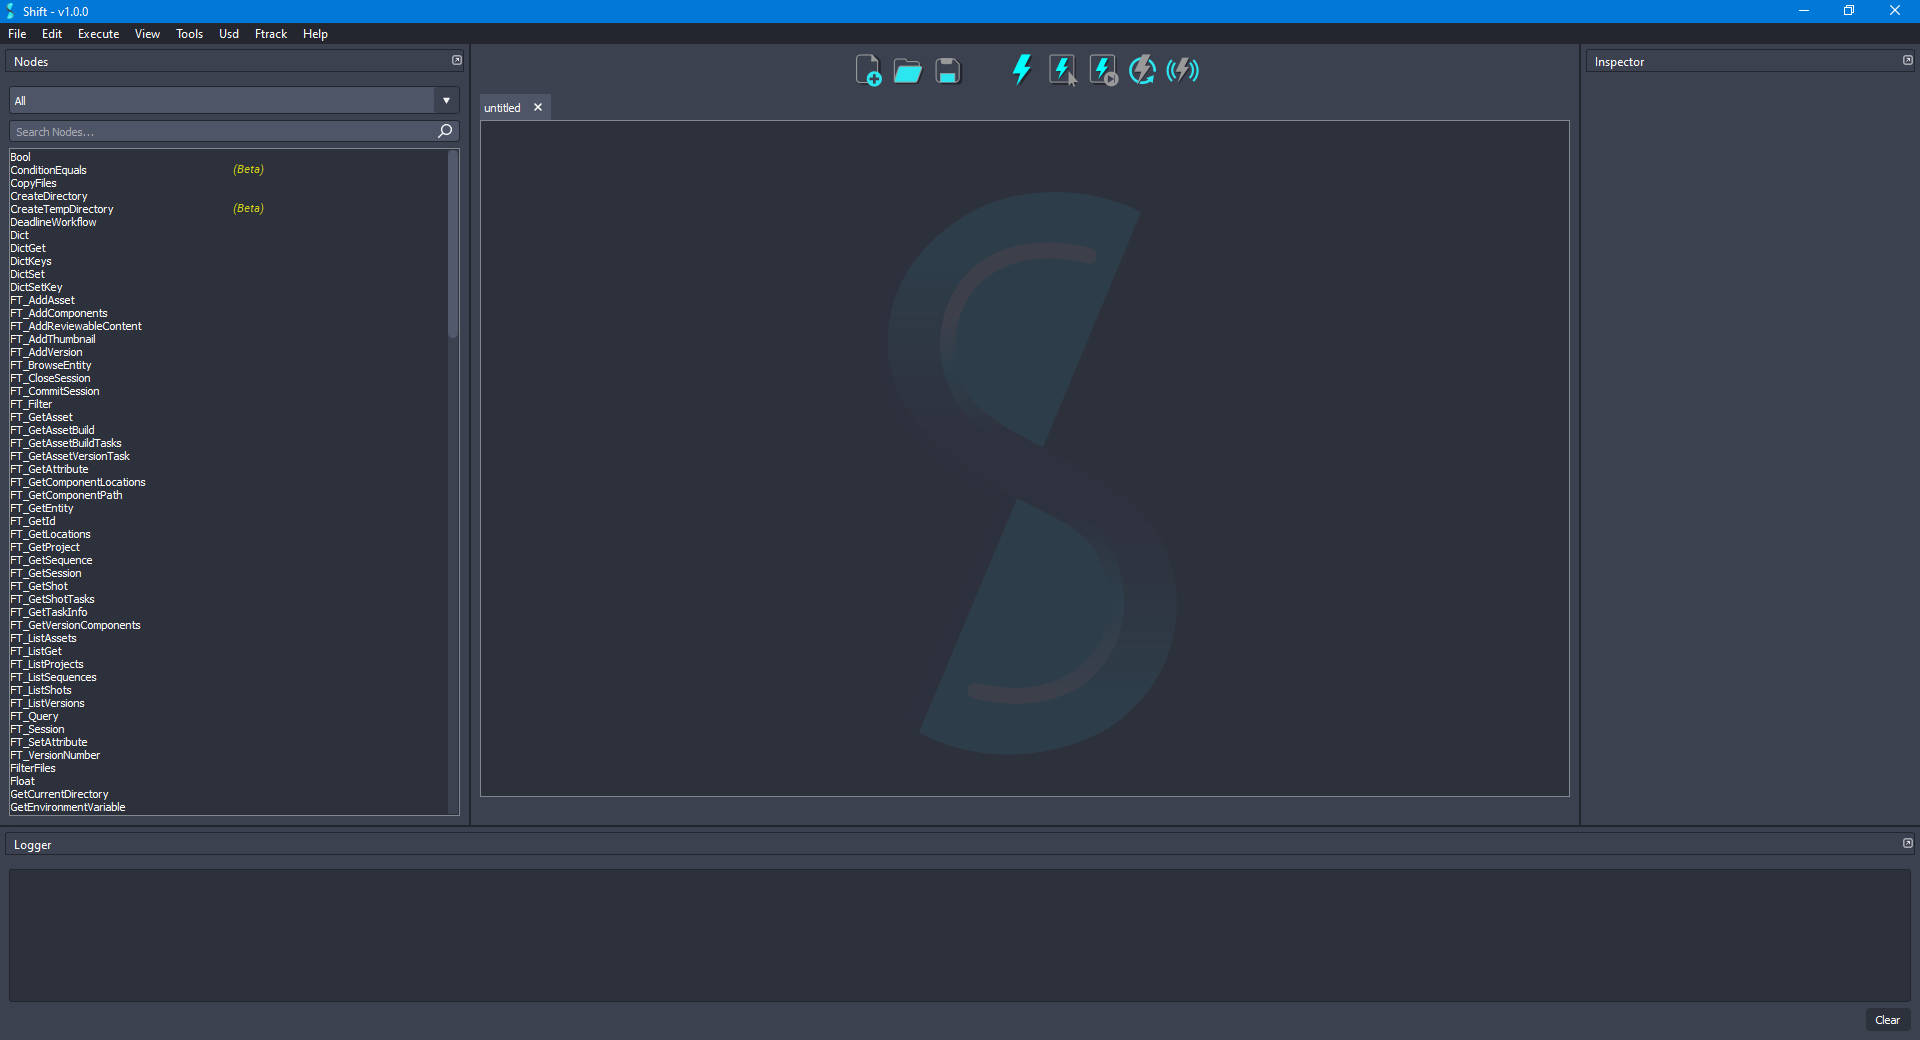
Before creating the USD workflow, ensure that the USD nodes appear in the Node List widget. The catalogs combobox should show
sUSDandsUSDTypesif USD is correctly loaded in Shift. If this is not the case, please check again the Shift_USD installation page.
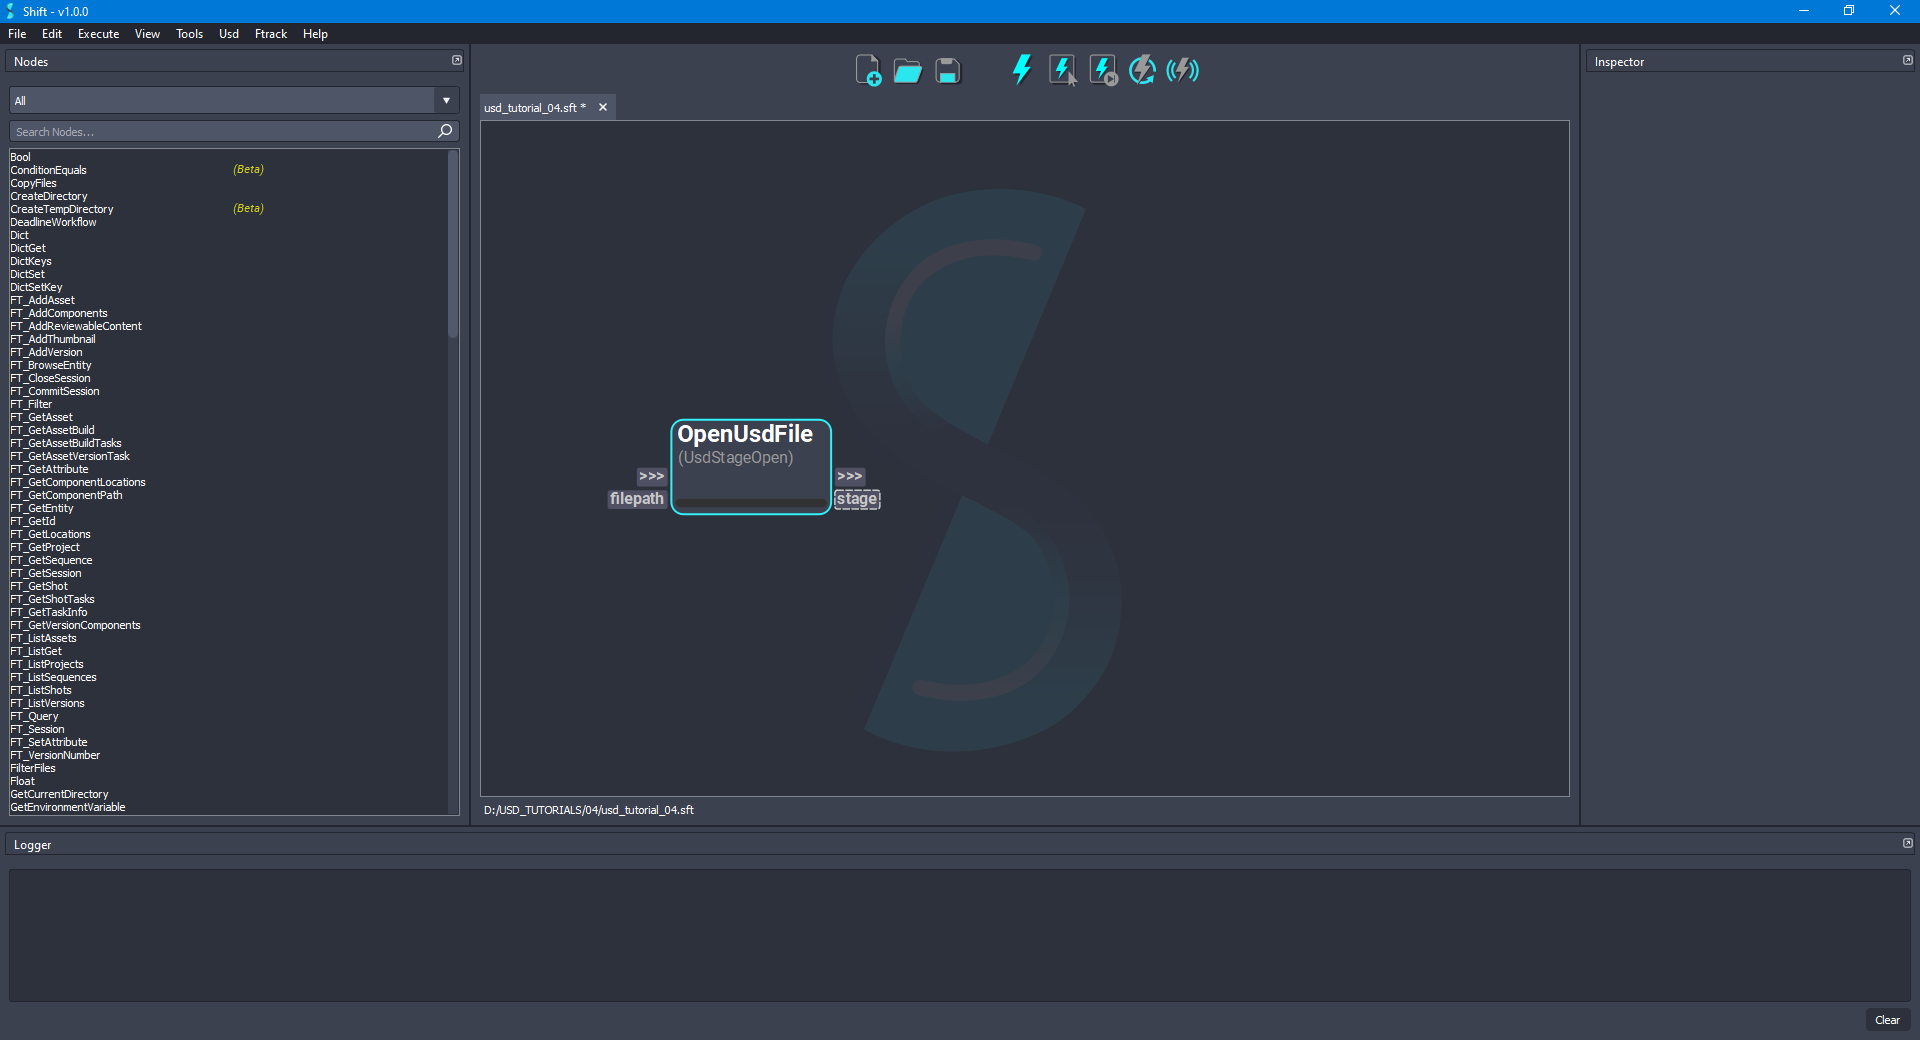
- First, add a new UsdStageOpen node to the board and rename it as OpenUsdFile. Using the Inspector widget, set as the value for the filepath input plug a filepath pointing to a
.usdfile. For the purpose of this tutorial, the filepath will be:D:/USD_TUTORIALS/04/Sphere.usd. The board should look like the following:
- To save a
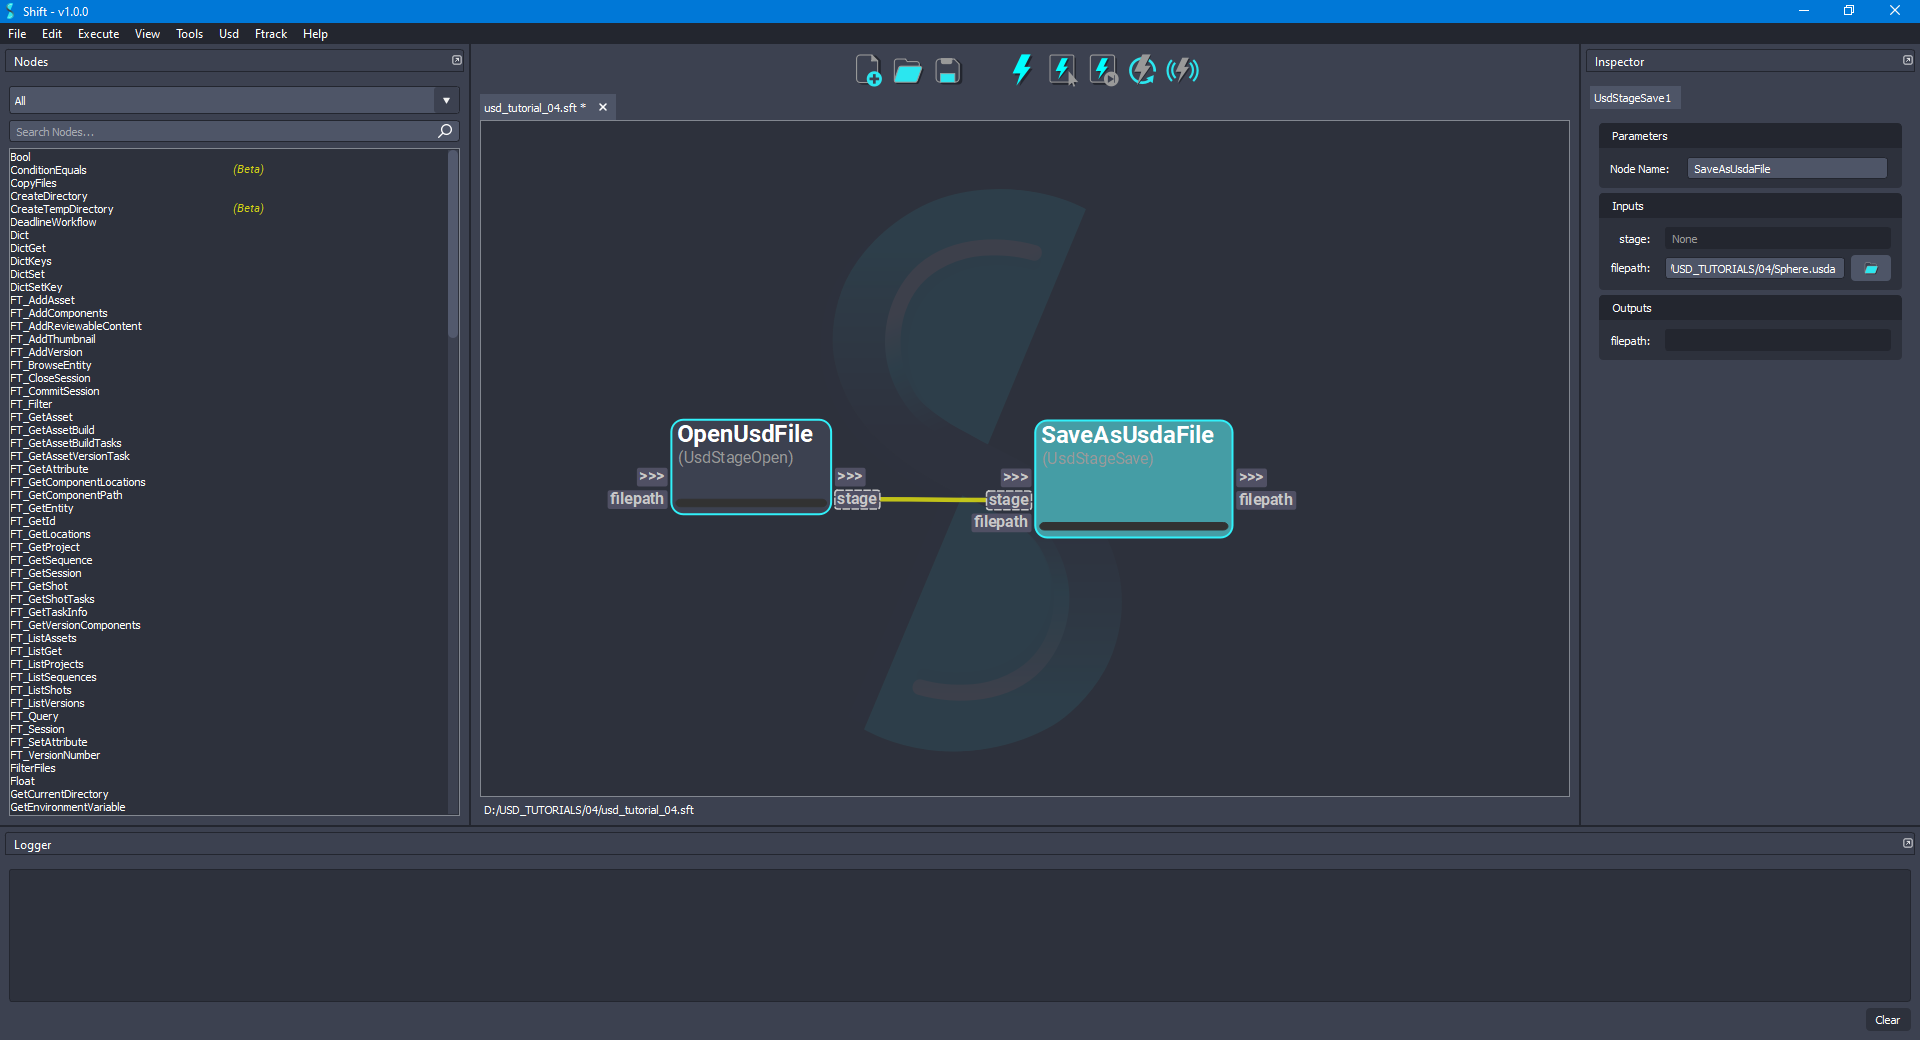
.usdafile, add a new UsdStageSave node to the board and rename it as SaveAsUsdaFile. Connect the stage output plug from the OpenUsdFile node to the stage input plug of the new node. Set as the value for the filepath input plug a valid filepath to a valid.usdafile path, such asD:/USD_TUTORIALS/04/Sphere.usda. The board should look like the following:
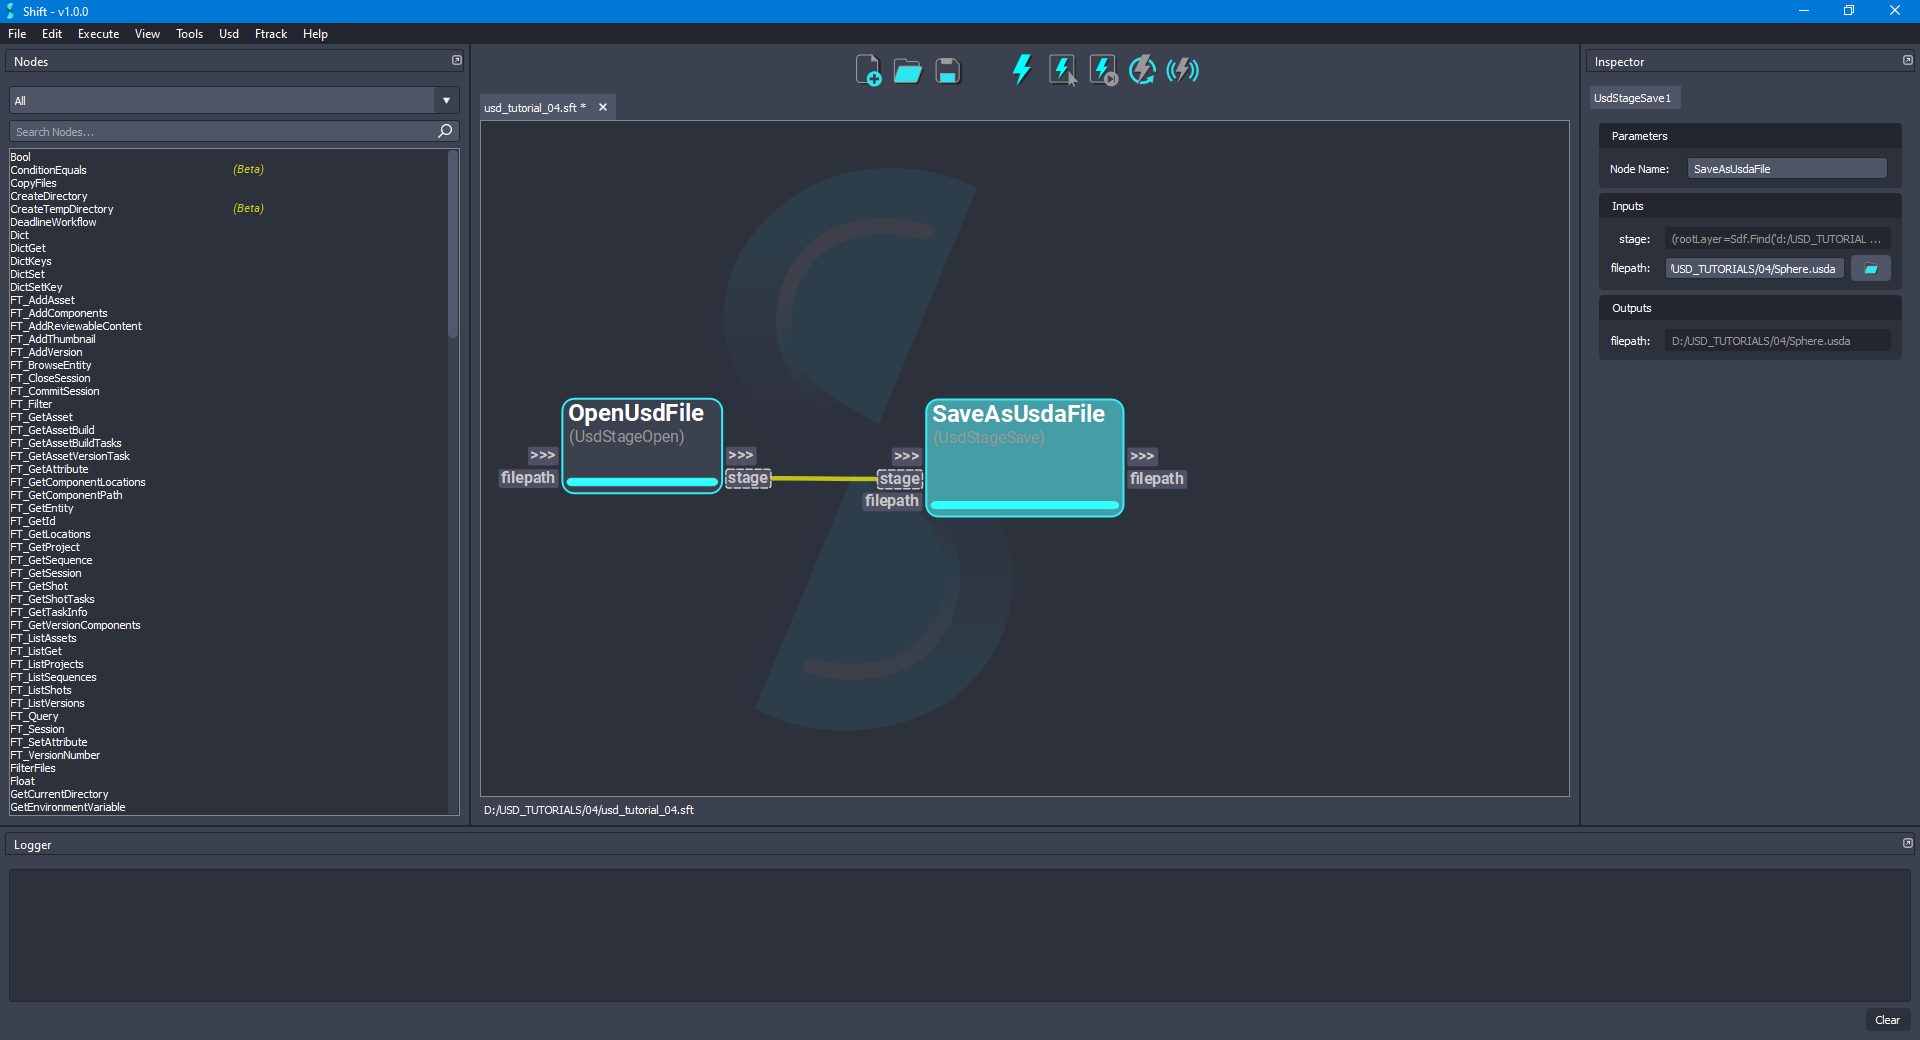
- Execute the workflow, which will generate a new file with the
.usdaextension using the information from the.usdfile. The board should look like the following:
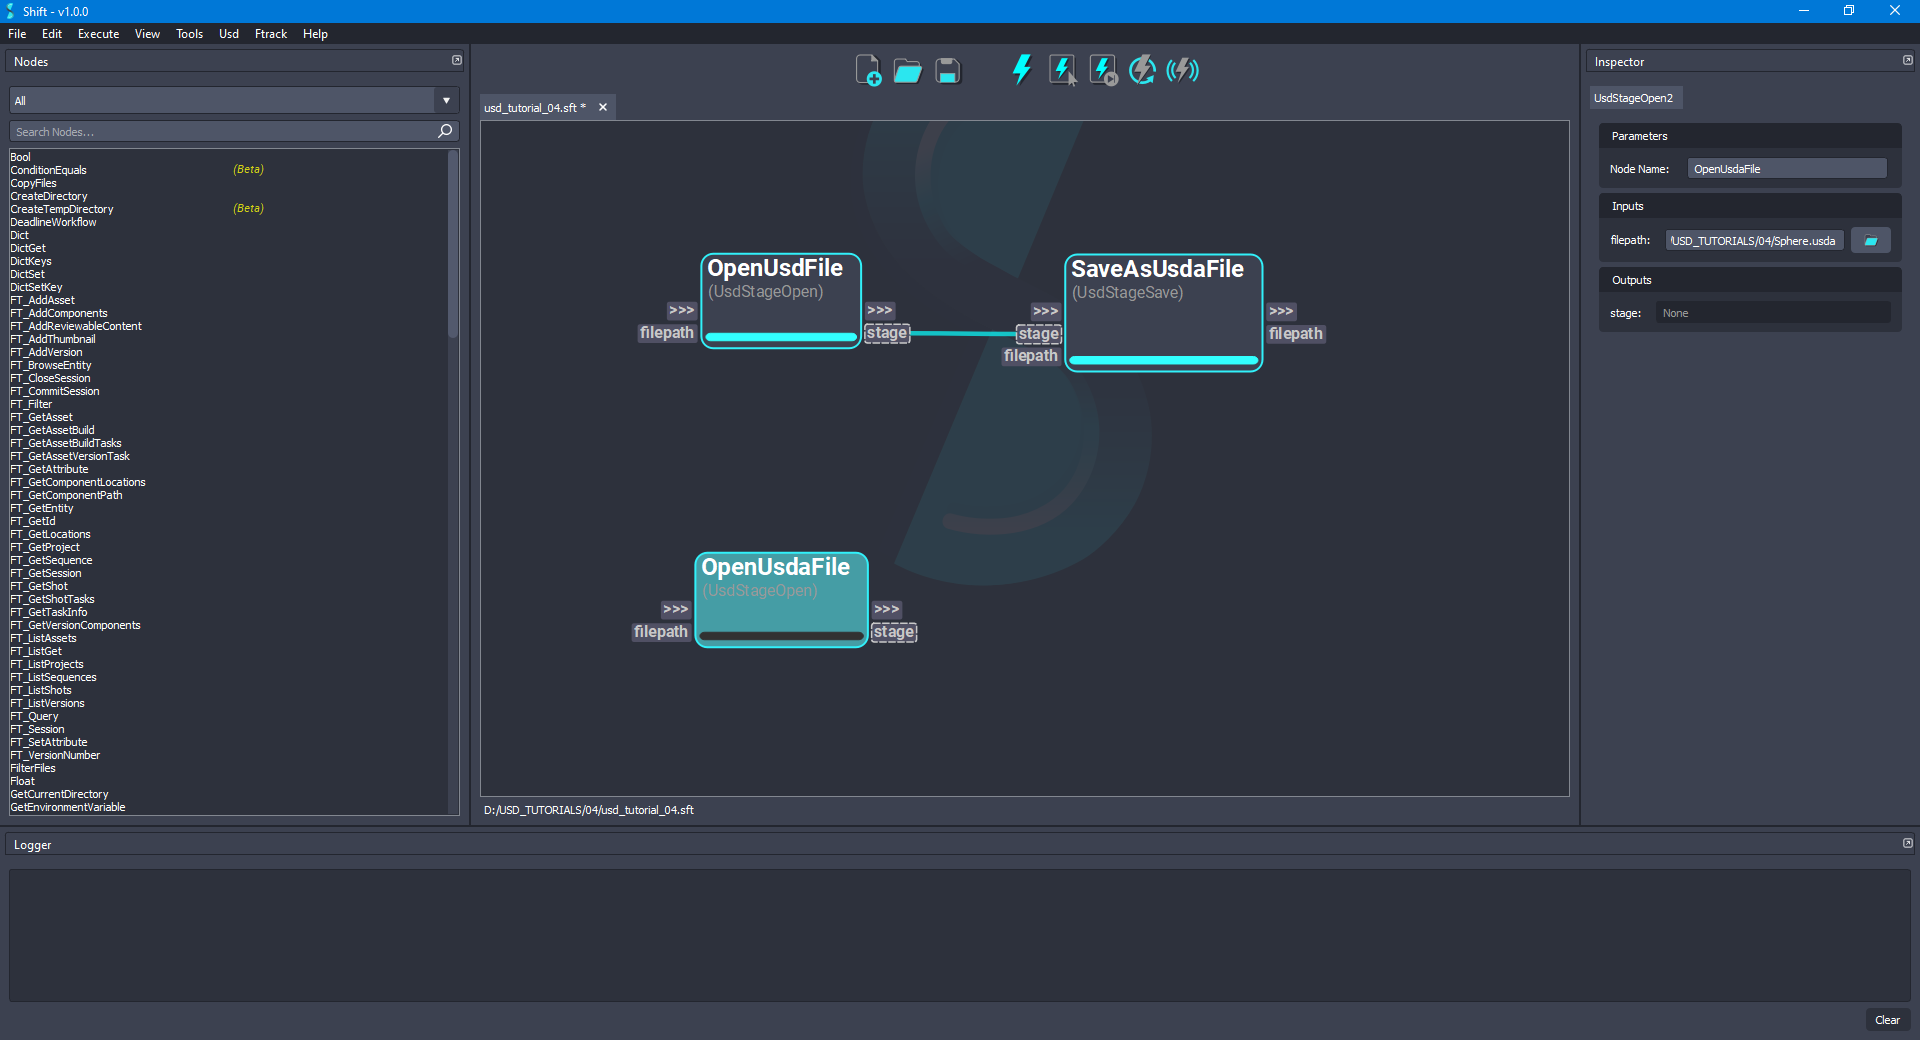
- Add another new UsdStageOpen node to the board and rename it as OpenUsdaFile. Set the value for the filepath input plug of the current node to point to the file generated by the SaveAsUsdaFile node, meaning having in the current example the value:
D:/USD_TUTORIALS/04/Sphere.usda. The board should look like the following:
- To save a
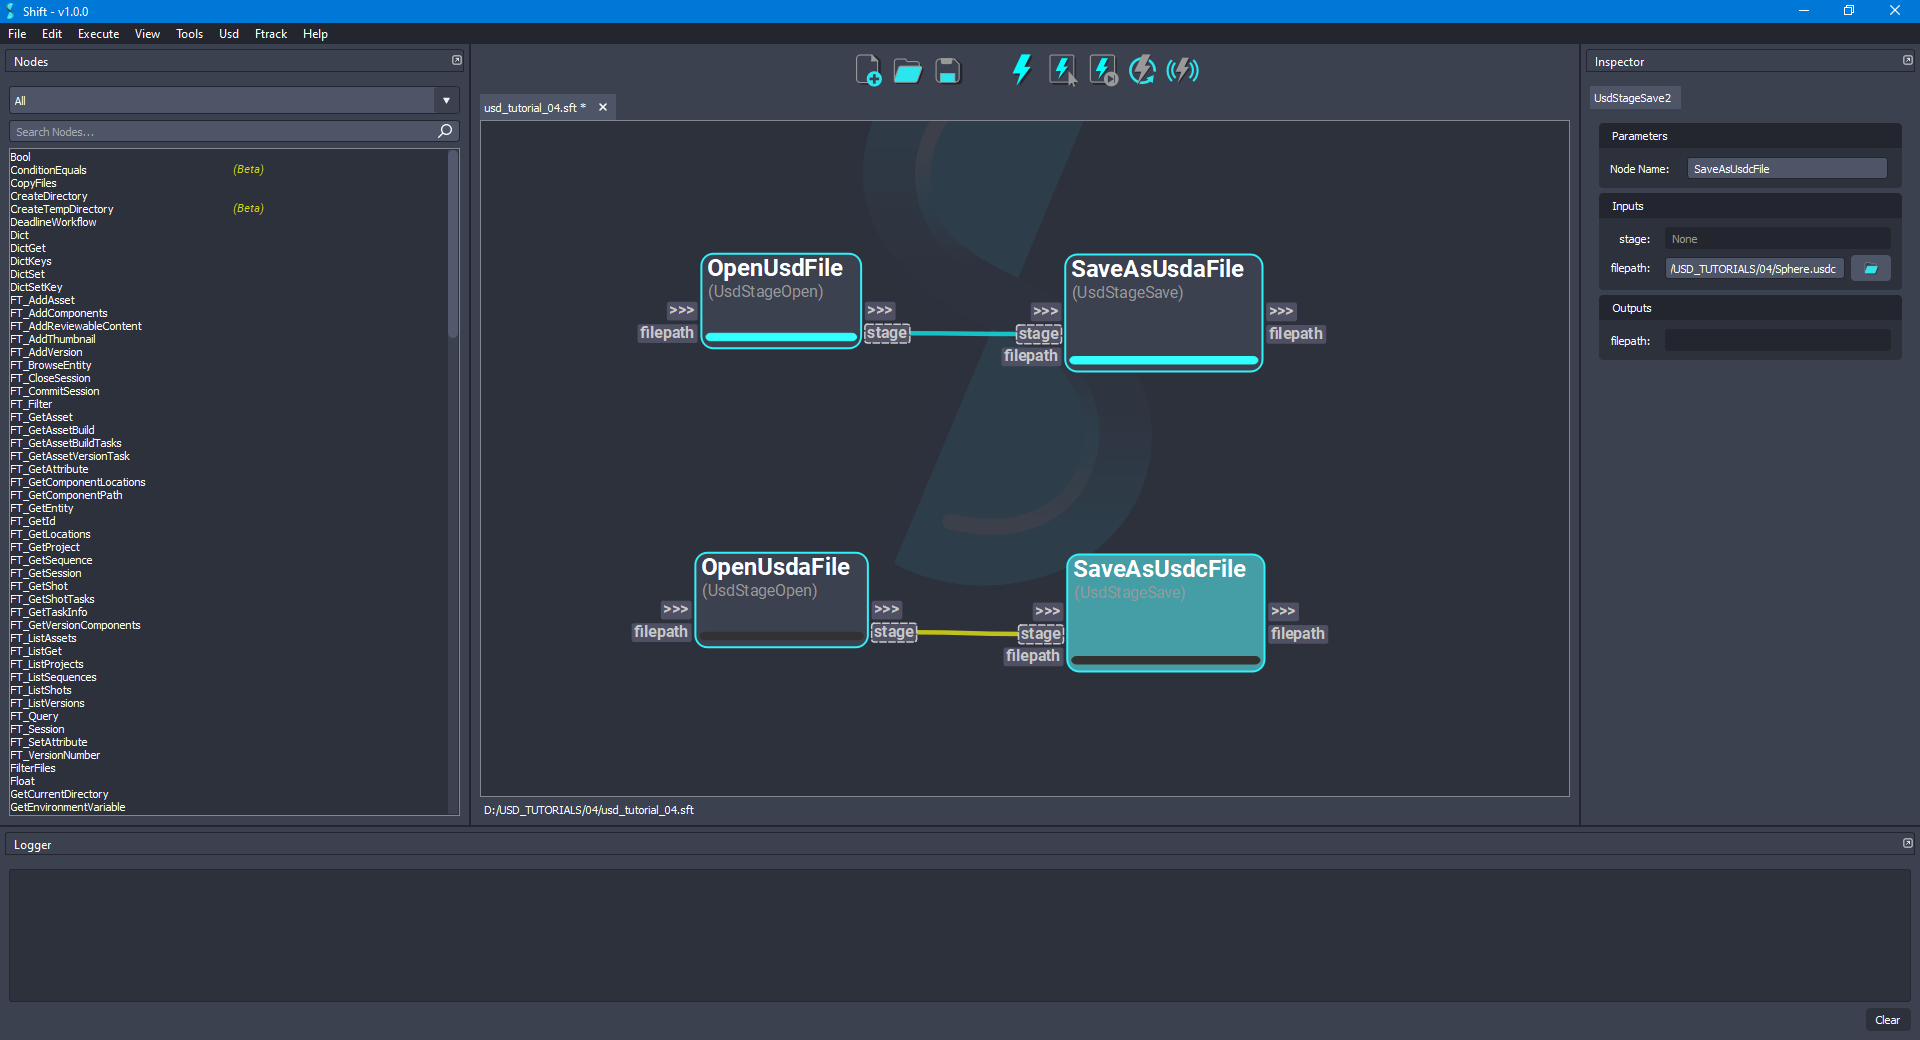
.usdcfile, add a new UsdStageSave node to the board and rename it as SaveAsUsdcFile. Connect the stage output plug from the OpenUsdaFile node to the stage input plug of the new node. Set as the value for the filepath input plug a valid filepath to a.usdcfile, such asD:/USD_TUTORIALS/04/Sphere.usdc. The board should look like the following:
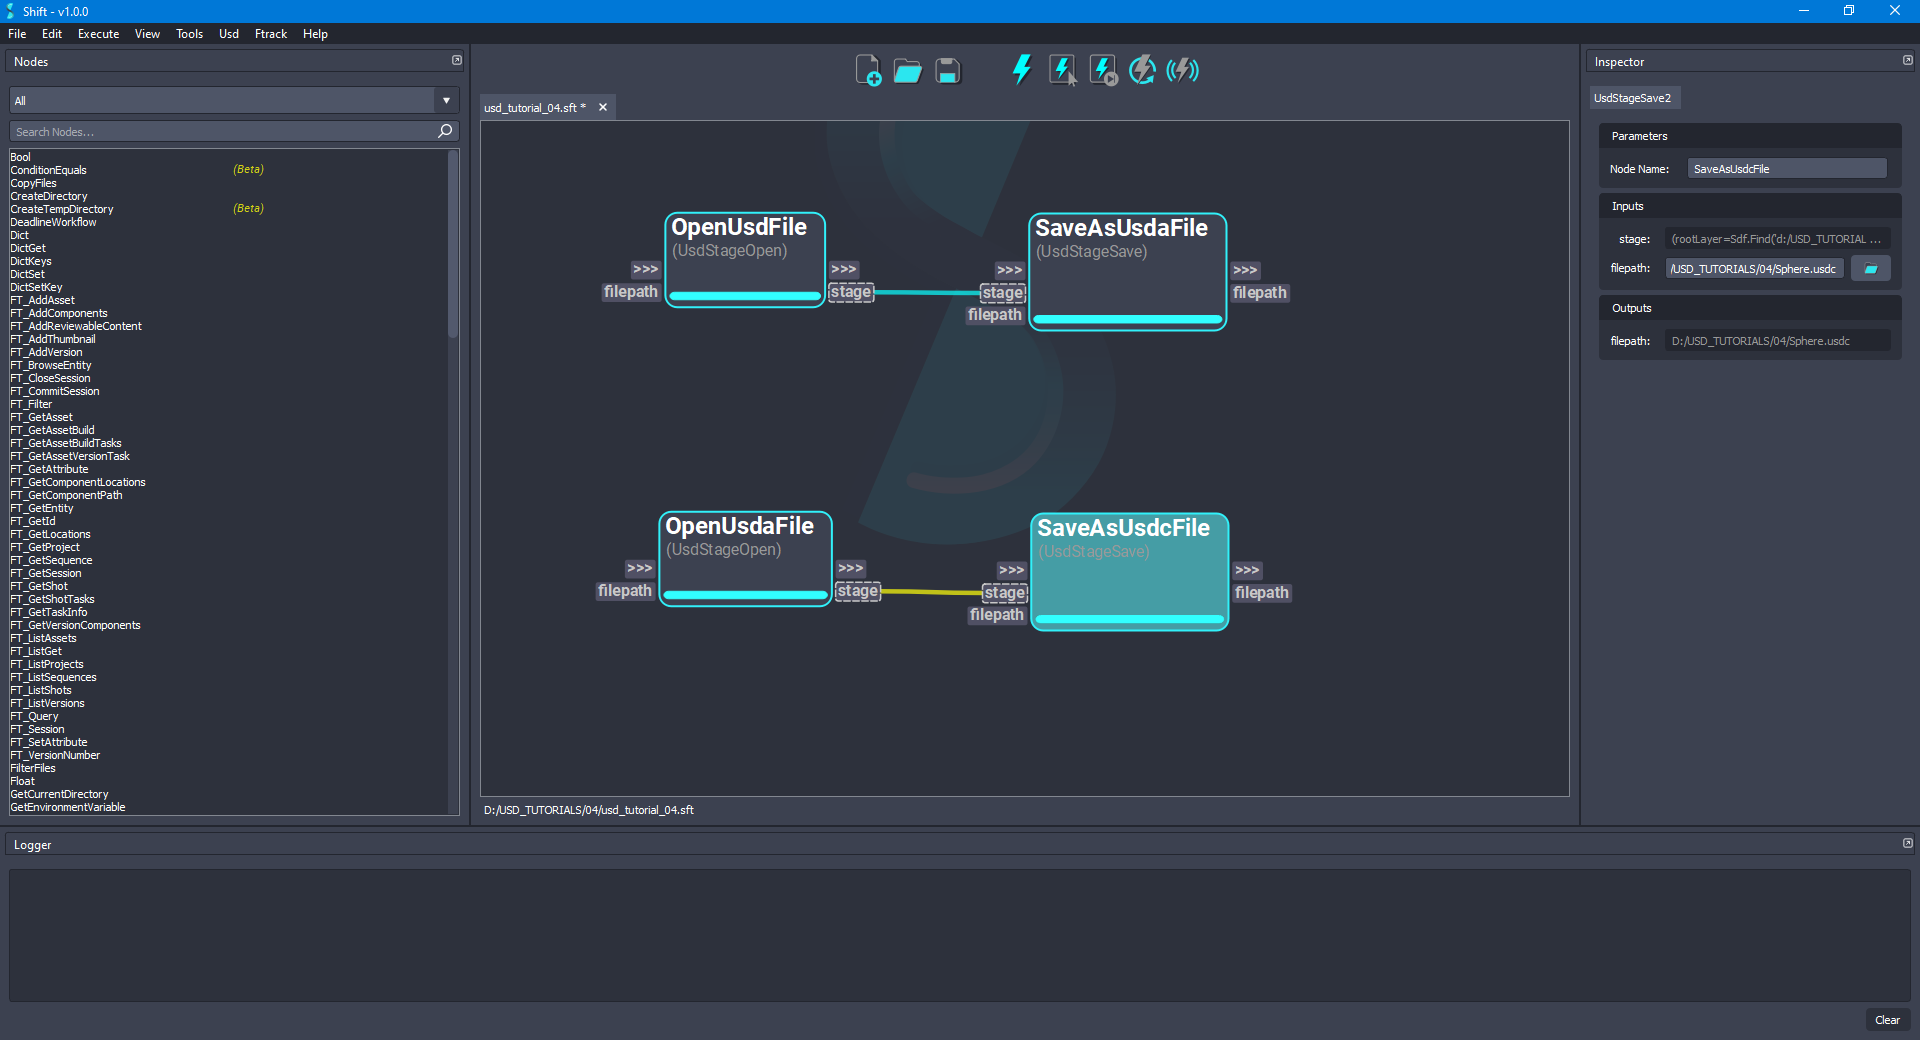
- Execute the workflow again. Now, the workflow will generate a new file with the
.usdcextension will be generated using the information from the.usdafile. The board should look like the following:
¶Run verifications
- To the verification and inspect the differences between the original
Sphere.usdfile and the generated fileSphere.usda, use the terminal and execute the usddiff tool shipped with USD. The terminal should show no differences:

- As previously done, to run the verification between the
Sphere.usdafile and theSphere.usdcfile, execute the usddiff tool in a terminal. The terminal should show no differences:

¶Workflow Resources
The workflow corresponding to this tutorial can be found in the following path in the Shift installation folder: <path_to_the_shift_installation_folder>/shift/examples/USD/tutorials/tutorial_04_converting_layer_formats/tutorial_04.sft
< Referencing Layers Traversing a Stage >


