< Converting Between Layer Formats Authoring Variants >
¶Traversing a Stage
This tutorial focuses on traversing the composed prims on a UsdStage, using the operators from the Shift_USD catalog. The example will reuse the layer files generated in the previous tutorial Referencing Layers.
The base files for the example, HelloWorld.usda and RefExample.usda, can be found in the following path in the Shift installation folder: <path_to_the_shift_installation_folder>/shift/examples/USD/tutorials/tutorial_03_referencing_layers/result/.
¶Tutorial
- Open Shift application. A new window instance of Shift should appear like the following one:
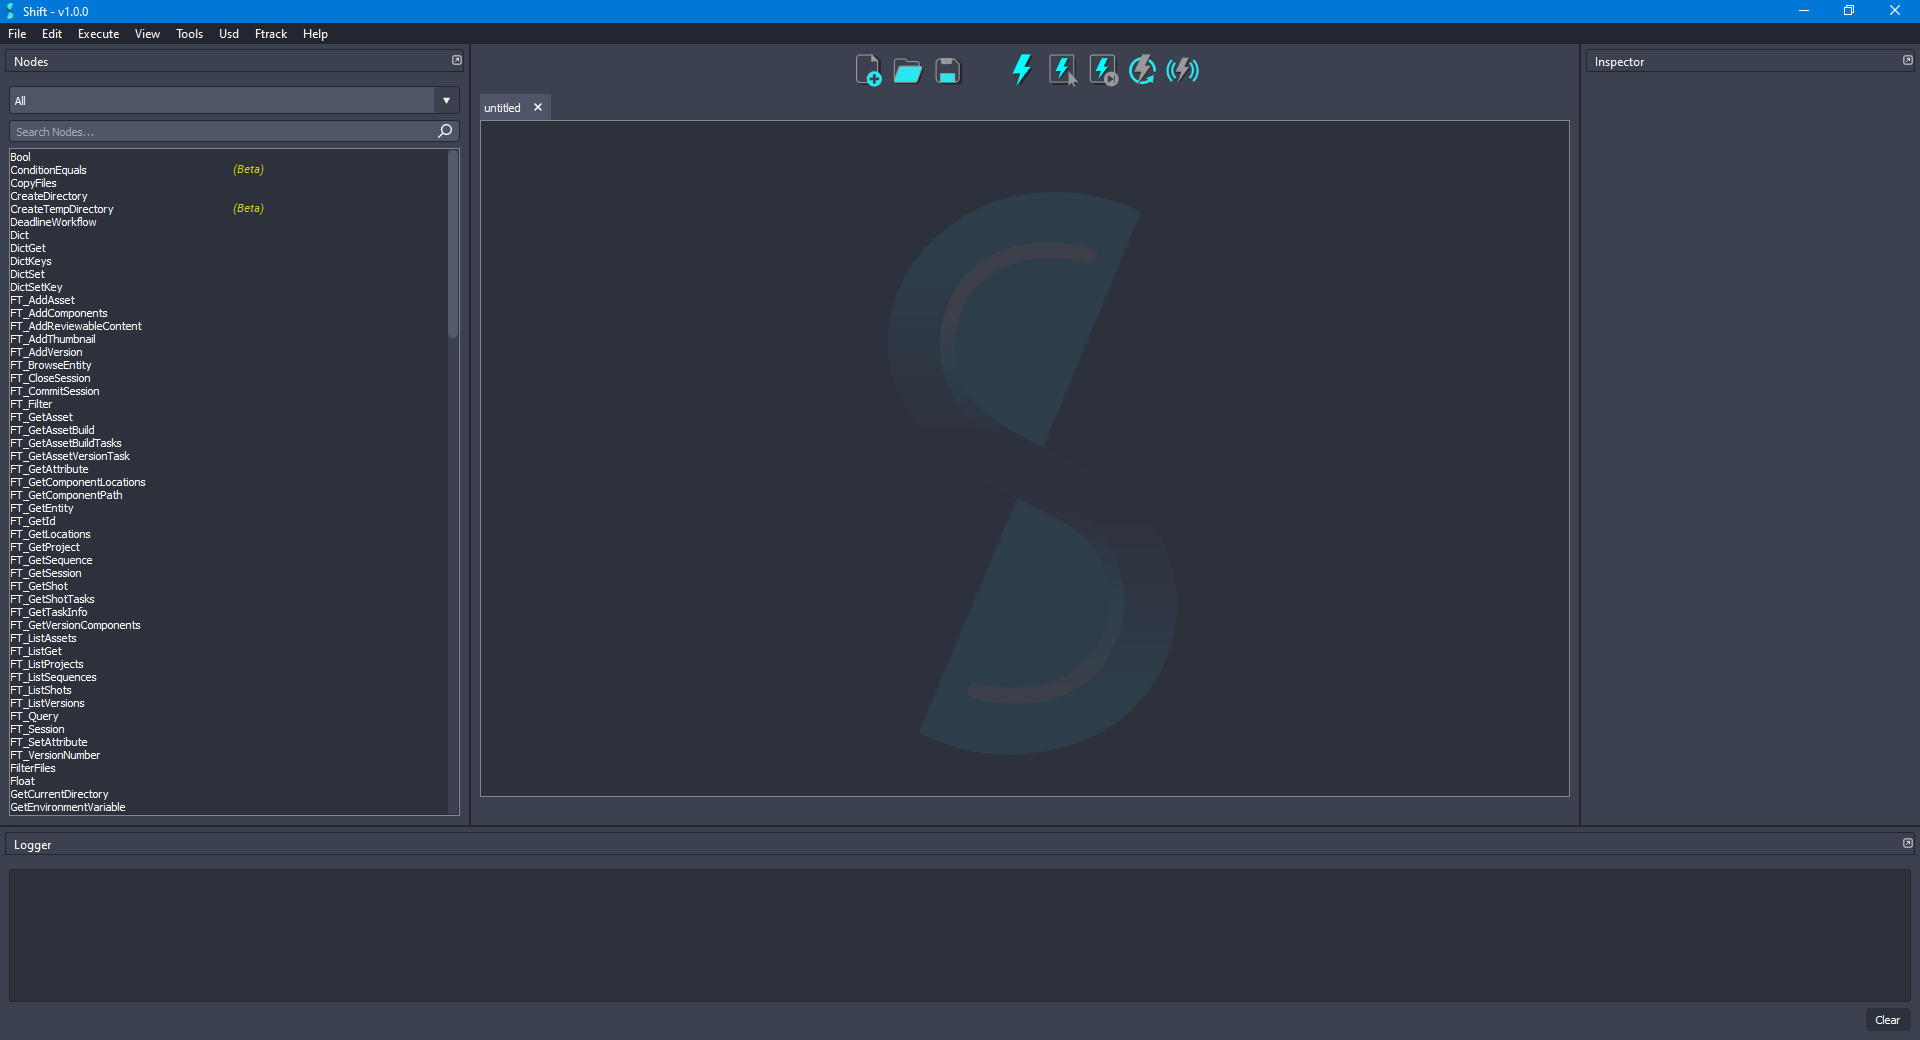
Before creating the USD workflow, ensure that the USD nodes appear in the Node List widget. The catalogs combobox should show
sUSDandsUSDTypesif USD is correctly loaded in Shift. If this is not the case, please check again the Shift_USD installation page.
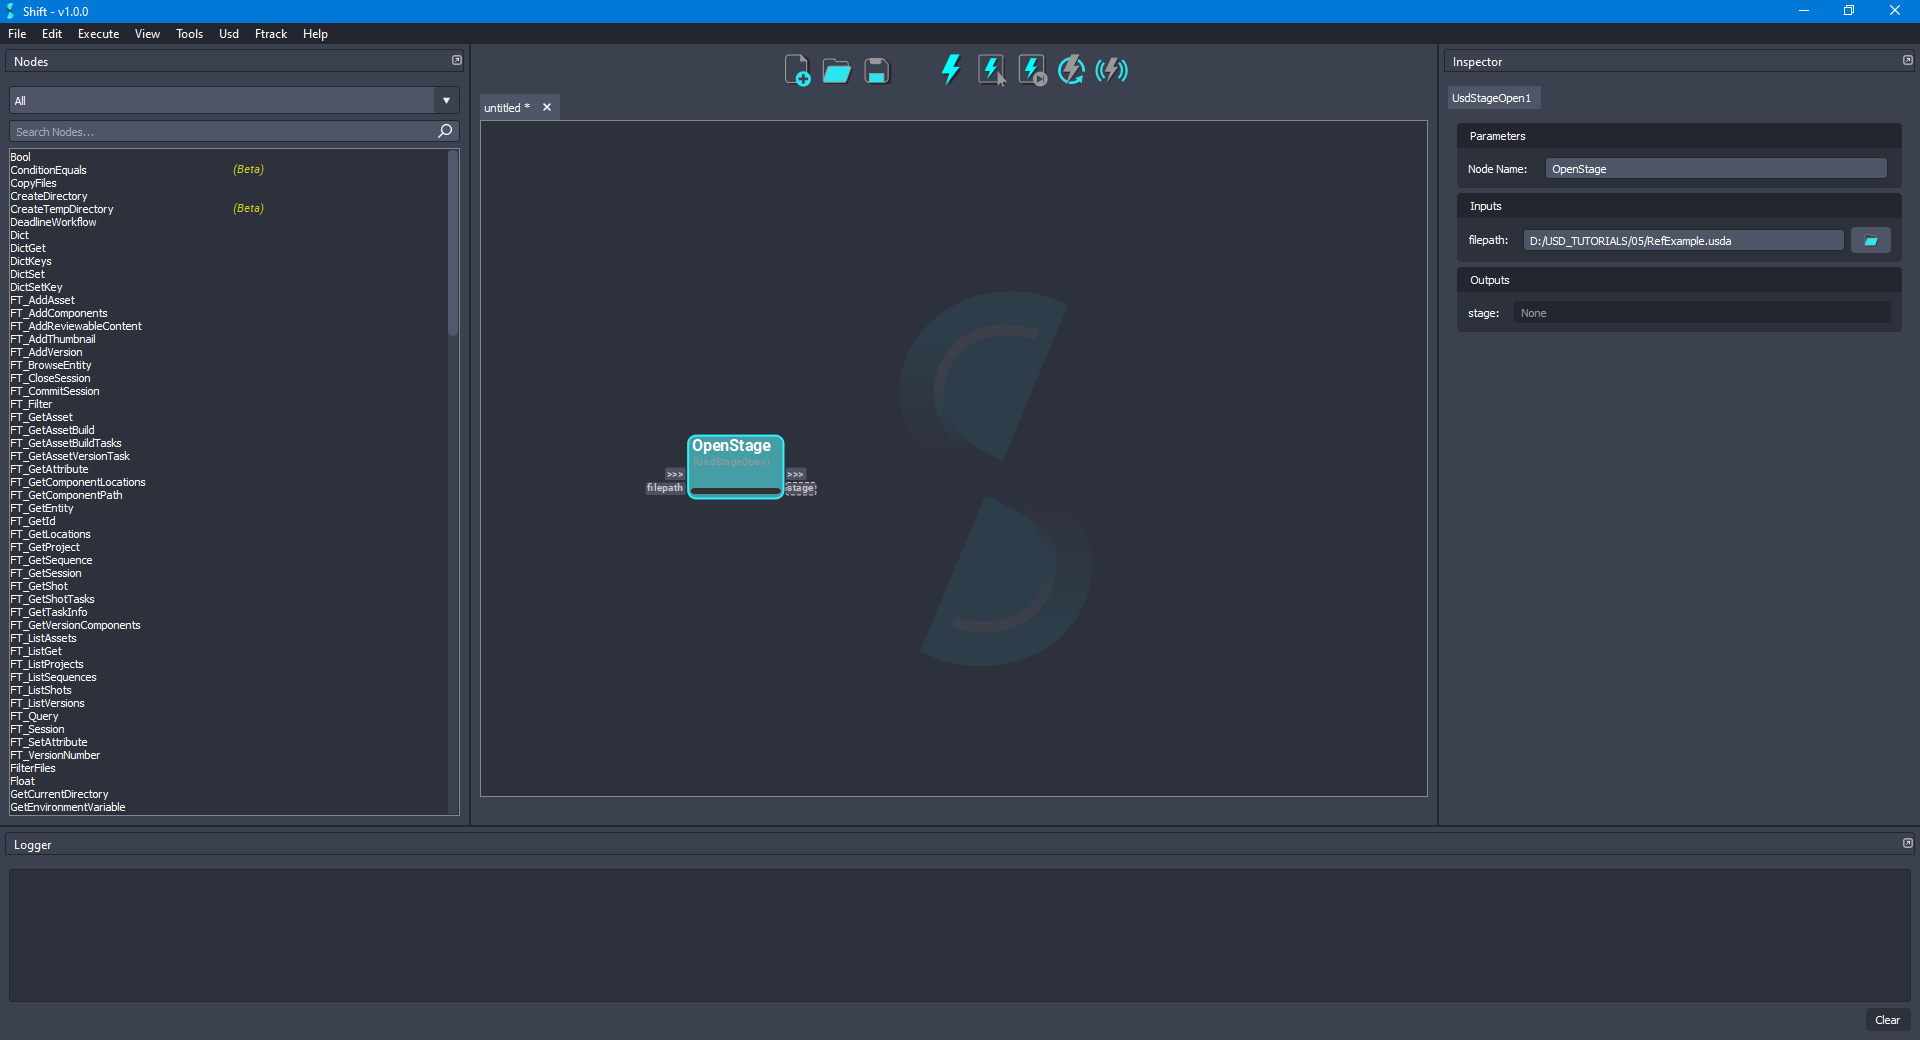
- Add a new UsdStageOpen node to the board and rename it as OpenStage. Using the Inspector widget, set as the value for the filepath input plug a filepath pointing to the
RefExample.usdafile. For the current example, the filepath will be:D:/USD_TUTORIALS/05/RefExample.usda. The board should look like the following:
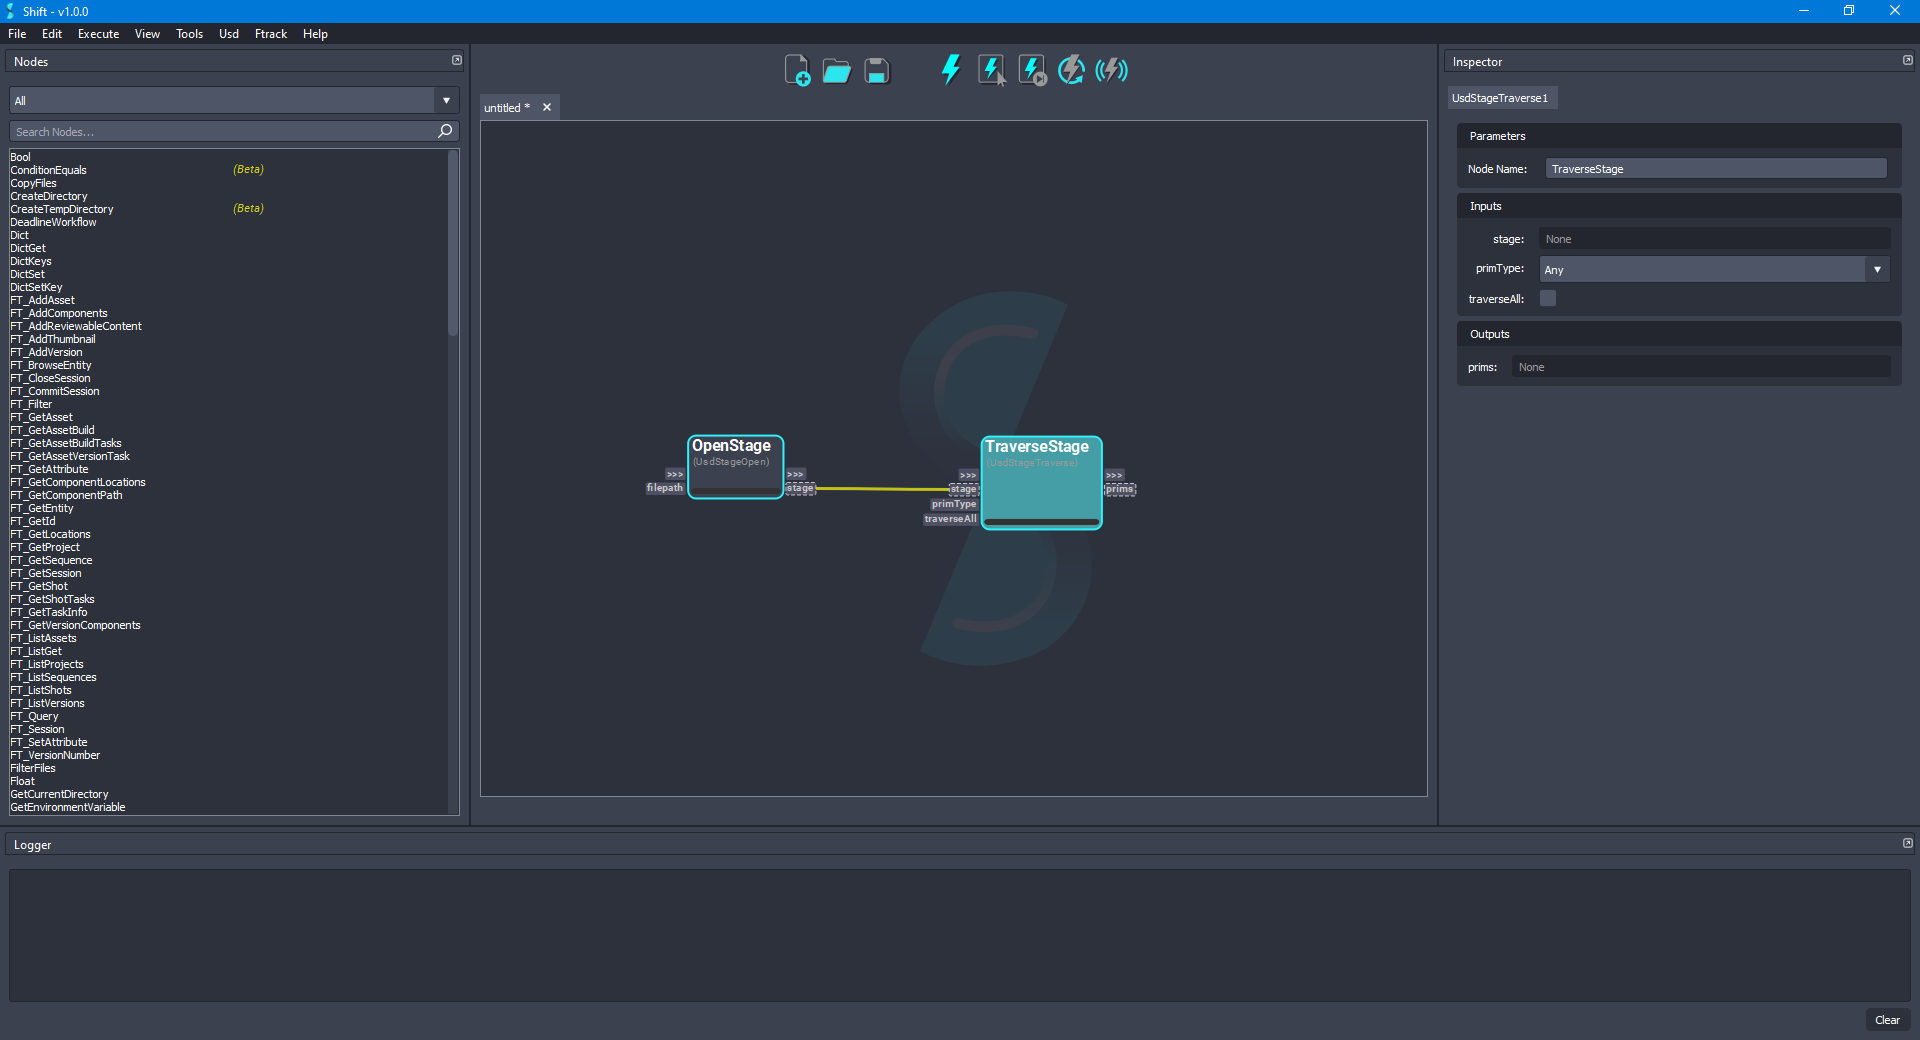
- For traversing the stage, add a new UsdStageTraverse node to the board and rename it as TraverseStage. Connect the stage output plug from the OpenStage node to the stage input plug of the new node. Leave the primType input plug set to
Anyand the traverseAll input plug set toFalse. The board should look like the following:
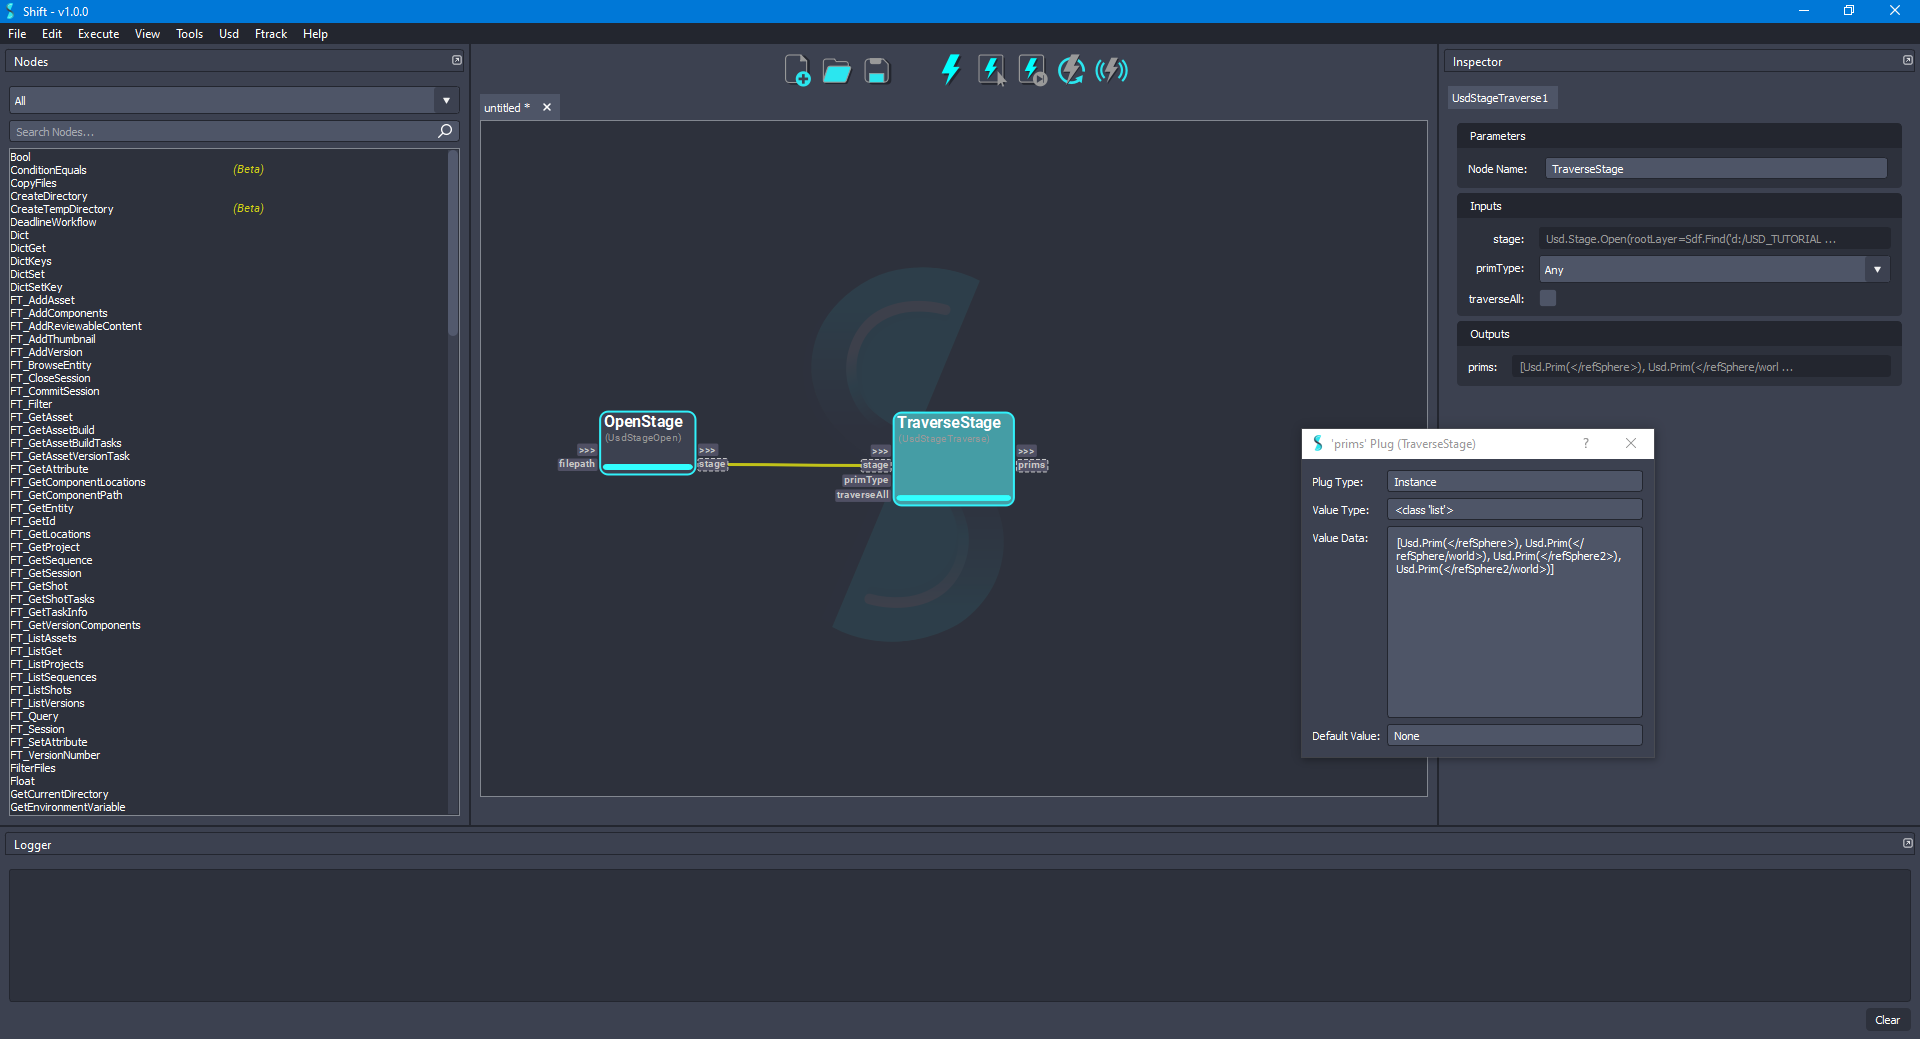
- Execute the current workflow for checking the prims output plug from the TraverseStage node. The value of the plug should be:
[Usd.Prim(</refSphere>), Usd.Prim(</refSphere/world>), Usd.Prim(</refSphere2>), Usd.Prim(</refSphere2/world>)], containing all the prims that build the stage. The board should look like the following:
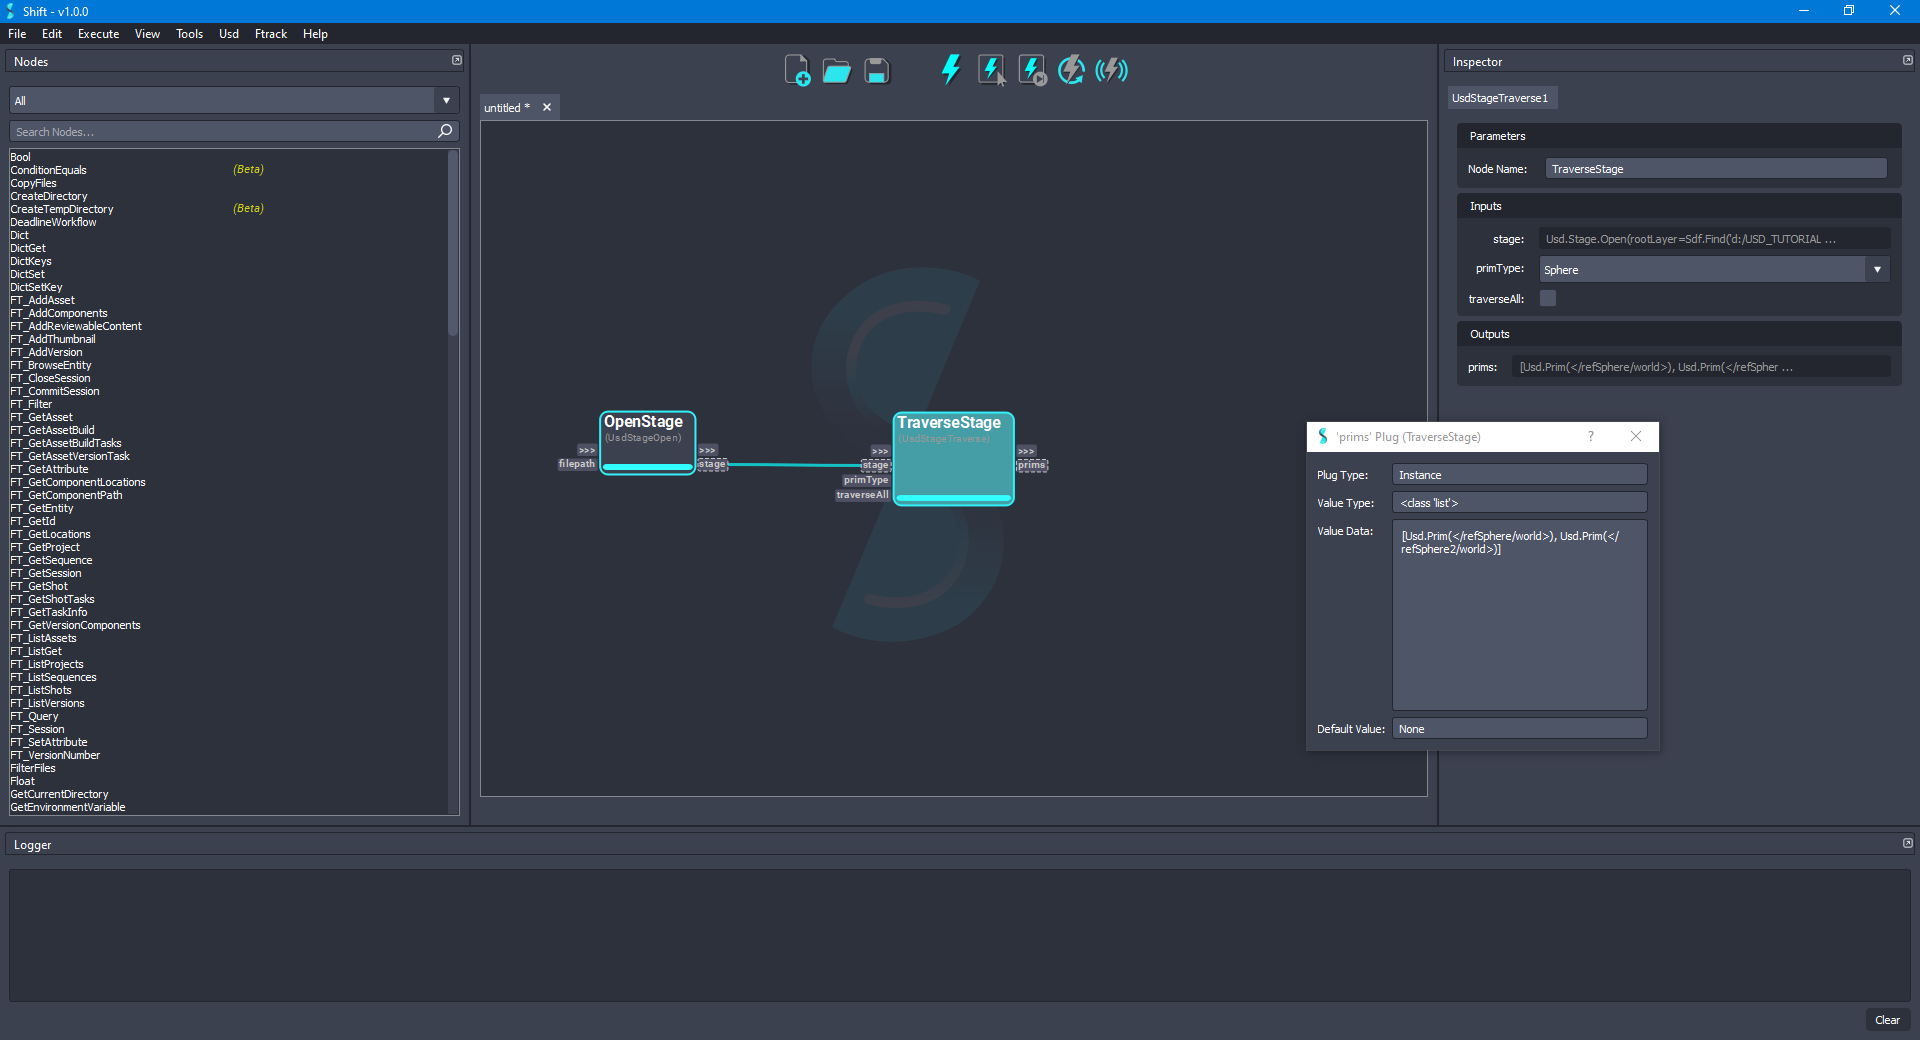
- For filtering the values of the prims output plug in the TraverseStage node, set the primType input plug to
Sphere. Execute again the node to refresh the output plug result. Once the node is executed again the plug value should be:[Usd.Prim(</refSphere/world>), Usd.Prim(</refSphere2/world>)]. The board should look like the following:
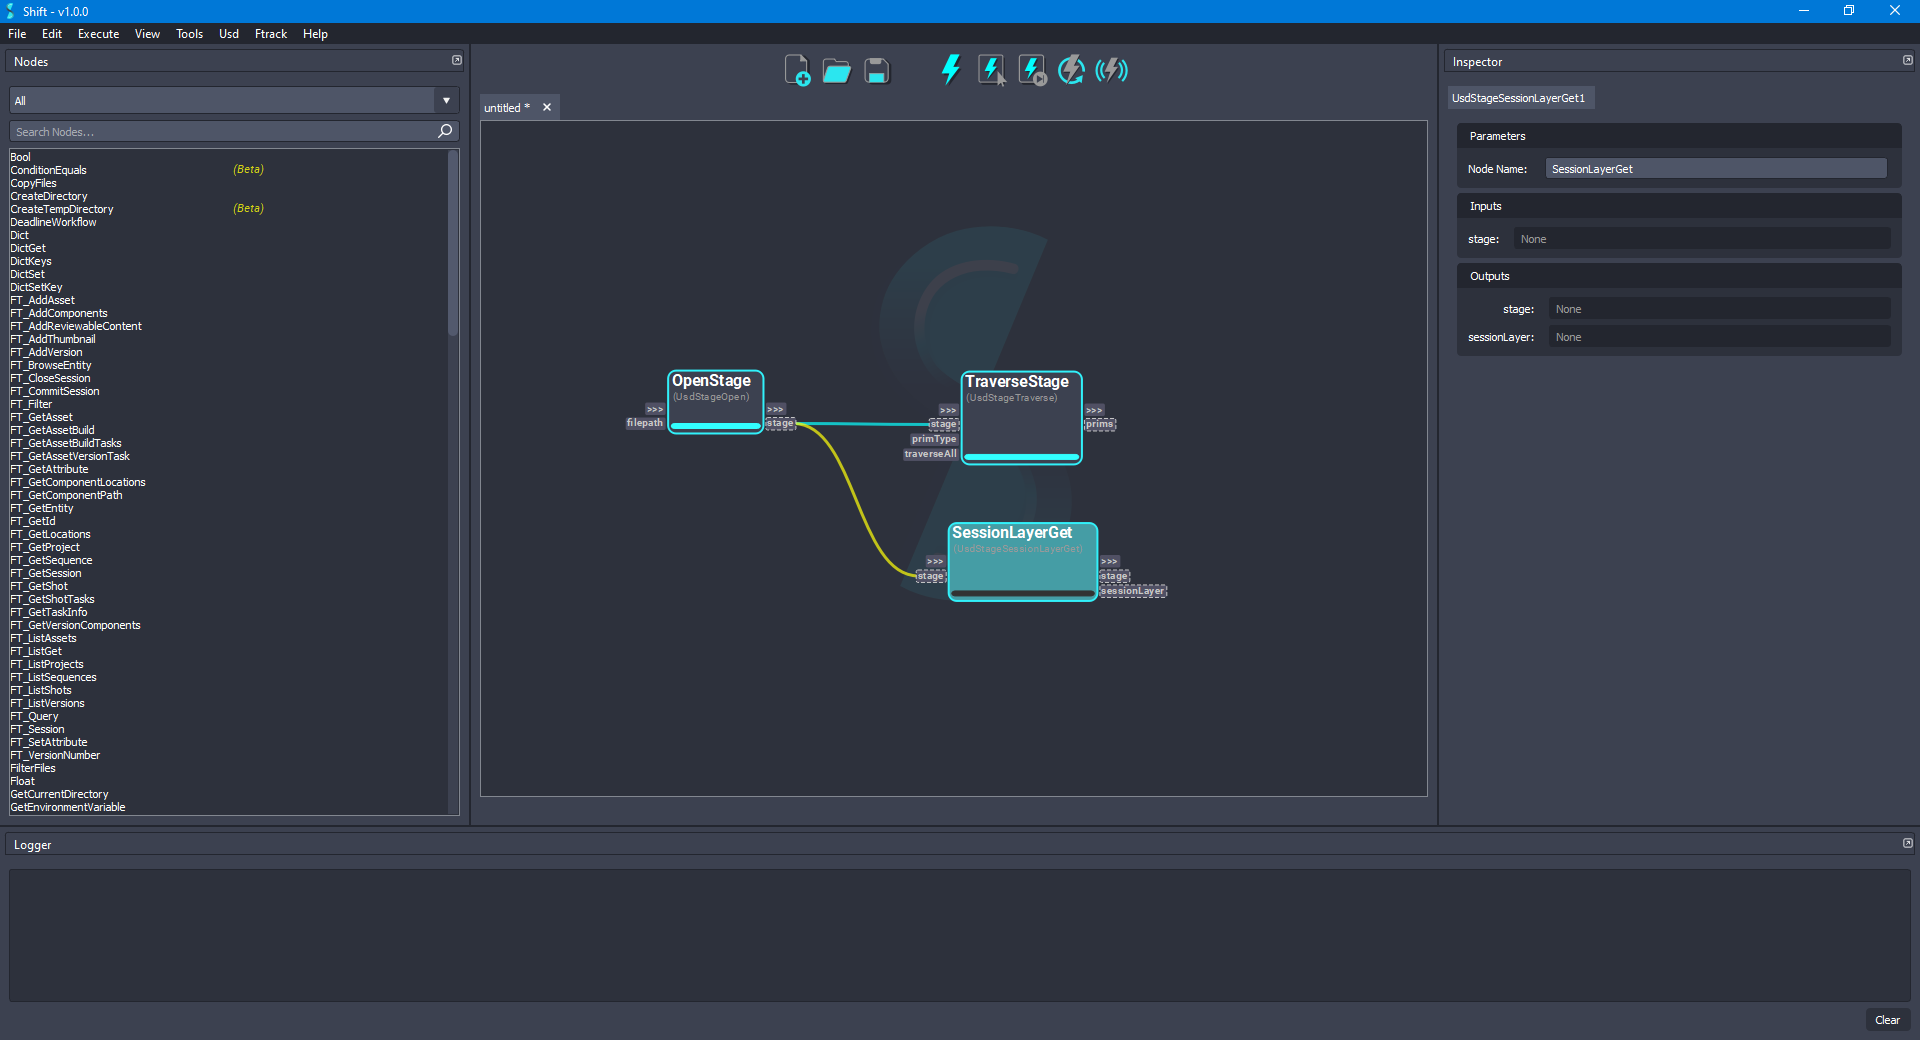
- To activate/deactivate a prim in a specific layer, for the current example, the session layer, add a new UsdStageSessionLayerGet node and rename it as SessionLayerGet. Connect the stage output plug from the OpenStage node to the stage input plug of the new node. The board should look like the following:
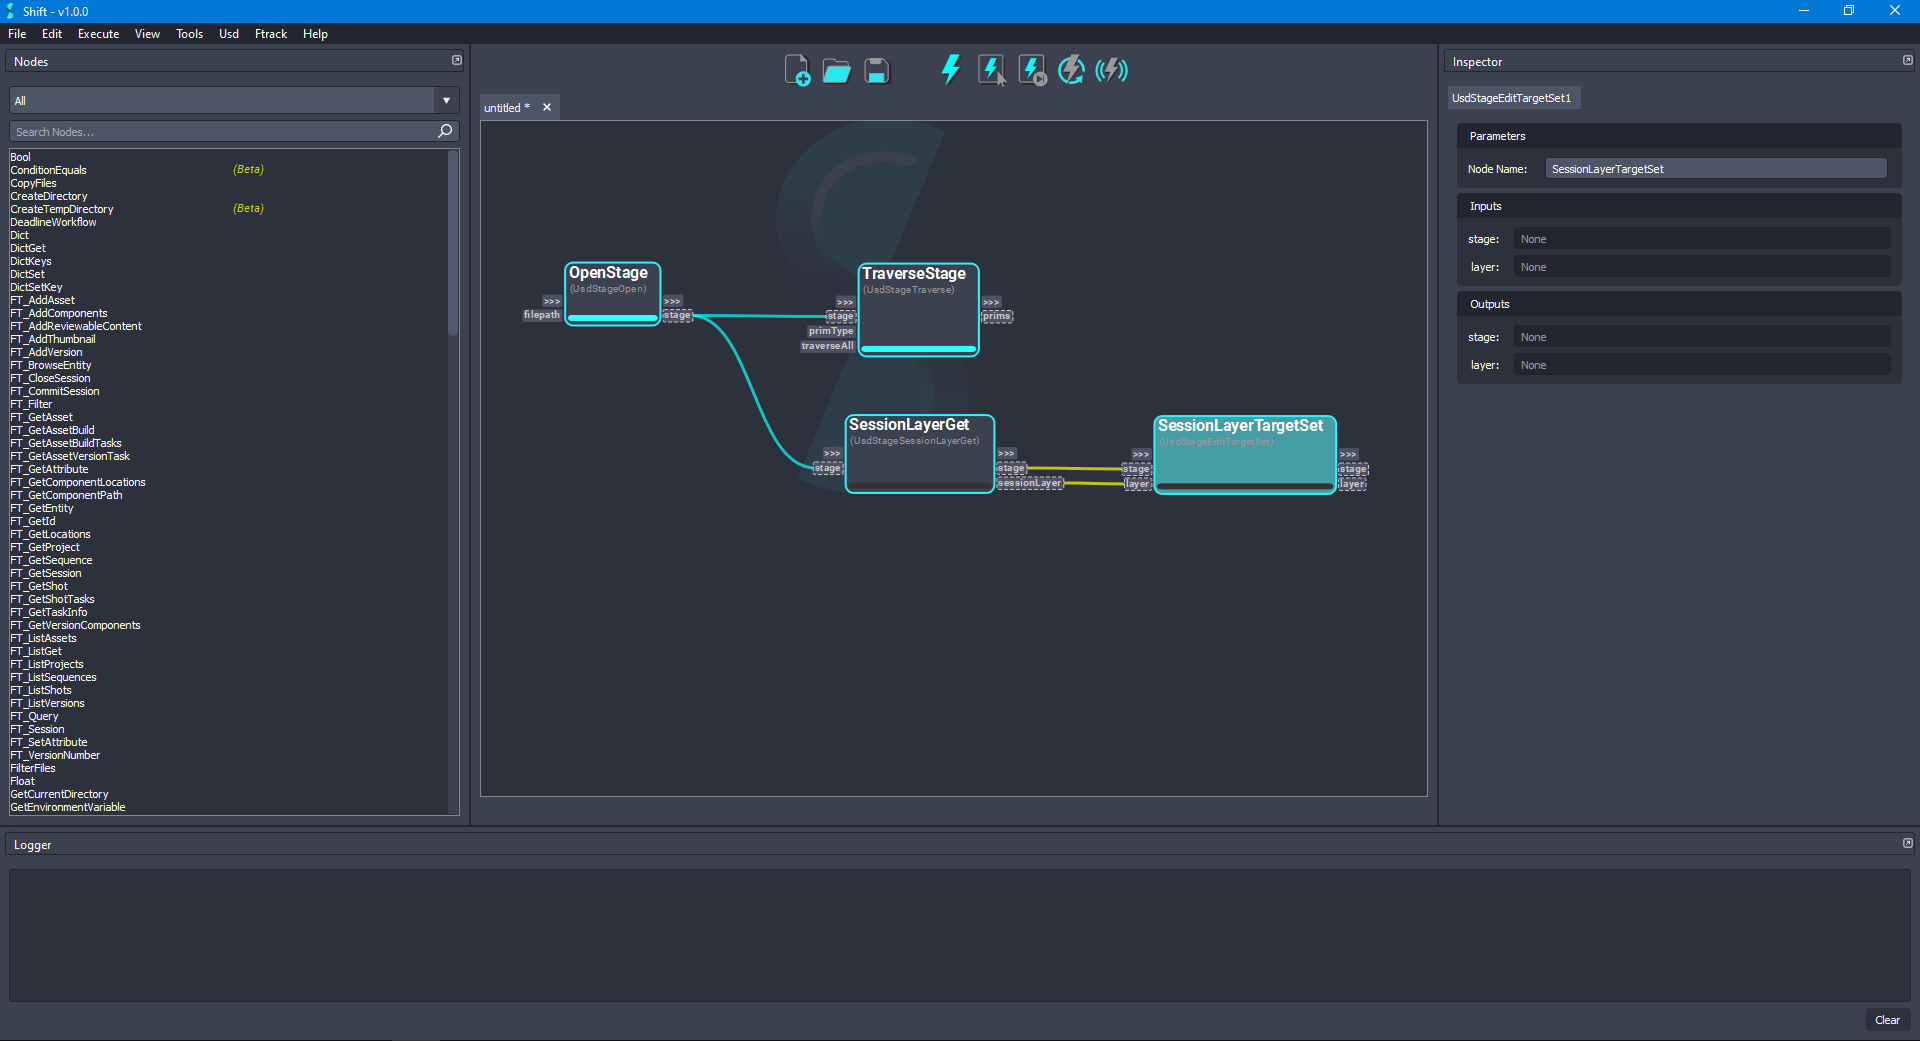
- Setting the edit target layer of the stage is important so that any modification done to the stage is registered in that layer instead of the root layer of the stage. Add a new UsdStageEditTargetSet node and rename it as SessionLayerTargetSet. Connect the stage and sessionLayer output plugs from the SessionLayerGet node to the stage and layer input plugs, respectively, of the new node. The board should look like the following:
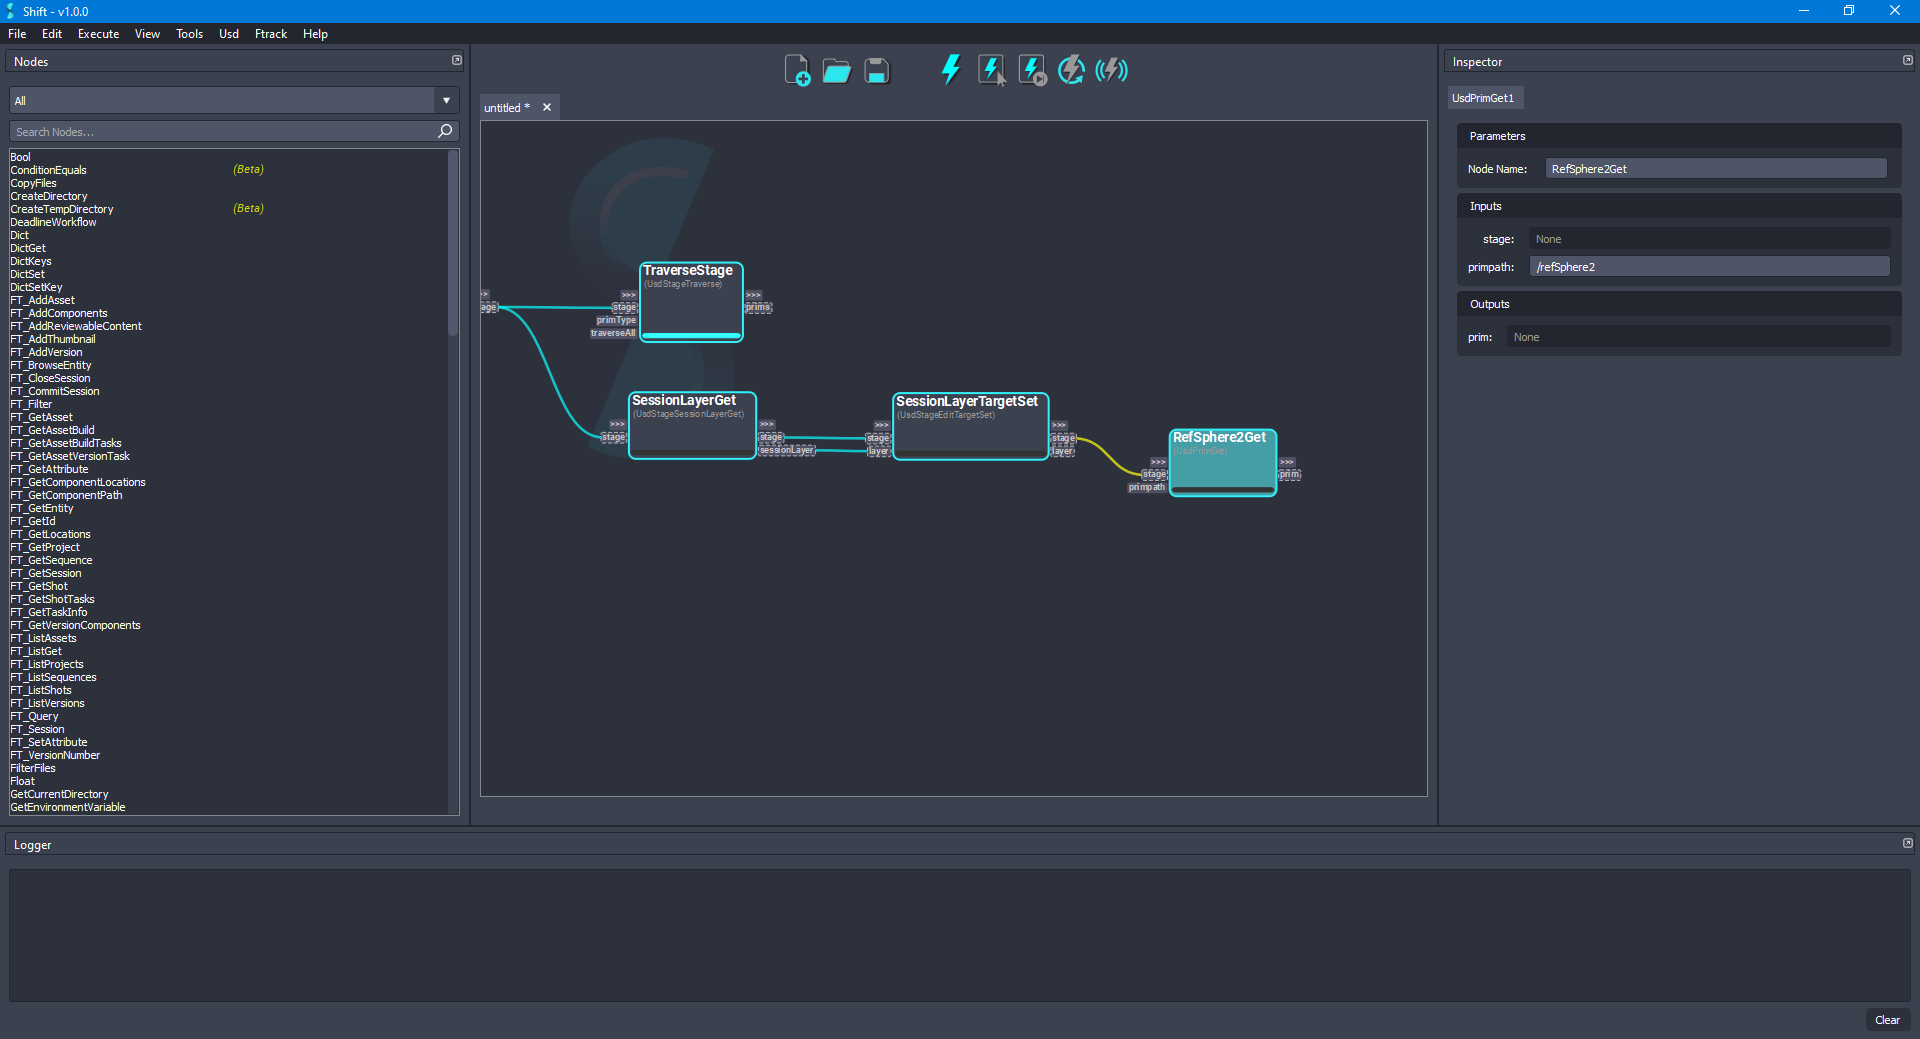
- Add a new UsdPrimGet node and rename it as RefSphere2Get. Connect the stage output plug from the SessionLayerTargetSet node to the stage input plug of the new node and set
/refSphere2as the value for the primpath input plug. The board should look like the following:
- Add a new UsdPrimDisable node and rename it as RefSphere2Disable. Connect the prim output plug from the RefSphere2Get node to the prim input plug of the new node and set the value of the disabled input plug to
Truetoo. The board should look like the following:
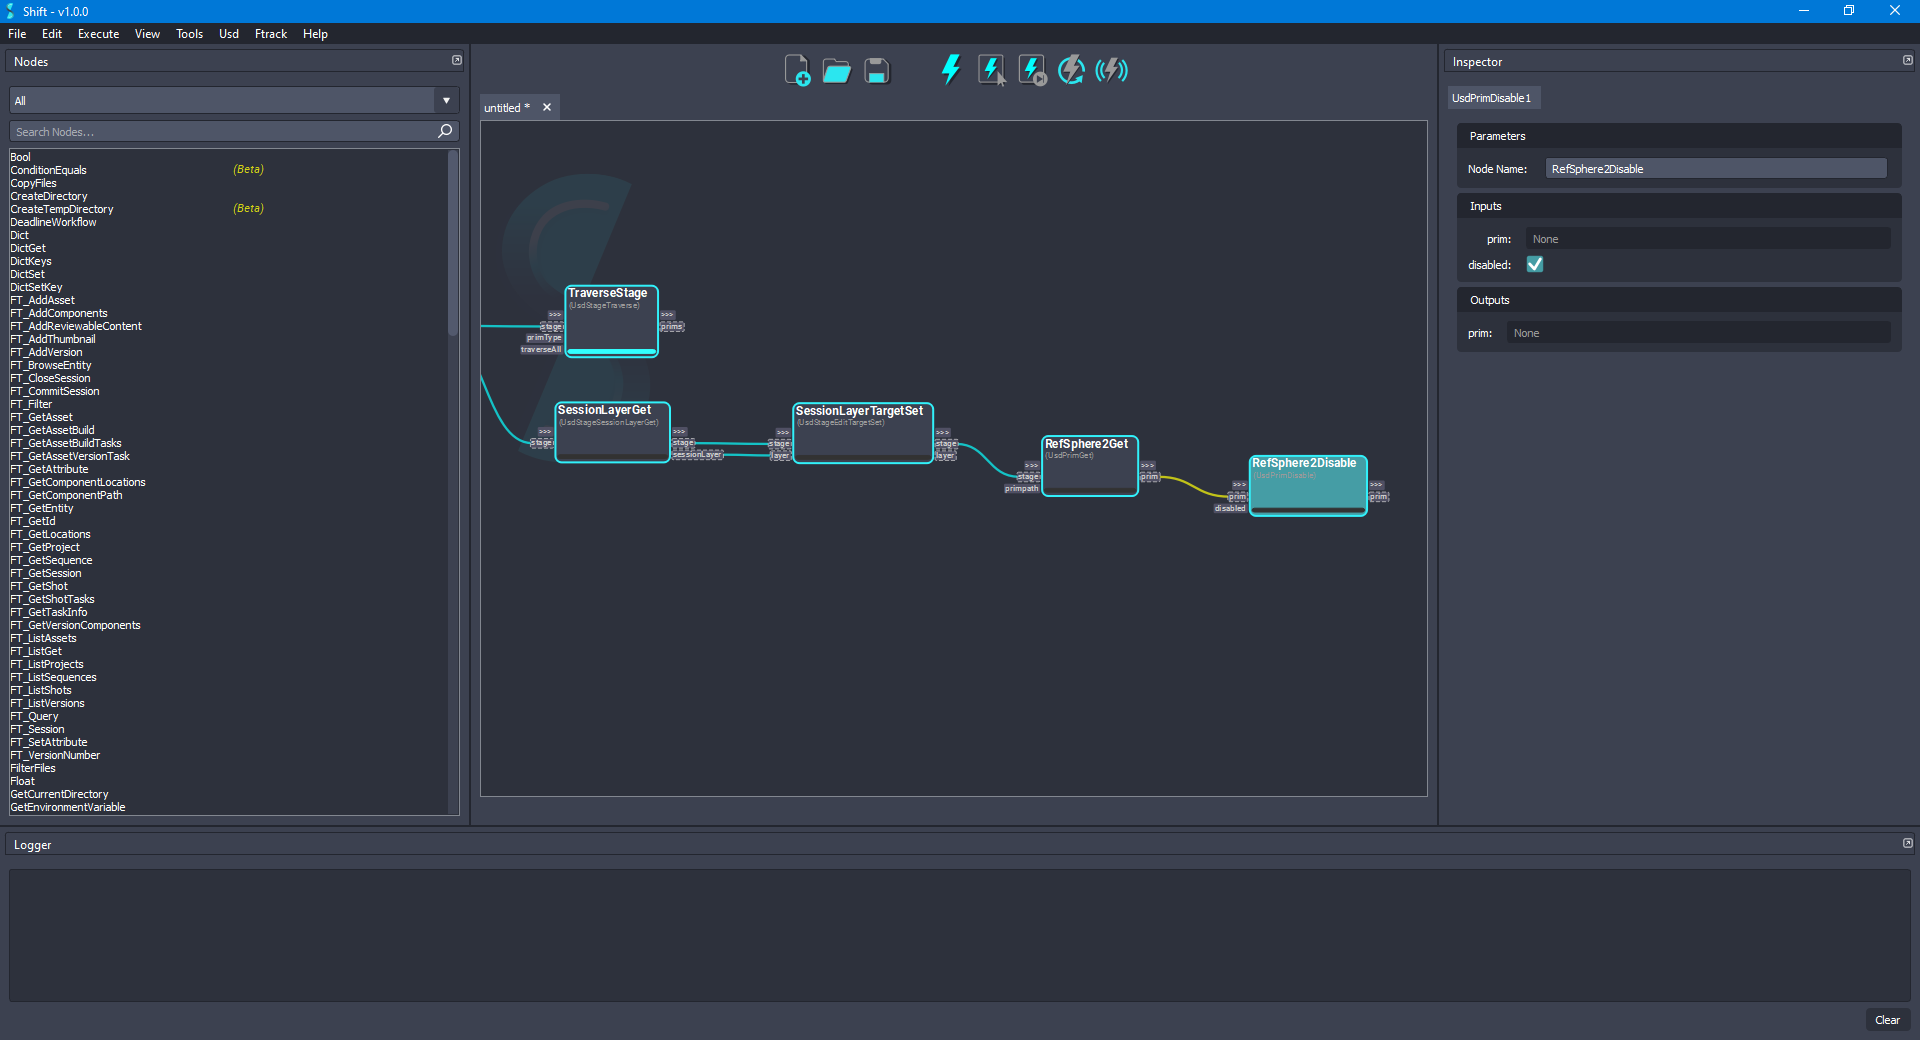
- Now, select the nodes SessionLayerGet, SessionLayerTargetSet, RefSphere2Get and RefSphere2Disable and execute only the selected nodes. Once the execution has finished, the board should look like the following:
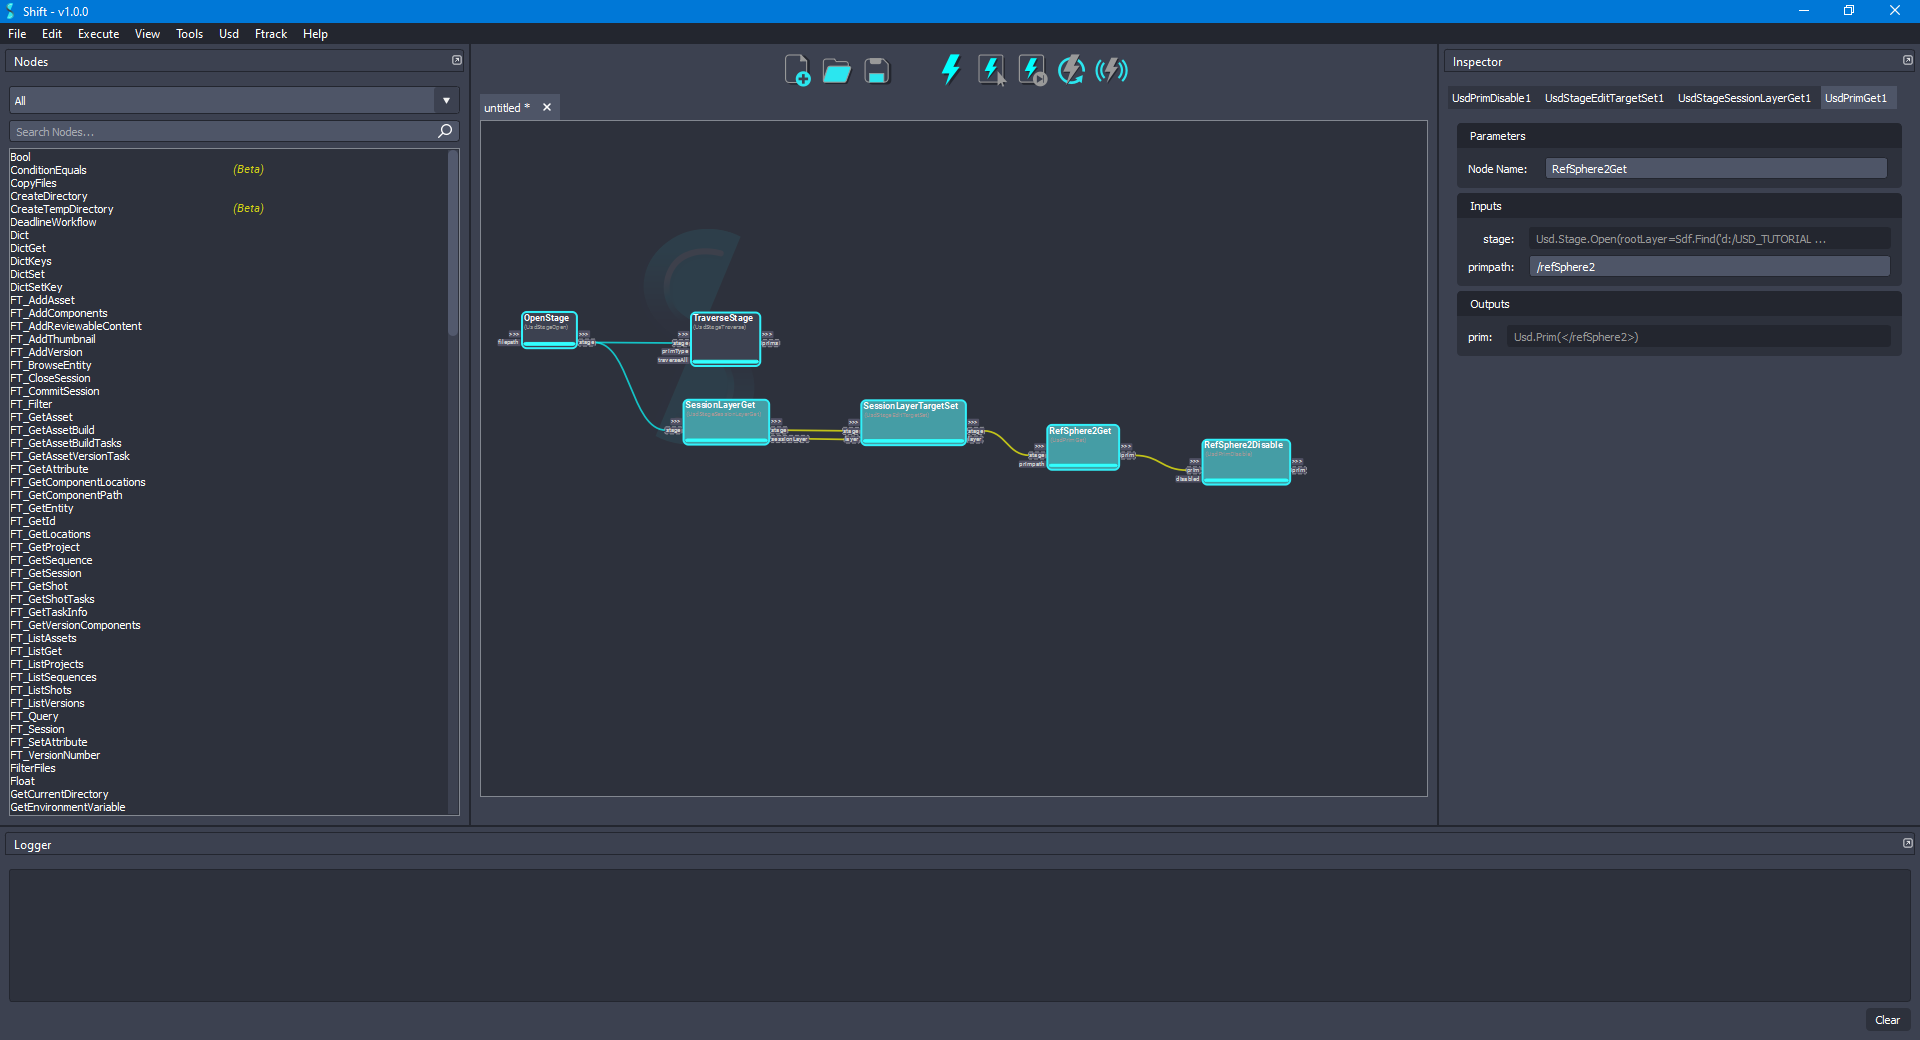
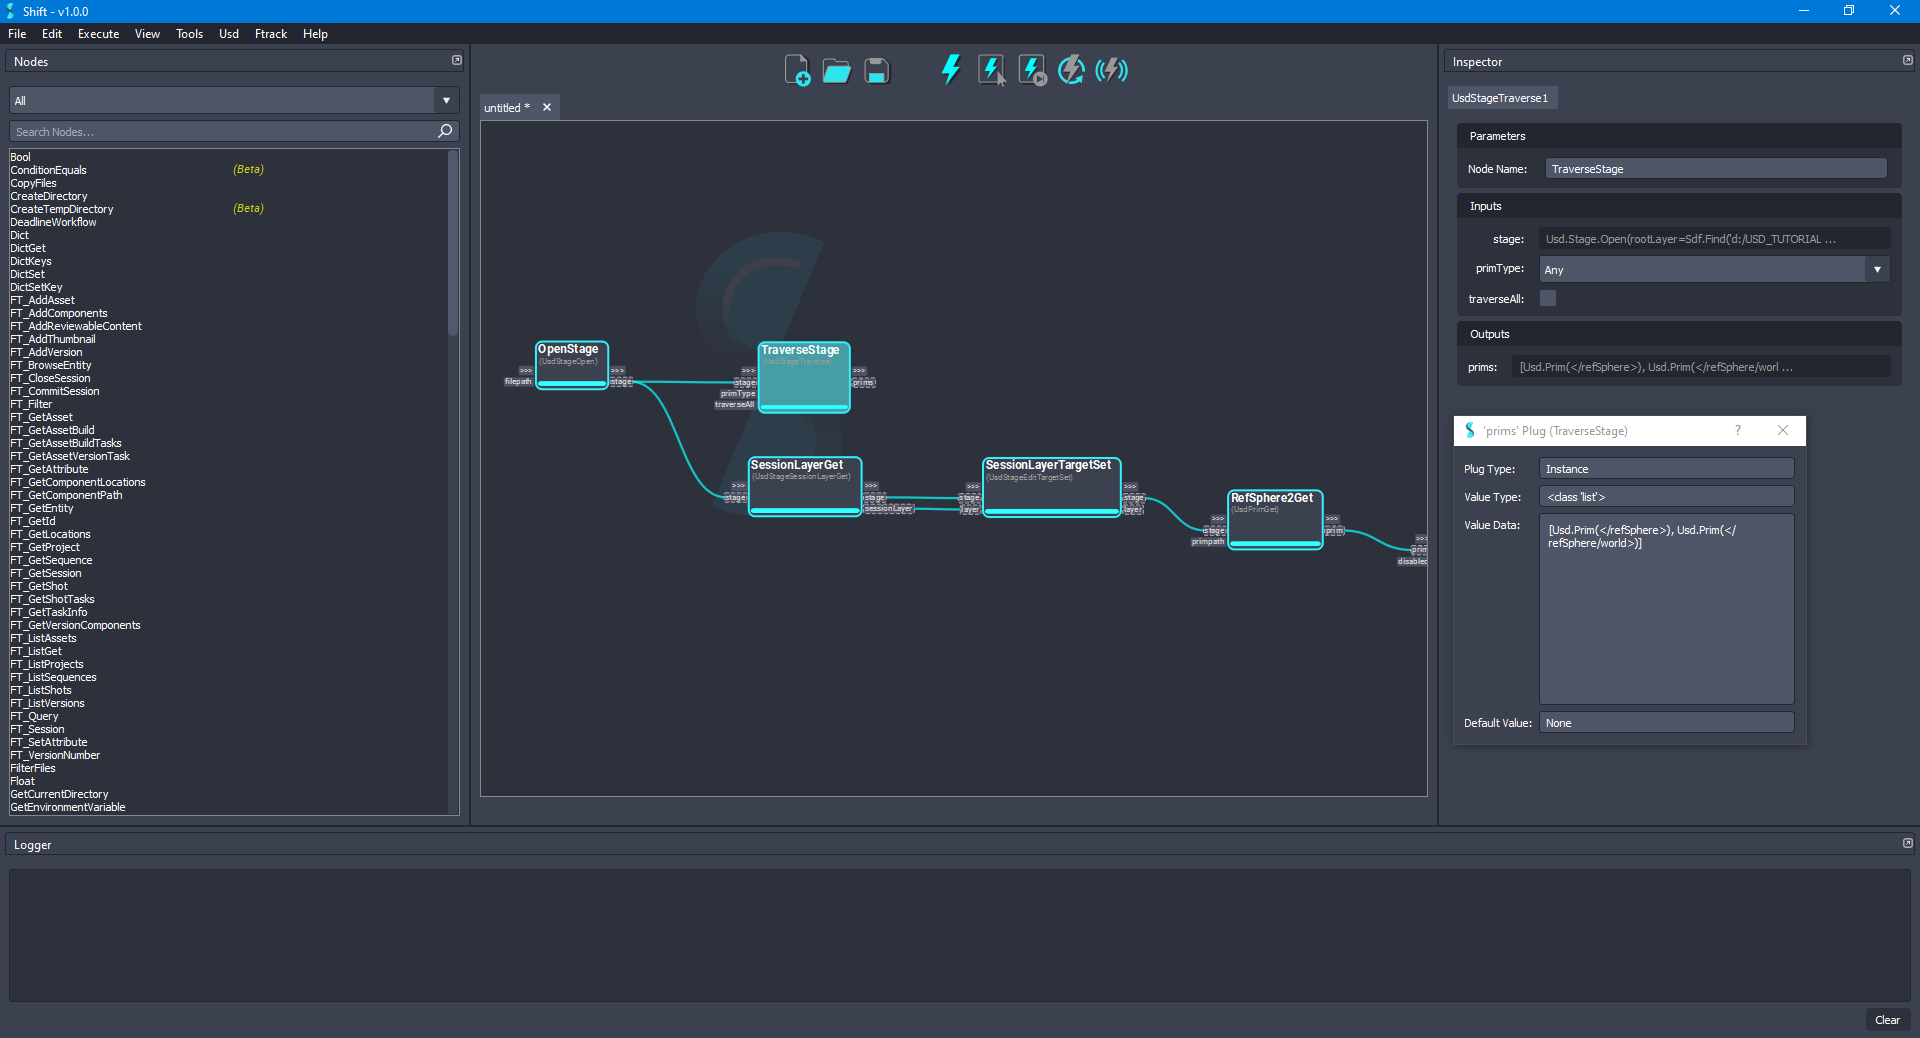
- Select the TraverseStage node and change the value of the primType input plug to
Any. Execute the selected node only to recompute the prims output plug value. The value of the prims output plug should not contain the disabled prim and children anymore. The board should look like the following:
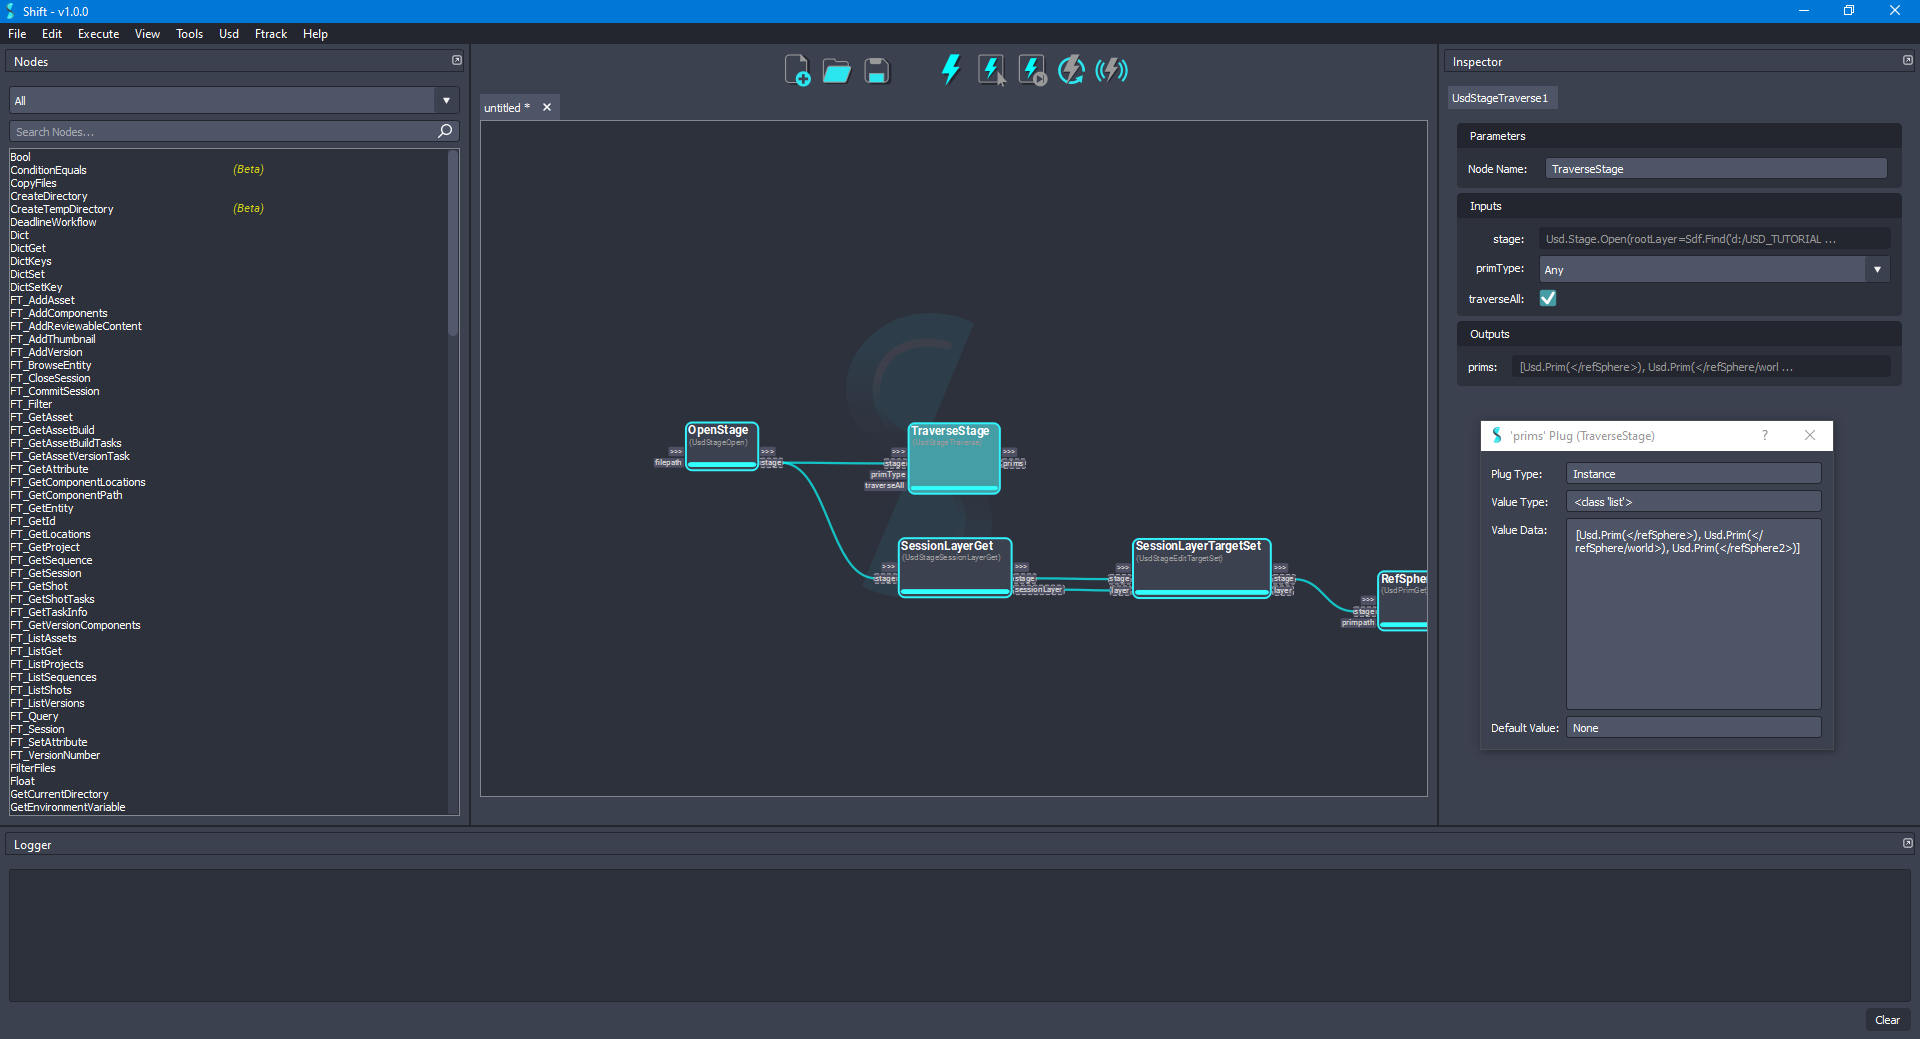
- Now, with the TraverseStage node selected, set the traverseAll input plug value to
True. Execute the selected node only to recompute the prims output plug value. The value of the prims output plug should be:[Usd.Prim(</refSphere>), Usd.Prim(</refSphere/world>), Usd.Prim(</refSphere2>)]. The board should look like the following:
¶Workflow Resources
The workflow corresponding to this tutorial can be found in the following path in the Shift installation folder: <path_to_the_shift_installation_folder>/shift/examples/USD/tutorials/tutorial_05_traversing_stage/tutorial_05.sft
< Converting Between Layer Formats Authoring Variants >


